
- SAP Community
- Products and Technology
- Technology
- Technology Blogs by Members
- [Part 1] - Installing SAP NetWeaver AS ABAP Develo...
Technology Blogs by Members
Explore a vibrant mix of technical expertise, industry insights, and tech buzz in member blogs covering SAP products, technology, and events. Get in the mix!
Turn on suggestions
Auto-suggest helps you quickly narrow down your search results by suggesting possible matches as you type.
Showing results for
arthursilva
Active Participant
Options
- Subscribe to RSS Feed
- Mark as New
- Mark as Read
- Bookmark
- Subscribe
- Printer Friendly Page
- Report Inappropriate Content
04-01-2019
4:16 PM
if you are here because you want to know more about how to install the SAP ABAP Application Server (trial) you've came right place, but before we start let me briefly explain how this blog series works.
Hello, how are you? Welcome to the first part of "The Dev Hero, a journey in the digital transformation". In this blog series I intent to demonstrate some vary technologies available in nowadays by putting some inputs about, recommendations, and (maybe the most exciting) how to connect several SAP and non-SAP applications in a single architecture.
When you finish, don't miss the [Part 2] Sync your SCP account with your on-premise system.
In this first part, I'll explain how to configure a Virtualbox machine by configuring Ubuntu 16.04 (also works on release 18.04) as operational system in order to run a SAP NetWeaver AS ABAP Developer Edition 7.52 SP01 trial instance. Sizing, system requirements and installation procedures will be covered along this post, and at the end you will be able to create programs and to expose services directly from you personal computer.

Don't be afraid if you're not comfortable in using Linux, or didn't have enogh experience so far, this tutorial was written for those who never had any contact with a unix based system before. Step-by-step guides will provide you a well explained context of each functionality. So let's get started!
1. Components available in SAPNW752 trial version for your software development project
1.1 - SAP_GWFND
1.2 - SAP_UI
2. Downloading software dependencies
2.1 Virtualbox
2.1.1 Known issues and how to fix
2.2 SAP NetWeaver AS ABAP Developer Edition 7.52 SP01 trial version
2.2.1 Installation guide (README.html) and files extraction
2.3 Ubuntu 16.04 64-bit PC (AMD64) desktop image (it will be used when booting Ubuntu for the first time)
3. Virtualbox instance configuration
3.1 - Hardware requirements (sizing)
3.2 - Creating a virtual disk
3.3 - Start the virtualbox machine
4. Ubuntu installation
4.1 - Defining vhcalnplci as hostname
4.2 - Ubuntu installation, Done!
5. Ubuntu configuration and update
5.1 - sudo apt-get update
5.2 - sudo apt-get upgrade
5.3 - sudo reboot now
5.4 - enabling/checking/disabling the ubuntu firewall (ufw)
5.5 - mount a shared folder between operation system and virtualbox
5.6 - sudo apt-get install gcc perl csh libaio1 libc6 libstdc++6
5.7 - edit /etc/hosts file
6. SAP Netweaver AS ABAP trial installation
6.1 - sudo ./install.sh
6.2 - Start SAP server
6.3 - Configuring network (NAT)
6.4 - Adding a new entry in SAPGUI
This SAP NetWeaver 752 SP01 version comes with a variety of components designed for software development, such as:
Component offers a tool for development and generation of OData services to a variety of client development tools. Through OData, it's possible to establish a connection between application or SAP Business Suite data and target clients, platforms, and programming framework. See more in SAP Gateway Foundation (SAP_GWFND)
Sometimes when initialising a virtual machine you might experience errors that prevent its start. Honestly, I've faced those errors only when working with Windows, and my tests with Macbook the installation worked really well. So here are errors you may find:
Download it on SAP Developers Portal at sap.com
The installation guide - or the named README.html, may be found in root folder of SAPNW752. Start Extraction from TD752SP01.part01.rar file, and let the unzip, 7zip (best option), winrar, unrar, (whatever zip/unzip application), work until it extracts the last file.
Installation guide shows the main system requirements, installation procedures, and users available for both database and sap gui.

Download it on Ubuntu web page.
Let's start by creating a new machine on Virtualbox. To do that, choose Machine on Virtualbox menu bar and select option New..


We should strictly follow system requirements before proceeding. julie.plummer details the system requirements on its blog AS ABAP 752 SP01 Developer Edition to Download

Click on Create

Click on Create
After complete steps above, the instance

Click on the instance and choose Start . A popup should appear prompting for a start-up disk containing Ubuntu operation system installation. Click on
  , and search for the ubuntu-16.04.5-desktop-amd64.iso previously downloaded on Downloads section.

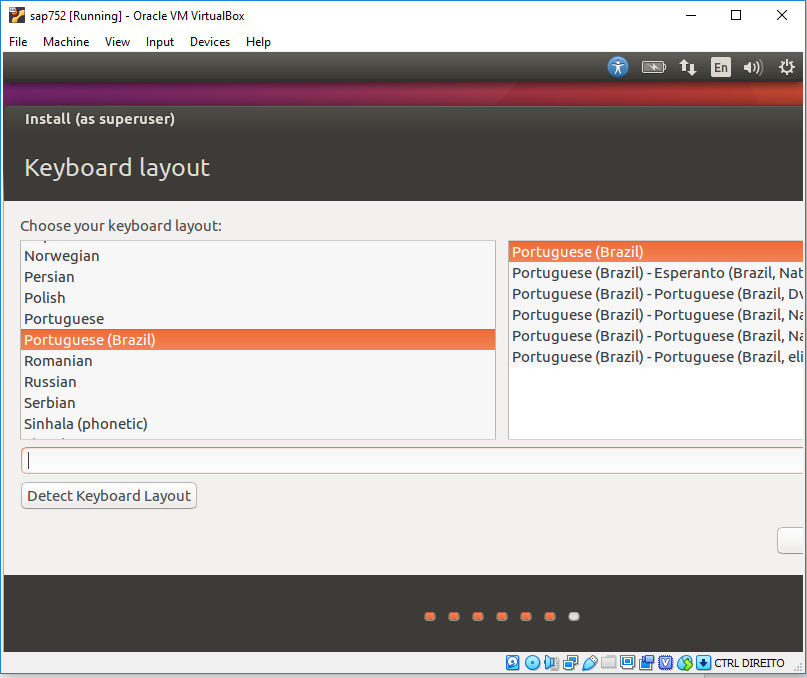
The Ubuntu installation should start now. During the installation will be asked for Language, Country and Keyboard layout, so choose the more appropriate option for you in each. Be aware in "Who are you?" screen to not forget to set the hostname as
Choose Install Ubuntu

Select option Download updates while installing Ubuntu, it will download and update libraries for the current Ubuntu version.


4.1 - Defining
SAP Netweaver 752 SP01 installation guide strongly recommends to use


Done! The installation will take a few time. Take your time to grab a coffee and relax. Wach some puppies’ funny videos on http://www.dailydogmemes.com/ ???
When installation finish, will be prompted to reboot the system. Just reboot and log on by using your user credentials (same created on installation time). Notice that superuser permissions was granted to your user, being able to manage the operational system entirely.

Click on the top left icon located in the toolbar, and search for Terminal. It is time for some upgrades before starting SAP NW 75 installation.

In case of the terminal open with a different user than defined on installation time, you have to reboot the ubuntu system. It happens because the installation haven't finished yet.

Now it is time to upgrade your ubuntu accordingly in order to receive SAP NW 752 properly. As long we are using Ubuntu 16.04 (xenial), The full package list may be find on https://packages.ubuntu.com/xenial/
Bear in mind that administrator privileges are need when installing any unix package. In case of "Permission denied" error after executing statements, use sudo to fix it.
E.g.: sudo apt-get update
Each statement below is followed by small explanation.
The statement apt-get update checks for new package versions available. It will download the information. You can see that there are download information with the 'get' line in the screenshot above. (Source https://itsfoss.com/apt-get-linux-guide)
The command apt-get upgrade is very obedient, and never tries to remove any packages or install a new package on its own. (Source https://itsfoss.com/apt-get-linux-guide). Reboot system after packages upgrade
Before proceeding, check for the current firewall status.
In order to disabled it, use statement below. Take in account firewall will not be enable again until you manually enable.

Now its time to create a shared folder (or a bridge - as you prefer), between your computer (host) and the virtual machine. We're going to mount a directory that contains installation files by using Hypervisor capabilities.
The hypervisor itself separates the computer’s operating system and applications from the underlying physical hardware.
Before mounting directories, make sure you've unpacked the installation files. Unpacking large files in this type of virtual machine might lead errors, and non extraction of all files properly. The strategy used in this tutorial, is to extract files on host system.
On Virtualbox, go to Devices > Insert Guest Additions CD images…

The superuser credential will be prompt just after clicking Run.

Point the folder to be shared:
Back in ubuntu console, add the user (that one created previously during ubuntu installation) to the newly group vboxsf. This user-group is responsible in managing mounted directories created by using HyperVision.

********************************* DON'T FORGET ********************************
As we've copied all files into the
Missing packages errors might happen during installation, and the log error will display which package is missing. Package csh contains shell with C-like syntax.
After installation finished, reboot your system and changes will have effect. Other errors like "failed to start" might happen, for those I strongly recommend you to check sites below:
https://websiteforstudents.com/how-to-fix-vboxclient-fail-to-start-error-on-ubuntu-virtalbox-guest-m...
https://askubuntu.com/questions/985815/vboxclient-seamless-failed-to-start-stage-setting-guest-irq-f...
Edit current hosts file by adjusting the loopback accordingly to the localhost (comment out line 127.0.1.1 vhcalnplci), and adding the mapping of hostname for FQDN vhcalnplci.dummy.nodomain
Restart ubuntu after /etc/hosts changes.
Still at the command line, go to

Also, you will have to accept license terms, so just type "yes" to continue.

Then you should specify a password for the newly OS users.
FINALLY, installation process will start! Installation might takes around 20 minutes (or more) depending of a few hardware factors. Grab another coffee, wait, take your time for relax. ☕
if you reach this point, WELL DONE!

Start the SAP system in ubuntu console:
Last thing to do is to configure the NAT network to access SAP system through SAP GUI with no intermediates. By default, SAP instance ports
In the virtualbox, click on Settings of your virtual machine.

When the Settings pop up, click on Network > Advanced > Port Fowarding

Add the following ports

Open SAPGUI, and add a new entry on it.

Done! The sap screen should appear.

Do not forget to check README.html file to get users/passwords. Also, share your thoughs on the comments! Did you have any trouble during the tutorial ?
[Part 2] Sync your SCP account with your on-premise system.
Cheers
Arthur Silva
Hello, how are you? Welcome to the first part of "The Dev Hero, a journey in the digital transformation". In this blog series I intent to demonstrate some vary technologies available in nowadays by putting some inputs about, recommendations, and (maybe the most exciting) how to connect several SAP and non-SAP applications in a single architecture.
Do not forget to like and to leave a comment, help us to improve the quality of our work ?
When you finish, don't miss the [Part 2] Sync your SCP account with your on-premise system.
What will be covered in this first part?
In this first part, I'll explain how to configure a Virtualbox machine by configuring Ubuntu 16.04 (also works on release 18.04) as operational system in order to run a SAP NetWeaver AS ABAP Developer Edition 7.52 SP01 trial instance. Sizing, system requirements and installation procedures will be covered along this post, and at the end you will be able to create programs and to expose services directly from you personal computer.
Don't be afraid if you're not comfortable in using Linux, or didn't have enogh experience so far, this tutorial was written for those who never had any contact with a unix based system before. Step-by-step guides will provide you a well explained context of each functionality. So let's get started!
Glossary
1. Components available in SAPNW752 trial version for your software development project
1.1 - SAP_GWFND
1.2 - SAP_UI
2. Downloading software dependencies
2.1 Virtualbox
2.1.1 Known issues and how to fix
2.2 SAP NetWeaver AS ABAP Developer Edition 7.52 SP01 trial version
2.2.1 Installation guide (README.html) and files extraction
2.3 Ubuntu 16.04 64-bit PC (AMD64) desktop image (it will be used when booting Ubuntu for the first time)
3. Virtualbox instance configuration
3.1 - Hardware requirements (sizing)
3.2 - Creating a virtual disk
3.3 - Start the virtualbox machine
4. Ubuntu installation
4.1 - Defining vhcalnplci as hostname
4.2 - Ubuntu installation, Done!
5. Ubuntu configuration and update
5.1 - sudo apt-get update
5.2 - sudo apt-get upgrade
5.3 - sudo reboot now
5.4 - enabling/checking/disabling the ubuntu firewall (ufw)
5.5 - mount a shared folder between operation system and virtualbox
5.6 - sudo apt-get install gcc perl csh libaio1 libc6 libstdc++6
5.7 - edit /etc/hosts file
6. SAP Netweaver AS ABAP trial installation
6.1 - sudo ./install.sh
6.2 - Start SAP server
6.3 - Configuring network (NAT)
6.4 - Adding a new entry in SAPGUI
1. Components available in SAPNW752 trial version for your software development project
This SAP NetWeaver 752 SP01 version comes with a variety of components designed for software development, such as:
Component offers a tool for development and generation of OData services to a variety of client development tools. Through OData, it's possible to establish a connection between application or SAP Business Suite data and target clients, platforms, and programming framework. See more in SAP Gateway Foundation (SAP_GWFND)
User Interface Technology (SAP_UI) is a software component available within SAP NetWeaver. The SAP_UI component comes as part of the following software component. See more in Software Component SAP_UI
- Web Dynpro ABAP and Floorplan Manager;
- SAP Fiori Launchpad;
- UI development toolkit for HTML5;
- UI Theme Designer;
- SAP NetWeaver User Interface Services;
- SAP NetWeaver Business Client;
- SAP Visual Business;
- Social Media Integration;
2. Downloading software dependencies
2.1 Virtualbox
2.1.1 Known issues and how to fix
Sometimes when initialising a virtual machine you might experience errors that prevent its start. Honestly, I've faced those errors only when working with Windows, and my tests with Macbook the installation worked really well. So here are errors you may find:
- Open the command console as an Administrator
- Run statement below with no args
bcdedit
Both Windows Boot Manager and Loader will be displayed, with value of property hypervisorlaunchtype equal Auto. Now you'll have to turn off the hypervision launch type - In order to disable Hyper-V, run:
bcdedit /set hypervisorlaunchtype off
Restart the system just after switching HyperVision off, and then the VirtualBox machine start should work properly - In case you want to turn Hyper-V again:
bcdedit /set hypervisorlaunchtype auto
- VERR_VMX_NO_VMX (VT-x is not available)
The most possible causes related to the this error are:
- Your CPU doesn’t support VT-x or AMD-V virtualization
- VT-x or AMD-V is not enabled in BIOS (UEFI)
- You have Hyper-V virtualization enabled in Windows (go to VERR_SUPDRV_NO_RAW_MODE_HYPER_V_ROOT
2.2 SAP NetWeaver AS ABAP Developer Edition 7.52 SP01 trial version
Download it on SAP Developers Portal at sap.com
2.2.1 Installation guide (README.html) and files extraction
The installation guide - or the named README.html, may be found in root folder of SAPNW752. Start Extraction from TD752SP01.part01.rar file, and let the unzip, 7zip (best option), winrar, unrar, (whatever zip/unzip application), work until it extracts the last file.
Installation guide shows the main system requirements, installation procedures, and users available for both database and sap gui.
2.3 Ubuntu 16.04 64-bit PC (AMD64) desktop image
Download it on Ubuntu web page.
3. Virtualbox instance configuration
Let's start by creating a new machine on Virtualbox. To do that, choose Machine on Virtualbox menu bar and select option New..
3.1 - Hardware requirements (sizing)
We should strictly follow system requirements before proceeding. julie.plummer details the system requirements on its blog AS ABAP 752 SP01 Developer Edition to Download
- x86_64 processor based hardware
- at least 4 GB RAM and about 8 GB swap space
- about 100 GB free disk space for the server installation
- about 2 GB free disk space for the client installation
- Name and operation system:
- Name: e.g. sap752 (feel free to choose any name for your ubuntu instance. This is not the machine's hostname, but the virtualbox instance name)
- Type: Linux
- Version: Ubuntu (64-bits)
- Memory size:
- Memory size: at least 4096mb. According to the SAP NW 752 documentation, 4096mb is the minimum required to have a NW 752 instance up and running.
- Hard disk:
- Create a virtual hard disk now: Choose this option in order to create a HD to the instance. At least 100 GB are need for the installation, so less the size might lead a not enough space error during and post-installation. Next steps consists in attach the HD the newly instance.
Click on Create
3.2 - Creating a virtual disk
- File size:
- 100 GB (mininum required)
- Hard size file type:
- VHD (Virtual Hard Disk) Other virtual disks should also work, but aiming for less complexity the VHD will be chosen.
- Storage on physical hard disk:
- Dynamically allocated
Click on Create
3.3 - Start the virtualbox machine
After complete steps above, the instance
sap752 should now appear in the your instances list view.Click on the instance and choose Start
, and search for the ubuntu-16.04.5-desktop-amd64.iso previously downloaded on Downloads section.The Ubuntu installation should start now. During the installation will be asked for Language, Country and Keyboard layout, so choose the more appropriate option for you in each. Be aware in "Who are you?" screen to not forget to set the hostname as
vhcalnplci. Otherwise, SAPNW752 installation might potentially fail. (I've never succeed when choosing a different hostname). The section 4.1 explains how to do so.4. Ubuntu installation
Choose Install Ubuntu
Select option Download updates while installing Ubuntu, it will download and update libraries for the current Ubuntu version.
4.1 - Defining vhcalnplci as hostname
SAP Netweaver 752 SP01 installation guide strongly recommends to use
vhcalnplci as hostname, and different might lead errors or make server not pingable after its restart. To do that, fill the "Who are you" screen accordingly:- Your computer's name:
- vhcalnplci
- Pick a username
- (choose any).
- Choose a password:
- (choose any - a strong one !! ?)
4.2 - Ubuntu installation, Done!
Done! The installation will take a few time. Take your time to grab a coffee and relax. Wach some puppies’ funny videos on http://www.dailydogmemes.com/ ???
When installation finish, will be prompted to reboot the system. Just reboot and log on by using your user credentials (same created on installation time). Notice that superuser permissions was granted to your user, being able to manage the operational system entirely.
5. Ubuntu configuration and update
Click on the top left icon located in the toolbar, and search for Terminal. It is time for some upgrades before starting SAP NW 75 installation.
In case of the terminal open with a different user than defined on installation time, you have to reboot the ubuntu system. It happens because the installation haven't finished yet.
Now it is time to upgrade your ubuntu accordingly in order to receive SAP NW 752 properly. As long we are using Ubuntu 16.04 (xenial), The full package list may be find on https://packages.ubuntu.com/xenial/
Bear in mind that administrator privileges are need when installing any unix package. In case of "Permission denied" error after executing statements, use sudo to fix it.
E.g.: sudo apt-get update
Each statement below is followed by small explanation.
$ sudo apt-get update

The statement apt-get update checks for new package versions available. It will download the information. You can see that there are download information with the 'get' line in the screenshot above. (Source https://itsfoss.com/apt-get-linux-guide)
$ sudo apt-get upgradeThe command apt-get upgrade is very obedient, and never tries to remove any packages or install a new package on its own. (Source https://itsfoss.com/apt-get-linux-guide). Reboot system after packages upgrade
$ sudo reboot nowBefore proceeding, check for the current firewall status.
$ sudo ufw statusIn order to disabled it, use statement below. Take in account firewall will not be enable again until you manually enable.
$ sudo ufw disable

Now its time to create a shared folder (or a bridge - as you prefer), between your computer (host) and the virtual machine. We're going to mount a directory that contains installation files by using Hypervisor capabilities.
The hypervisor itself separates the computer’s operating system and applications from the underlying physical hardware.
Before mounting directories, make sure you've unpacked the installation files. Unpacking large files in this type of virtual machine might lead errors, and non extraction of all files properly. The strategy used in this tutorial, is to extract files on host system.
On Virtualbox, go to Devices > Insert Guest Additions CD images…
The superuser credential will be prompt just after clicking Run.
Point the folder to be shared:
- Select the virtual machine and select VM > Settings.
- On the Share folder option, select Adds New Shared Folder


- Fill the popup by inputing the host folder and mount directory (ubuntu).

Folder path
host folder containing SAPNW752 extracted installation files
Auto-mount
true
Mount point
Shared folder on Ubuntu side. E.g: /var/www
Make Permanent
true (Keep folder sharing enabled, even when the virtual machine is shut down, suspended, or powered off)
(Source Enable a Shared Folder for a Virtual Machine)
Back in ubuntu console, add the user (that one created previously during ubuntu installation) to the newly group vboxsf. This user-group is responsible in managing mounted directories created by using HyperVision.
$ sudo adduser <youruser> vboxsf

$ sudo reboot now
********************************* DON'T FORGET ********************************
As we've copied all files into the
/var/www directory, now it's necessary to move those to an internal ubuntu directory (a non shared one). The idea behind is that /var/www is a shared folder, being not able to be used to handle SAPNW752 and leading errors during it install.cd /srv/ && sudo mkdir www
sudo mv -f /var/www/* /srv/www/
$ sudo apt-get install gcc perl csh libaio1 libc6 libstdc++6Missing packages errors might happen during installation, and the log error will display which package is missing. Package csh contains shell with C-like syntax.
After installation finished, reboot your system and changes will have effect. Other errors like "failed to start" might happen, for those I strongly recommend you to check sites below:
https://websiteforstudents.com/how-to-fix-vboxclient-fail-to-start-error-on-ubuntu-virtalbox-guest-m...
https://askubuntu.com/questions/985815/vboxclient-seamless-failed-to-start-stage-setting-guest-irq-f...
$ sudo nano /etc/hostsEdit current hosts file by adjusting the loopback accordingly to the localhost (comment out line 127.0.1.1 vhcalnplci), and adding the mapping of hostname for FQDN vhcalnplci.dummy.nodomain
# comment --

# 127.0.1.1	vhcalnplci


# add --

10.0.2.15	vhcalnplci	vhcalnplci.dummy.nodomain

Restart ubuntu after /etc/hosts changes.
$ sudo reboot now6. SAP Netweaver AS ABAP trial installation
6.1 sudo ./install.sh
Still at the command line, go to
/srv/www and execute statement sudo install.sh to start installation. In case of skipping any previous step by mistaken missing dependencies will be shown, and it will be asked for its install. Just type "yes" and hit enter to continue.$ cd /srv/www
$ sudo install.shAlso, you will have to accept license terms, so just type "yes" to continue.
Then you should specify a password for the newly OS users.
| sapadm | Created by SAP Hostagent, you can manually assign a password |
| npladm | SAP System Administrator |
| sybnpl | SAP Database Administrator |
FINALLY, installation process will start! Installation might takes around 20 minutes (or more) depending of a few hardware factors. Grab another coffee, wait, take your time for relax. ☕
if you reach this point, WELL DONE!
6.2 Start SAP server
Start the SAP system in ubuntu console:
- Switch to user npladm in the console:
$ su - npladm- Start the SAP system:
$ startsap ALL- To stop the service:
$ stopsap ALL6.3 Configuring network (NAT)
Last thing to do is to configure the NAT network to access SAP system through SAP GUI with no intermediates. By default, SAP instance ports
8000 (HTTP), 44300 (HTTPS), 3300 (RFC), 3200 (SAPGUI) are opened. So, to get the instance it working with SAP GUI, ports mentioned should now be exposed.In the virtualbox, click on Settings of your virtual machine.
When the Settings pop up, click on Network > Advanced > Port Fowarding
Add the following ports
6.4 Adding a new entry in SAPGUI
Open SAPGUI, and add a new entry on it.
- Application server: 127.0.0.1
- Instance number: 00
- ID: NPL
Done! The sap screen should appear.
Do not forget to check README.html file to get users/passwords. Also, share your thoughs on the comments! Did you have any trouble during the tutorial ?
[Part 2] Sync your SCP account with your on-premise system.
Cheers
Arthur Silva
26 Comments
You must be a registered user to add a comment. If you've already registered, sign in. Otherwise, register and sign in.
Labels in this area
-
"automatische backups"
1 -
"regelmäßige sicherung"
1 -
"TypeScript" "Development" "FeedBack"
1 -
505 Technology Updates 53
1 -
ABAP
14 -
ABAP API
1 -
ABAP CDS Views
2 -
ABAP CDS Views - BW Extraction
1 -
ABAP CDS Views - CDC (Change Data Capture)
1 -
ABAP class
2 -
ABAP Cloud
3 -
ABAP Development
5 -
ABAP in Eclipse
1 -
ABAP Platform Trial
1 -
ABAP Programming
2 -
abap technical
1 -
abapGit
1 -
absl
2 -
access data from SAP Datasphere directly from Snowflake
1 -
Access data from SAP datasphere to Qliksense
1 -
Accrual
1 -
action
1 -
adapter modules
1 -
Addon
1 -
Adobe Document Services
1 -
ADS
1 -
ADS Config
1 -
ADS with ABAP
1 -
ADS with Java
1 -
ADT
2 -
Advance Shipping and Receiving
1 -
Advanced Event Mesh
3 -
Advanced formula
1 -
AEM
1 -
AI
8 -
AI Launchpad
1 -
AI Projects
1 -
AIML
9 -
Alert in Sap analytical cloud
1 -
Amazon S3
1 -
Analytic Models
1 -
Analytical Dataset
1 -
Analytical Model
1 -
Analytics
1 -
Analyze Workload Data
1 -
annotations
1 -
API
1 -
API and Integration
4 -
API Call
2 -
API security
1 -
Application Architecture
1 -
Application Development
5 -
Application Development for SAP HANA Cloud
3 -
Applications and Business Processes (AP)
1 -
Artificial Intelligence
1 -
Artificial Intelligence (AI)
5 -
Artificial Intelligence (AI) 1 Business Trends 363 Business Trends 8 Digital Transformation with Cloud ERP (DT) 1 Event Information 462 Event Information 15 Expert Insights 114 Expert Insights 76 Life at SAP 418 Life at SAP 1 Product Updates 4
1 -
Artificial Intelligence (AI) blockchain Data & Analytics
1 -
Artificial Intelligence (AI) blockchain Data & Analytics Intelligent Enterprise
1 -
Artificial Intelligence (AI) blockchain Data & Analytics Intelligent Enterprise Oil Gas IoT Exploration Production
1 -
Artificial Intelligence (AI) blockchain Data & Analytics Intelligent Enterprise sustainability responsibility esg social compliance cybersecurity risk
1 -
AS Java
1 -
ASE
1 -
ASR
2 -
ASUG
1 -
Attachments
1 -
Authentication
1 -
Authorisations
1 -
Automating Processes
1 -
Automation
2 -
aws
2 -
Azure
2 -
Azure AI Studio
1 -
Azure API Center
1 -
Azure API Management
1 -
B2B Integration
1 -
Backorder Processing
1 -
Backpropagation
1 -
Backup
1 -
Backup and Recovery
1 -
Backup schedule
1 -
BADI_MATERIAL_CHECK error message
1 -
Bank
1 -
Bank Communication Management
1 -
BAS
1 -
basis
2 -
Basis Monitoring & Tcodes with Key notes
2 -
Batch Management
1 -
BDC
1 -
Best Practice
1 -
BI
1 -
bitcoin
1 -
Blockchain
3 -
bodl
1 -
BOP in aATP
1 -
BOP Segments
1 -
BOP Strategies
1 -
BOP Variant
1 -
BPC
1 -
BPC LIVE
1 -
BTP
14 -
BTP AI Launchpad
1 -
BTP Destination
2 -
Business AI
1 -
Business and IT Integration
1 -
Business application stu
1 -
Business Application Studio
1 -
Business Architecture
1 -
Business Communication Services
1 -
Business Continuity
2 -
Business Data Fabric
3 -
Business Fabric
1 -
Business Partner
12 -
Business Partner Master Data
10 -
Business Technology Platform
2 -
Business Trends
4 -
BW4HANA
1 -
CA
1 -
calculation view
1 -
CAP
4 -
Capgemini
1 -
CAPM
1 -
Catalyst for Efficiency: Revolutionizing SAP Integration Suite with Artificial Intelligence (AI) and
1 -
CCMS
2 -
CDQ
12 -
CDS
2 -
Cental Finance
1 -
Certificates
1 -
CFL
1 -
Change Management
1 -
chatbot
1 -
chatgpt
3 -
CICD
1 -
CL_SALV_TABLE
2 -
Class Runner
1 -
Classrunner
1 -
Cloud ALM Monitoring
1 -
Cloud ALM Operations
1 -
cloud connector
1 -
Cloud Extensibility
1 -
Cloud Foundry
4 -
Cloud Integration
6 -
Cloud Platform Integration
2 -
cloudalm
1 -
communication
1 -
Compensation Information Management
1 -
Compensation Management
1 -
Compliance
1 -
Compound Employee API
1 -
Configuration
1 -
Connectors
1 -
Consolidation Extension for SAP Analytics Cloud
2 -
Control Indicators.
1 -
Controller-Service-Repository pattern
1 -
Conversion
1 -
Cosine similarity
1 -
CPI
1 -
cryptocurrency
1 -
CSI
1 -
ctms
1 -
Custom chatbot
3 -
Custom Destination Service
1 -
custom fields
1 -
Custom Headers
1 -
Customer Experience
1 -
Customer Journey
1 -
Customizing
1 -
cyber security
4 -
cybersecurity
1 -
Data
1 -
Data & Analytics
1 -
Data Aging
1 -
Data Analytics
2 -
Data and Analytics (DA)
1 -
Data Archiving
1 -
Data Back-up
1 -
Data Flow
1 -
Data Governance
5 -
Data Integration
2 -
Data Quality
12 -
Data Quality Management
12 -
Data Synchronization
1 -
data transfer
1 -
Data Unleashed
1 -
Data Value
8 -
Database and Data Management
1 -
database tables
1 -
Databricks
1 -
Dataframe
1 -
Datasphere
3 -
datenbanksicherung
1 -
dba cockpit
1 -
dbacockpit
1 -
Debugging
2 -
Defender
1 -
Delimiting Pay Components
1 -
Delta Integrations
1 -
Destination
3 -
Destination Service
1 -
Developer extensibility
1 -
Developing with SAP Integration Suite
1 -
Devops
1 -
digital transformation
1 -
Disaster Recovery
1 -
Documentation
1 -
Dot Product
1 -
DQM
1 -
dump database
1 -
dump transaction
1 -
e-Invoice
1 -
E4H Conversion
1 -
Eclipse ADT ABAP Development Tools
2 -
edoc
1 -
edocument
1 -
ELA
1 -
Embedded Consolidation
1 -
Embedding
1 -
Embeddings
1 -
Employee Central
1 -
Employee Central Payroll
1 -
Employee Central Time Off
1 -
Employee Information
1 -
Employee Rehires
1 -
Enable Now
1 -
Enable now manager
1 -
endpoint
1 -
Enhancement Request
1 -
Enterprise Architecture
1 -
Entra
1 -
ESLint
1 -
ETL Business Analytics with SAP Signavio
1 -
Euclidean distance
1 -
Event Dates
1 -
Event Driven Architecture
1 -
Event Mesh
2 -
Event Reason
1 -
EventBasedIntegration
1 -
EWM
1 -
EWM Outbound configuration
1 -
EWM-TM-Integration
1 -
Existing Event Changes
1 -
Expand
1 -
Expert
2 -
Expert Insights
2 -
Exploits
1 -
Fiori
15 -
Fiori Elements
2 -
Fiori SAPUI5
12 -
first-guidance
1 -
Flask
2 -
FTC
1 -
Full Stack
8 -
Funds Management
1 -
gCTS
1 -
GenAI hub
1 -
General
2 -
Generative AI
1 -
Getting Started
1 -
GitHub
10 -
Google cloud
1 -
Grants Management
1 -
groovy
2 -
GTP
1 -
HANA
6 -
HANA Cloud
2 -
Hana Cloud Database Integration
2 -
HANA DB
2 -
Hana Vector Engine
1 -
HANA XS Advanced
1 -
Historical Events
1 -
home labs
1 -
HowTo
1 -
HR Data Management
1 -
html5
8 -
HTML5 Application
1 -
Identity cards validation
1 -
idm
1 -
Implementation
1 -
Infuse AI
1 -
input parameter
1 -
instant payments
1 -
Integration
3 -
Integration Advisor
1 -
Integration Architecture
1 -
Integration Center
1 -
Integration Suite
1 -
intelligent enterprise
1 -
iot
1 -
Java
1 -
JMS Receiver channel ping issue
1 -
job
1 -
Job Information Changes
1 -
Job-Related Events
1 -
Job_Event_Information
1 -
joule
4 -
Journal Entries
1 -
Just Ask
1 -
Kerberos for ABAP
9 -
Kerberos for JAVA
8 -
KNN
1 -
Launch Wizard
1 -
Learning Content
2 -
Life at SAP
5 -
lightning
1 -
Linear Regression SAP HANA Cloud
1 -
Loading Indicator
1 -
local tax regulations
1 -
LP
1 -
Machine Learning
4 -
Marketing
1 -
Master Data
3 -
Master Data Management
14 -
Maxdb
2 -
MDG
1 -
MDGM
1 -
MDM
1 -
Message box.
1 -
Messages on RF Device
1 -
Microservices Architecture
1 -
Microsoft
1 -
Microsoft Universal Print
1 -
Middleware Solutions
1 -
Migration
5 -
ML Model Development
1 -
MLFlow
1 -
Modeling in SAP HANA Cloud
8 -
Monitoring
3 -
MPL
1 -
MTA
1 -
Multi-factor-authentication
1 -
Multi-Record Scenarios
1 -
Multilayer Perceptron
1 -
Multiple Event Triggers
1 -
Myself Transformation
1 -
Neo
1 -
Neural Networks
1 -
New Event Creation
1 -
New Feature
1 -
Newcomer
1 -
NodeJS
3 -
ODATA
2 -
OData APIs
1 -
odatav2
1 -
ODATAV4
1 -
ODBC
1 -
ODBC Connection
1 -
Onpremise
1 -
open source
2 -
OpenAI API
1 -
Oracle
1 -
PaPM
1 -
PaPM Dynamic Data Copy through Writer function
1 -
PaPM Remote Call
1 -
Partner Built Foundation Model
1 -
PAS-C01
1 -
Pay Component Management
1 -
PGP
1 -
Pickle
1 -
PLANNING ARCHITECTURE
1 -
Popup in Sap analytical cloud
1 -
PostgrSQL
1 -
POSTMAN
1 -
Prettier
1 -
Process Automation
2 -
Product Updates
6 -
PSM
1 -
Public Cloud
1 -
Python
5 -
python library - Document information extraction service
1 -
Qlik
1 -
Qualtrics
1 -
RAP
3 -
RAP BO
2 -
React
1 -
Record Deletion
1 -
Recovery
1 -
recurring payments
1 -
redeply
1 -
Release
1 -
Remote Consumption Model
1 -
Replication Flows
1 -
research
1 -
Resilience
1 -
REST
1 -
REST API
1 -
Retagging Required
1 -
Risk
1 -
rolandkramer
2 -
Rolling Kernel Switch
1 -
route
1 -
rules
1 -
S4 HANA
1 -
S4 HANA Cloud
1 -
S4 HANA On-Premise
1 -
S4HANA
4 -
S4HANA Cloud
1 -
S4HANA_OP_2023
2 -
SAC
10 -
SAC PLANNING
9 -
SAP
4 -
SAP ABAP
1 -
SAP Advanced Event Mesh
1 -
SAP AI Core
9 -
SAP AI Launchpad
8 -
SAP Analytic Cloud
1 -
SAP Analytic Cloud Compass
1 -
Sap Analytical Cloud
1 -
SAP Analytics Cloud
4 -
SAP Analytics Cloud for Consolidation
3 -
SAP Analytics Cloud Story
1 -
SAP analytics clouds
1 -
SAP API Management
1 -
SAP Application Logging Service
1 -
SAP BAS
1 -
SAP Basis
6 -
SAP BODS
1 -
SAP BODS certification.
1 -
SAP BODS migration
1 -
SAP BTP
24 -
SAP BTP Build Work Zone
2 -
SAP BTP Cloud Foundry
8 -
SAP BTP Costing
1 -
SAP BTP CTMS
1 -
SAP BTP Generative AI
1 -
SAP BTP Innovation
1 -
SAP BTP Migration Tool
1 -
SAP BTP SDK IOS
1 -
SAP BTPEA
1 -
SAP Build
11 -
SAP Build App
1 -
SAP Build apps
1 -
SAP Build CodeJam
1 -
SAP Build Process Automation
3 -
SAP Build work zone
10 -
SAP Business Objects Platform
1 -
SAP Business Technology
2 -
SAP Business Technology Platform (XP)
1 -
sap bw
1 -
SAP CAP
2 -
SAP CDC
1 -
SAP CDP
1 -
SAP CDS VIEW
1 -
SAP Certification
1 -
SAP Cloud ALM
4 -
SAP Cloud Application Programming Model
1 -
SAP Cloud Integration
1 -
SAP Cloud Integration for Data Services
1 -
SAP cloud platform
8 -
SAP Companion
1 -
SAP CPI
3 -
SAP CPI (Cloud Platform Integration)
2 -
SAP CPI Discover tab
1 -
sap credential store
1 -
SAP Customer Data Cloud
1 -
SAP Customer Data Platform
1 -
SAP Data Intelligence
1 -
SAP Data Migration in Retail Industry
1 -
SAP Data Services
1 -
SAP DATABASE
1 -
SAP Dataspher to Non SAP BI tools
1 -
SAP Datasphere
9 -
SAP DRC
1 -
SAP EWM
1 -
SAP Fiori
3 -
SAP Fiori App Embedding
1 -
Sap Fiori Extension Project Using BAS
1 -
SAP GRC
1 -
SAP HANA
1 -
SAP HANA PAL
1 -
SAP HANA Vector
1 -
SAP HCM (Human Capital Management)
1 -
SAP HR Solutions
1 -
SAP IDM
1 -
SAP Integration Suite
10 -
SAP Integrations
4 -
SAP iRPA
2 -
SAP LAGGING AND SLOW
1 -
SAP Learning Class
1 -
SAP Learning Hub
1 -
SAP Master Data
1 -
SAP Odata
2 -
SAP on Azure
2 -
SAP PAL
1 -
SAP PartnerEdge
1 -
sap partners
1 -
SAP Password Reset
1 -
SAP PO Migration
1 -
SAP Prepackaged Content
1 -
sap print
1 -
SAP Process Automation
2 -
SAP Process Integration
2 -
SAP Process Orchestration
1 -
SAP Router
1 -
SAP S4HANA
2 -
SAP S4HANA Cloud
2 -
SAP S4HANA Cloud for Finance
1 -
SAP S4HANA Cloud private edition
1 -
SAP Sandbox
1 -
SAP STMS
1 -
SAP successfactors
3 -
SAP SuccessFactors HXM Core
1 -
SAP Time
1 -
SAP TM
2 -
SAP Trading Partner Management
1 -
SAP UI5
1 -
SAP Upgrade
1 -
SAP Utilities
1 -
SAP-GUI
8 -
SAP_COM_0276
1 -
SAPBTP
1 -
SAPCPI
1 -
SAPEWM
1 -
sapfirstguidance
3 -
SAPHANAService
1 -
SAPIQ
2 -
sapmentors
1 -
saponaws
2 -
saprouter
1 -
SAPRouter installation
1 -
SAPS4HANA
1 -
SAPUI5
5 -
schedule
1 -
Script Operator
1 -
Secure Login Client Setup
8 -
security
9 -
Selenium Testing
1 -
Self Transformation
1 -
Self-Transformation
1 -
SEN
1 -
SEN Manager
1 -
Sender
1 -
service
2 -
SET_CELL_TYPE
1 -
SET_CELL_TYPE_COLUMN
1 -
SFTP scenario
2 -
Simplex
1 -
Single Sign On
8 -
Singlesource
1 -
SKLearn
1 -
Slow loading
1 -
SOAP
2 -
Software Development
1 -
SOLMAN
1 -
solman 7.2
2 -
Solution Manager
3 -
sp_dumpdb
1 -
sp_dumptrans
1 -
SQL
1 -
sql script
1 -
SSL
8 -
SSO
8 -
Story2
1 -
Substring function
1 -
SuccessFactors
1 -
SuccessFactors Platform
1 -
SuccessFactors Time Tracking
1 -
Sybase
1 -
system copy method
1 -
System owner
1 -
Table splitting
1 -
Tax Integration
1 -
Technical article
1 -
Technical articles
1 -
Technology Updates
15 -
Technology Updates
1 -
Technology_Updates
1 -
terraform
1 -
Testing
1 -
Threats
2 -
Time Collectors
1 -
Time Off
2 -
Time Sheet
1 -
Time Sheet SAP SuccessFactors Time Tracking
1 -
Tips and tricks
2 -
toggle button
1 -
Tools
1 -
Trainings & Certifications
1 -
Transformation Flow
1 -
Transport in SAP BODS
1 -
Transport Management
1 -
TypeScript
3 -
ui designer
1 -
unbind
1 -
Unified Customer Profile
1 -
UPB
1 -
Use of Parameters for Data Copy in PaPM
1 -
User Unlock
1 -
VA02
1 -
Validations
1 -
Vector Database
2 -
Vector Engine
1 -
Vectorization
1 -
Visual Studio Code
1 -
VSCode
2 -
VSCode extenions
1 -
Vulnerabilities
1 -
Web SDK
1 -
Webhook
1 -
work zone
1 -
workload
1 -
xsa
1 -
XSA Refresh
1
- « Previous
- Next »
Related Content
- Error installing ABAP 7.5.2. Assertion failed: Unable to generate a new password for database login in Technology Q&A
- Consuming SAP with SAP Build Apps - Mobile Apps for iOS and Android in Technology Blogs by SAP
- App to automatically configure a new ABAP Developer System in Technology Blogs by Members
- SAP Datasphere - Space, Data Integration, and Data Modeling Best Practices in Technology Blogs by SAP
- Exposing an oData Service from SAP S/4HANA Cloud Public Edition to the SAP BTP in Technology Blogs by SAP
Top kudoed authors
| User | Count |
|---|---|
| 55 | |
| 5 | |
| 5 | |
| 4 | |
| 4 | |
| 4 | |
| 3 | |
| 3 | |
| 3 | |
| 3 |