
- SAP Community
- Products and Technology
- Technology
- Technology Blogs by SAP
- How to Predefined Push for SAP Fiori Client
Technology Blogs by SAP
Learn how to extend and personalize SAP applications. Follow the SAP technology blog for insights into SAP BTP, ABAP, SAP Analytics Cloud, SAP HANA, and more.
Turn on suggestions
Auto-suggest helps you quickly narrow down your search results by suggesting possible matches as you type.
Showing results for
Product and Topic Expert
Options
- Subscribe to RSS Feed
- Mark as New
- Mark as Read
- Bookmark
- Subscribe
- Printer Friendly Page
- Report Inappropriate Content
10-23-2017
9:38 PM
For latest information, please visit documentation.
There are so many features available in SAP Cloud Platform, Mobile Service for Development & Operations and one of them is "Predefined Push for SAP Fiori Client". But how does it work? What all are per-requisite / Configuration required for this?
Well, idea of writing this blog post has come after looking into a question asked by a community member on twitter , glad that he asked it.
Fyi: SAP Fiori Client is (Free) standard native application (iOS, Android, Windows) that enables you to run web application (or consume Fiori-based applications) as online hybrid apps. Check here for more information.
There is already lots of information posted by daniel.vanleeuwen in his blog where you can learn how to build, run, customize Fiori Client and many more.
But below write-up covers some important information for above mentioned feature. This feature works only with standard Fiori Client application.
In order to work/test that feature, you should have a running UI5 or Fiori-like application. Quick way to do>
- a create a simple SAPUI5 app in SAP Web IDE.
- Add below code in the index.html ( intial application page that Fiori client displays )
<!-- Push notificaiton -->

    <script>

        function onSapLogonSuccess() {

            alert("EventLogging: onSapLogonSuccess");

            initPush();

        }

function initPush() {

            alert("EventLogging: initPush");

            sap.Push.initPush(processNotification);

        }

function processNotification(notification) {

            alert("in processNotification: " + JSON.stringify(notification));

            if (sap.Push.setPushFeedbackStatus && notification.additionalData) {  //SP15 new feature

                sap.Push.setPushFeedbackStatus('consumed', notification.additionalData.notificationId, pushFeedbackStatusSuccessCallback, pushFeedbackStatusErrorCallback);

            }

        }


        document.addEventListener("onSapLogonSuccess", onSapLogonSuccess, false);

    </script>

<!-- Push notificaiton -->Note: The page Fiori Client displays should contain logic to register for Push notifications, above code is for register for Push notifications and also it contains a method that gets called when the notification arrives.
3. Enforce NoAuth for this app (please note, this option is selected for this demo only)
in neo-app.json file added authenticationMethod as none
{

  "welcomeFile": "/webapp/index.html",

  "authenticationMethod": "none",

  "routes": [

    {

      "path": "/resources",

      "target": {

        "type": "service",

        "name": "sapui5",

        "entryPath": "/resources"

      },

      "description": "SAPUI5 Resources"

    },

    {

      "path": "/test-resources",

      "target": {

        "type": "service",

        "name": "sapui5",

        "entryPath": "/test-resources"

      },

      "description": "SAPUI5 Test Resources"

    }

  ],

  "sendWelcomeFileRedirect": true

}
4. Deploy above UI5 app to SAP Cloud Platform
5. In Mobile Services (Development & Operations) Cockpit, create an app (give it some name com.test.fc1)
- By default, app is assigned to SAML security provider
- Under Connectivity, enter URL as generated from step#3

Select predefined for PUSH client option under Push notifications

6. Download Standard "SAP Fiori" app from appstore
7. Enter URL as https://hcpms-xxxxxxtrial.hanatrial.ondemand.com/com.test.fc1?appid=com.test.fc1&fioriurlissmp=true&...
Here: host >> Mobile service (server) URL
com.test.fc1 >> application ID created in Mobile service for development and operations (step#4)
fioriurlissmp=true >> proxying Application URL via Mobile service
authtype=saml2.web.post >> since my app is configured with SAML authentication provider as mentioned in step#4
(there is also an alternate way in SAP Fiori Client to scan QR code so rather than entering URL or sending it via emails, you can generated its QR code , for this i used http://goqr.me/ )
8. Go through steps as shown here

9. Above steps also include user-on-boarding on Mobile service, to verify this, click in application configuration in Mobile service cockpit, go to "user Registration" tab , here you would fine registration ID ( or we call it X-SMP-APPCID )
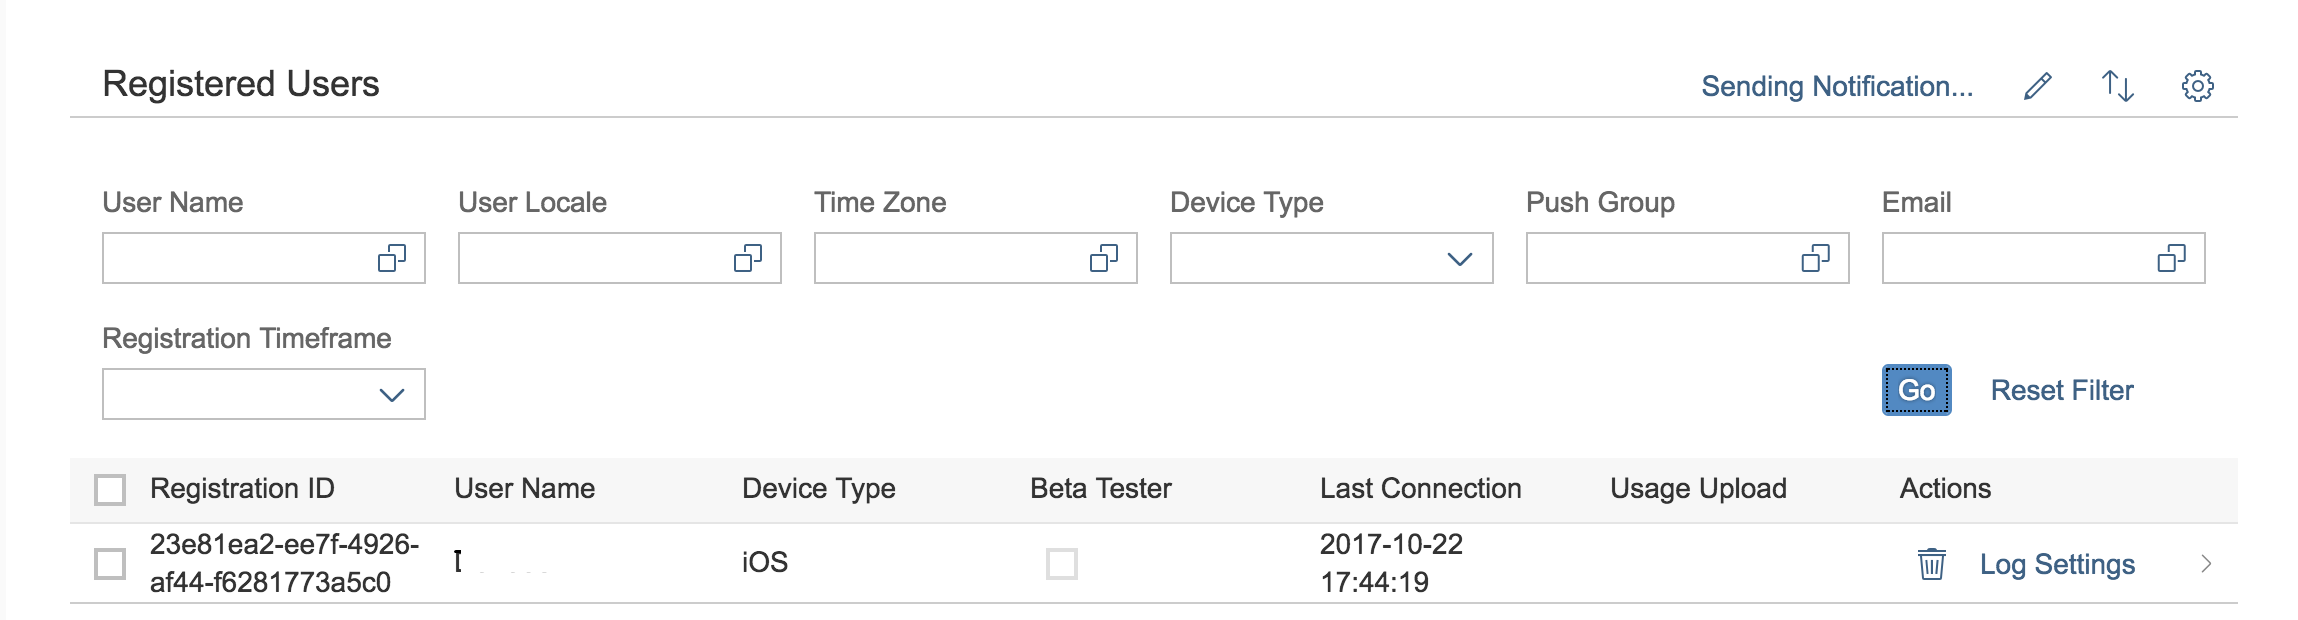
10. In order to send notification to this user , select checkbox in front of registration ID 23e81..... and click on "Sending Notification" option . Write a message in this new window and click on "Send".


Once you confirm above dialog, you should able to see notification reaching to your device

This is all above this feature, predefined push for Fiori Client.
Additional Info:
(1)
Here in above configurations , you might have noticed that nowhere we added any APNS (since my Fiori client is running on iOS device) configuration, well, mobile service under the hood taking care of registering device to APNS, getting token ID from there and storing it to the respective registration ID. So lets cross check it:
Since we have already got registration ID for user, lets make a GET call in a REST client
URL : https://hcpms-xxxxtrial.hanatrial.ondemand.com/odata/applications/v4/com.test.fc1/Connections('23e81...
Headers: Authorization: username and password
X-SMP-APPCID : 23e81ea2-ee7f-4926-af44-f6281773a5c0

in response, you should see ApnsPushEnable as true and ApnsDeviceToken value.

(2)
You can also send push message from REST client itself
- https://hcpms-xxxxxxtrial.hanatrial.ondemand.com/restnotification/application/com.test.fc1
- POSTmethod
- Header:
- Authorization : Basic
- content-type : application/json
- Payload >>{"alert":"notif from REST client", "data":"For 123", "badge":2}
- make sure user entered under Authorization header should have "notification user" role. Go to "Configure Development and operations" > Roles > select Notification User role > assign userID


Thanks daniel.vanleeuwen & martingrasshoff for your inputs.
Jitendra Kansal
Product Management, SAP Cloud Platform User Experience
SAP SE
- SAP Managed Tags:
- SAP Mobile Services,
- SAPUI5,
- SAP Mobile Platform SDK,
- SAP Web IDE,
- SAP Business Technology Platform
14 Comments
You must be a registered user to add a comment. If you've already registered, sign in. Otherwise, register and sign in.
Labels in this area
-
ABAP CDS Views - CDC (Change Data Capture)
2 -
AI
1 -
Analyze Workload Data
1 -
BTP
1 -
Business and IT Integration
2 -
Business application stu
1 -
Business Technology Platform
1 -
Business Trends
1,658 -
Business Trends
103 -
CAP
1 -
cf
1 -
Cloud Foundry
1 -
Confluent
1 -
Customer COE Basics and Fundamentals
1 -
Customer COE Latest and Greatest
3 -
Customer Data Browser app
1 -
Data Analysis Tool
1 -
data migration
1 -
data transfer
1 -
Datasphere
2 -
Event Information
1,400 -
Event Information
69 -
Expert
1 -
Expert Insights
177 -
Expert Insights
322 -
General
1 -
Google cloud
1 -
Google Next'24
1 -
GraphQL
1 -
Kafka
1 -
Life at SAP
780 -
Life at SAP
13 -
Migrate your Data App
1 -
MTA
1 -
Network Performance Analysis
1 -
NodeJS
1 -
PDF
1 -
POC
1 -
Product Updates
4,576 -
Product Updates
369 -
Replication Flow
1 -
REST API
1 -
RisewithSAP
1 -
SAP BTP
1 -
SAP BTP Cloud Foundry
1 -
SAP Cloud ALM
1 -
SAP Cloud Application Programming Model
1 -
SAP Datasphere
2 -
SAP S4HANA Cloud
1 -
SAP S4HANA Migration Cockpit
1 -
Technology Updates
6,873 -
Technology Updates
454 -
Workload Fluctuations
1
Related Content
- SAP Datasphere + SAP S/4HANA: Your Guide to Seamless Data Integration in Technology Blogs by SAP
- Extract blob data (PDF) from CAPM using python library of Document information extraction service. in Technology Blogs by Members
- Govern SAP APIs living in various API Management gateways in a single place with Azure API Center in Technology Blogs by Members
- SAP Fiori for SAP S/4HANA - Empowering Your Homepage: Enabling My Home for SAP S/4HANA 2023 FPS01 in Technology Blogs by SAP
- Recommended approach for Fiori Adapt UI in S/4H On-Premise system (Customizing client) with no data in Technology Q&A
Top kudoed authors
| User | Count |
|---|---|
| 24 | |
| 8 | |
| 7 | |
| 7 | |
| 6 | |
| 6 | |
| 6 | |
| 6 | |
| 6 | |
| 5 |