Learn how to extend and personalize SAP applications. Follow the SAP technology blog for insights into SAP BTP, ABAP, SAP Analytics Cloud, SAP HANA, and more.
HCPSDKforiOSAssistant is an application Mac machine, which will be used to create the Xcode project along with proxy classes.
What is proxy class: Proxy class is a swift class and its blueprint of a Collection. For ex: if oDATA URL has 5 collections, then HCPSDKforiOSAssistant will create 5 swift classes for each collection. This proxy class has all the variables, attributes and methods. Developer do not need to spend time on defining the classes. This class will saves the developer time, so s/he can focus business logic.
Now, lets look at how to create the Xcode project using HCPSDKforiOSAssistant.
Open HCP SDK for iOS Assistant on mac machine, which must be inside the Applications folder.
Click on Open if you get this popup.
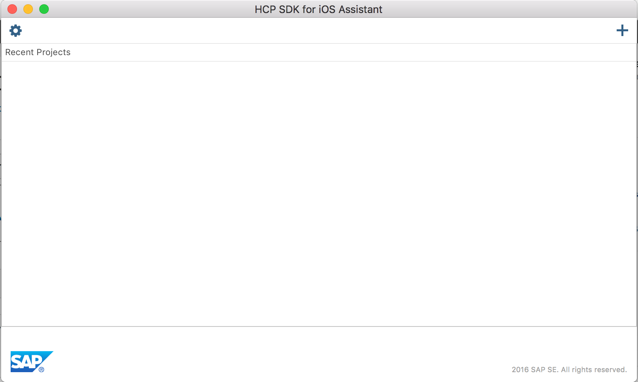
The HCP SDK for iOS Assistant is opened now.
We will test the settings once again.
Click on Settings icon.
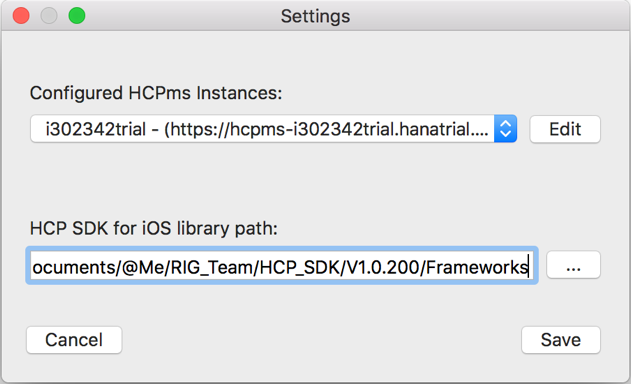
HCP Ms Instances:
Select the your C/I/D instance from the list.
HCP SDK for iOS library path:
Make sure the path is pointing to the correct folder.
It should be:
/abcd/efgh/Frameworks.
(Until framework).
Click on Save button.
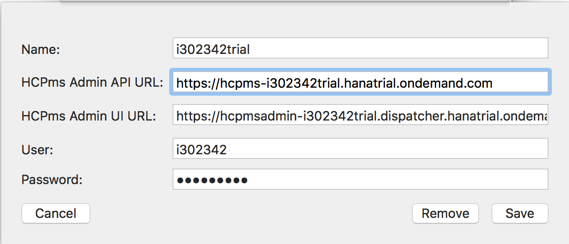
HCP Ms instances settings:
HCP iOS Library path:
Final it should like this:
We will now create the Xcode project.
Click on + button on right side.
Tab1: Project Properties
Enter the following parameters.
Product Name: SampleDemo
Author:
YourName
Org Name:
SAP
Org Identifier:
com.sap
Destination:
Destination folder where the project will be created.
Click on Next
Tab2: HCPms Configuration
Click on Use Existing.
Click on Select from HCPms.
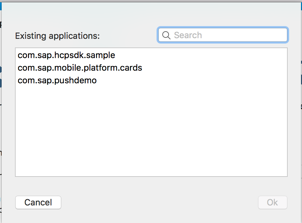
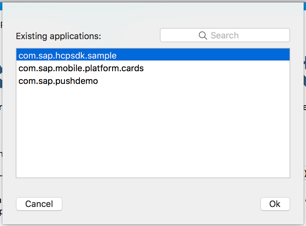
You would see the list of app configurations that you would have configured in your HCPms account on HCPms admin portal.
Select com.sap.hcpsdk.sample app ID.
Click on OK button.
And then, click on Next button to go to Tab3.
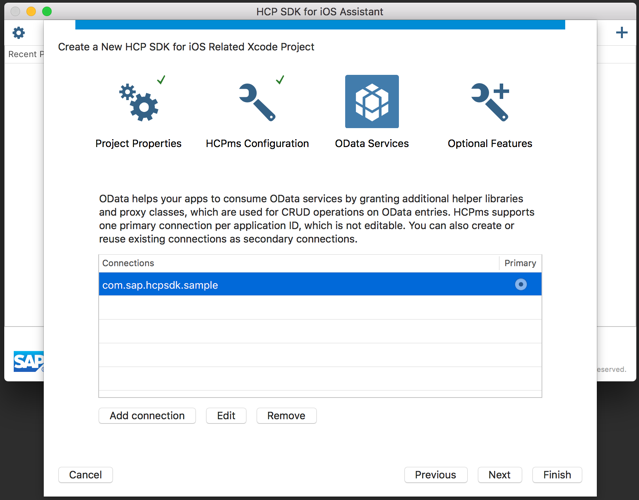
Tab3: oData Services
It should list out com.sap.hcpsdk.sample app configuration automatically under Connections.
Select com.sap.hcpsdk.sample from the list.
Click on Next button.
Tab4: Optional Features
Lets have default selections as it is. Do not change anything.
Click on Finish.
The Assistant will create the Xcode project on Desktop with foldername as SampleDemo.
We have created the Xcode project successfully. We will run the app on simulator in the next blog.
Thanks for sharing this blog on the sdk, its useful to get started.
I was trying to use the assistant to create a project, the application & connections are created fine. However the project generation fails with an error, here is a screenshot
It says few pre-reqs are missing. I have installed JDK 8, gem activesupport 4.1.8 & gem xcodeproj 1.2.0 are installed. Am I missing some other pre-reqs?