

- SAP Community
- Products and Technology
- Enterprise Resource Planning
- ERP Blogs by SAP
- Automated VM and SAP Systems Deployment on Cloud –...
Enterprise Resource Planning Blogs by SAP
Get insights and updates about cloud ERP and RISE with SAP, SAP S/4HANA and SAP S/4HANA Cloud, and more enterprise management capabilities with SAP blog posts.
Turn on suggestions
Auto-suggest helps you quickly narrow down your search results by suggesting possible matches as you type.
Showing results for
darpan92
Explorer
Options
- Subscribe to RSS Feed
- Mark as New
- Mark as Read
- Bookmark
- Subscribe
- Printer Friendly Page
- Report Inappropriate Content
05-05-2021
5:43 PM
Introduction:
While the concepts I explained here can be leveraged for any Cloud Infrastructure-as-a-Service Provider, public or even private, in this blog I have used AWS as the IaaS Provider.
Welcome to part 1 of Automating SAP Deployments with Terraform and Ansible on AWS. This blog post series aims at enabling you to deploy infrastructure and SAP solutions in an automated way. In this first blog post I would like to go over how and where you can install Terraform and Ansible to achieve this goal. In addition, I will be walking you through a Terraform and Ansible project that I have created and published to GitHub here. You can use my sample code to provision your own instance of SAP S/4HANA 2020. The project that I set up will Install an instance of SAP S/4HANA 2020 on one SUSE Linux 15 SP 2 server. In upcoming posts, I will be going over how we can setup a system copy using Terraform and Ansible.
Background:
Technology is changing so rapidly that we can barely keep up with it. Now, as companies make the shift to the Cloud, the way we started deploying applications changed as well. The old way to deploy applications would be to buy the hardware, install an OS, install dependencies, and then you could deploy your application on top of all that. With the Cloud you don’t need to worry about the Hardware or OS for that matter. You can pick what you want and deploy in seconds. You do still need to manage all the software dependencies and computing resources for your application to run. For example, if I am installing SAP S/4HANA there are a list of dependencies that need to go on the server to run the application. In addition, you will need to have a file system to hold the application files and database files. This can be done manually, but it is a very tedious process to have to manage every time you want to provision a new instance of an application. This is where Terraform and Ansible can come in to help automate processes such as installing applications, dependencies, provisioning infrastructure, compute, and network resources.
Terraform Explained:
Terraform is a software that was developed by HashiCorp. It is used to automate infrastructure builds. For example, you can write a terraform script to provision EC2 instances in AWS. Not only can you provision these instances, but you can decide everything about them. You can configure their security group with custom rules, define the subnets for the servers, the vpc’s they reside in, attaching an Elastic File System to them, etc. This list goes on, pretty much anything you can do on AWS console you would be able to automate with Terraform. So, what is the benefit of Terraform? Say for example you have a need to spin up infrastructure for your Active Directory servers in AWS. If we do this the manual way, you will need to know all the specs and provision the servers through AWS Console. There is chance for human error here, and it is also a time-consuming process as you would need to gather all the specs. Writing a terraform script could automate this whole process for you. Instead of having to memorize or find all the specs you can just write them out in your Terraform script. So, whenever you have a need to provision Active Directory Servers, you just run your script and your servers will be up and running in just a few!
Let’s look at the flow for provisioning a server on AWS with Terraform:

1 – AWS.tf is our Terraform Script that defines what we are trying to provision.
2 – Terraform Core or Binary will take this request and check to see if a plugin for AWS exists.
3 – If AWS plugin does not exist, terraform will reach out to Terraform site to pull this plugin.
4 – Plugin translate your AWS.tf into api requests.
5 – API requests sent to AWS
6 – AWS will provision the resources you have called out in AWS.tf. Once the provisioning is complete, the state of these resources is sent back to terraform where it outputs a tfstate file. This file will prevent you from provisioning the same resource twice, and it tracks changes for you.
Note: Terraform can be installed on any type of OS. For this blog post I will be using a SUSE Linux 15 SP2 server to install Terraform.
Ansible Explained:
Ansible is a software used to automate application deployment and OS configurations. Some examples of configurations you can do include, create files systems, mount resources like physical volumes, install OS packages via package manager, etc. You can deploy applications like SAP S/4HANA or simple applications like word press, apache, etc. Ansible uses python to interact with OS and do the tasks that were defined. In our case we will be using Ansible to install SAP HANA and SAP S/4HANA. In addition, we will be using Ansible to make our directories, mounting our physical volume, installing OS packages, making hosts file changes, ssh config changes and copying media over to our target server.
Now let’s look at what an Ansible Environment could look like:

We have a control node, which is where we have Ansible installed and where our scripts reside. The control node must not be a Windows system. Ansible control node will only run on Linux or Unix. Then we have our managed nodes, which are the nodes we want to do configuration and application deployment on. On Managed Nodes, there is no installation of Ansible required. On our control node we have something called a playbook.yml, which defines the tasks we want to execute. Then we also have a hosts file that defines what hosts are available to perform tasks against. The way the control node authenticates to the managed nodes is through ssh. You can either do a password-based approach or using ssh keys. In my project I have setup the use of ssh keys as this is more secure.
Note: Ansible Control Node must be installed on a Linux or Unix system. In our case we will be installing Ansible on a SUSE Linux 15 SP 2 server.
What you will need:
In this section I would like to highlight the different resources that are required for this project.
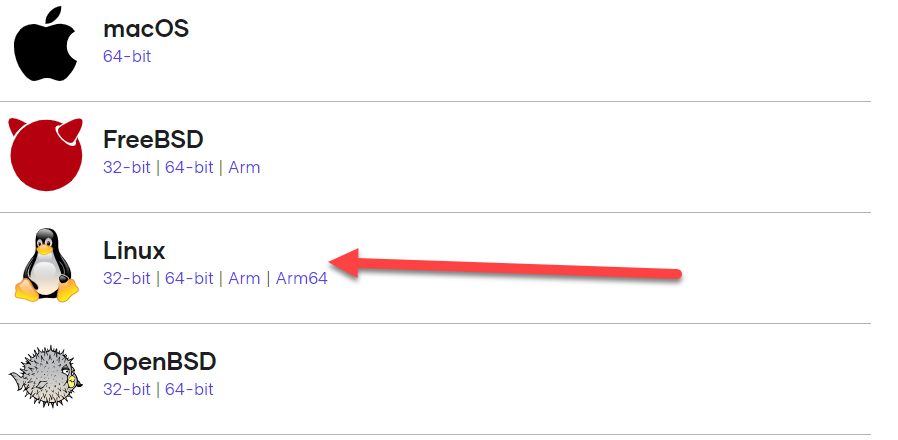
- You will need a Linux Server to install Terraform and Ansible on. I will be using a SUSE Linux 15 SP 2 server. You can download a free image here and run through a visualization software on your laptop here
- Alternatively, if you do not wish to use a Linux image, you can use MacOS. Remember, Ansible can only be installed on Linux or Unix.
- You will need to download the Installation media for SAP S/4HANA 2020 and HANA 2.0 Latest from: https://launchpad.support.sap.com/#/softwarecenter/. Move this installation media to your Linux Server where you have Terraform and Ansible Installed.
- Next you will need an AWS Account, and will need programmatic access with an access and secret key.
- You will need to setup a Key Pair in AWS console, which will then be specified as a parameter to create your AWS EC2 Instance.
- The script will provision an EC2 Instance on SUSE Linux 15 SP2. It will be using a r4.8xlarge to hold the S/4HANAapplication and HANA DB on one server. Note that this will incur costs.
- Lastly the script will provision a 1024gb Volume that will be attached to the EC2 instance to hold the installation media, SAP S/4HANA files, and HANA files. Note that this will incur costs.
Install Terraform:
- This first task we want to do is download the Terraform Binary. To do this head over to here and select the Linux version: Download Terraform - Terraform by HashiCorp
- The next step is to unzip the download and take the terraform binary and move it to your server where you want to have terraform installed. For our use case we will be using a SUSE Linux 15 SP2 server. I am putting it in /media directory. Then run the following command so you can use the CLI for Terraform:
ln -snf /media/terraform /usr/bin/terraform
- Once run, type terraform in your ssh session and you should see the Terraform CLI help text

Install Ansible:
- We will now be installing Ansible on the same server we installed Terraform on. Since we are installing on SUSE, we need to add the repo for Ansible. Open the following link.
- Pick SUSE SLE:

- Next click Add Repository and Install manually. Then look at the instructions for SLE 15 SP2:

- Next, I am going to open up a terminal session and run the following command to add the repo and install ansible:
zypper addrepo https://download.openSUSE.org/repositories/systemsmanagement/SLE_15_SP2/systemsmanagem ent.repo
zypper refresh
zypper install ansible
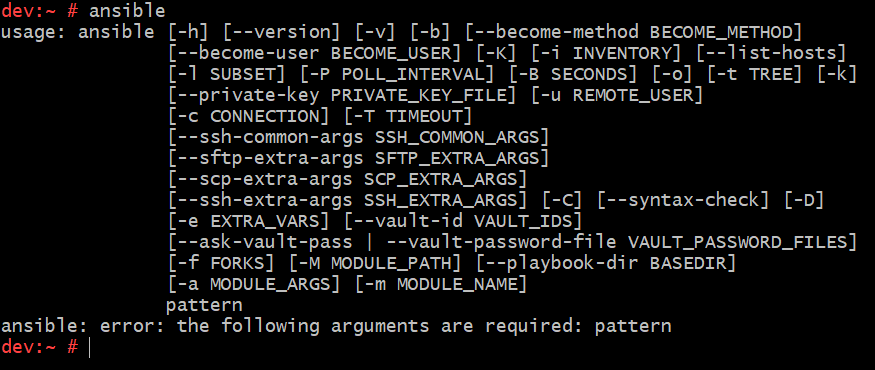
- After installation is complete run the command ansible and you should see the ansible command line interface help screen come up:
Pull GitHub project:
To pull the GitHub project, go to the following link. You will want to hit the code dropdown and click on download as a zip.

Setup of Terraform and Ansible Project:
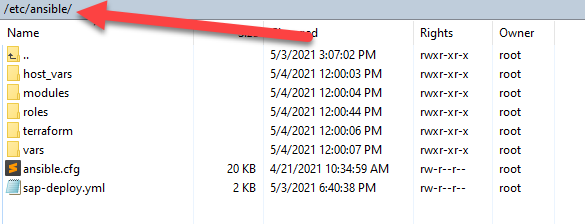
- Now that you have the project, copy the project over to your Terraform/Ansible Linux server. By default when you install ansible it creates a directory in /etc/ansible. Let’s move our project to this directory as seen below:
- Next in order for Terraform to be able to communicate with your AWS account you need to install the AWS CLI. To install the CLI run the following commands
$ curl "https://awscli.amazonaws.com/awscli-exe-Linux-x86_64.zip" -o "awscliv2.zip"
unzip awscliv2.zip
sudo ./aws/install
- Once the AWS CLI is installed, we need to input our access credentials to our AWS Account. To do so simply run aws configure. You will be prompted for you Access Key, Secret Key, Region, and Output Format like below. Once complete you will now have access to your AWS Account via CLI. This also means that Terraform will be able to interact with your account as well.

- Now we need to set up a new project for Terraform to run against and save its configurations. To do so navigate to /etc/ansible/terraform/AWS. You should see a main.tf and variables.tf like below:

- Come up with a name for your terraform project. It could be test, dev, S/4Server, HANA, or anything you want. Now create a folder with that name in this directory and copy the main.tf and variables.tf into the folder like below. I named my folder test:

Note: The main.tf contains the blueprint for our S/4HANA Server infrastructure-wise. Terraform will run against this main.tf. The variables.tf contain variables that we will be populating specific to our S/4HANA Instance. At this point, the variables.tf should be blank, except for a few variables.
Parameters that need to be filled out for Execution:
For this project to run successfully we need to fill out two separate variables/config/parameters files, whatever you would like to call them. One file is for our Terraform Parameters, so related to the infrastructure. The other file is for Ansible and related to our config, HANA, and SWPM parameters for S/4HANA.
The Terraform parameters file will now be in /etc/ansible/terraform/AWS/<The Name of the folder you created in previous step>/variables.tf. Open this file and maintain Parameters. I have provided a short description for these below:
Provider_region: The region your AWS account is located and the region you would like to provision new EC2 instances in.
Instance_name: Name of the server you are creating. Name it anything you want.
Ami_id: I have prepopulated this to SUSE Linux 15 SP2 for you.
Instance_Type: I have prepopulated this with an r4.8xlarge
Volume_availability_zone: The AZ that you want the volume created in.
Volume_Size: I have prepopulated this with 1024GB
Volume_name: Create a name for the volume
Hosts_filename: Here provide the location “/etc/ansible/<any name you want>” This parameter will create a hosts file at that location for Ansible to consume. You can name it the same as your Terraform Project folder name or put any name you want. You will need this name later when we try to run the project.
Key_name: Input the key pair name in the AWS account that you would like to use to provision the servers. This key will also be used by ansible to ssh into them and install the software.
Now we have gotten through all our Terraform parameters, let’s look at the ansible parameters. All ansible parameters can be found in /etc/ansible/vars/ansible_vars.yml. All of them will need to be filled out, and few have already been prepopulated for you. Below are some that I would like to explain to you:
Private_key: This parameter takes the location of private key that you used to create the EC2 instance. This will need to be a location accessible to the Terraform/Ansible Server.
HANA_media: This parameter takes the location of the HANA_media. This will need to be a location either on your terraform/ansible server or accessible to it.
S4_media: This parameter takes the location of the HANA media. This will need to be a location either on your terraform/ansible server or accessible to it.
Terraform_dir: This will need to be the path to your terraform project that you created earlier. For example, the one I am using in the blog post is “/etc/ansible/terraform/AWS/test”. With Test being the name of my terraform project. This parameter requires the full path to project like above.
Note: The rest of the parameters are related to HANA and S/4HANA. Like passwords and locations to SWPM, SAPCAR, etc. Once you have completed these we are finally ready to run our project.
How to run:
To run the project, it is quite simple. In our /etc/ansible directory is our Ansible playbook: sap-deploy.yml

Sap-deploy.yml contains all of the tasks to deploy the infrastructure and install SAP S/4HANA. It will first use terraform to provision the infrastructure and then run ansible to deploy the application. To run, go to /etc/ansible in a terminal window. Run the following command:
ansible-playbook -I <hosts filename> sap-deploy.yml
The <hosts filename> should be replaced with the name you provided for the Hosts_filename parameter. For example if I provided “/etc/ansible/test” for the Hosts_filename parameter, I would put test as my parameter for <hosts filename> in the above Ansible-playbook command.
Now let it run, it should do everything on its own from provisioning the infrastructure to deploying SAP S/4HANA 2020!
Hope you guys found this useful, and please reach out with any questions. In addition, be on the lookout for my second blog post where I will perform a system copy with Terraform and Ansible.
- SAP Managed Tags:
- DevOps,
- SAP S/4HANA
Labels:
3 Comments
You must be a registered user to add a comment. If you've already registered, sign in. Otherwise, register and sign in.
Labels in this area
-
Artificial Intelligence (AI)
1 -
Business Trends
363 -
Business Trends
29 -
Customer COE Basics and Fundamentals
1 -
Digital Transformation with Cloud ERP (DT)
1 -
Event Information
461 -
Event Information
28 -
Expert Insights
114 -
Expert Insights
186 -
General
1 -
Governance and Organization
1 -
Introduction
1 -
Life at SAP
414 -
Life at SAP
2 -
Product Updates
4,679 -
Product Updates
267 -
Roadmap and Strategy
1 -
Technology Updates
1,499 -
Technology Updates
98
Related Content
- Subscription Billing with Convergent Invoicing and Contract-Based Revenue Recognition in Enterprise Resource Planning Blogs by SAP
- SAP Activate Realize and Deploy phase activities in the context of Scaled Agile Framework in Enterprise Resource Planning Blogs by SAP
- SAP S/4HANA - Extracting User Email Addresses from Standard Tables in Enterprise Resource Planning Blogs by SAP
- Why YCOA? The value of the standard Chart of Accounts in S/4HANA Cloud Public Edition. in Enterprise Resource Planning Blogs by SAP
- Understand Upgrading and Patching Processes of SAP S/4HANA Cloud Public Edition in Enterprise Resource Planning Blogs by SAP
Top kudoed authors
| User | Count |
|---|---|
| 7 | |
| 6 | |
| 4 | |
| 4 | |
| 4 | |
| 3 | |
| 3 | |
| 3 | |
| 3 | |
| 3 |