
- SAP Community
- Products and Technology
- Technology
- Technology Blogs by SAP
- Achieve Separate Lifecycles for Managed Approuter ...
Technology Blogs by SAP
Learn how to extend and personalize SAP applications. Follow the SAP technology blog for insights into SAP BTP, ABAP, SAP Analytics Cloud, SAP HANA, and more.
Turn on suggestions
Auto-suggest helps you quickly narrow down your search results by suggesting possible matches as you type.
Showing results for
Employee
Options
- Subscribe to RSS Feed
- Mark as New
- Mark as Read
- Bookmark
- Subscribe
- Printer Friendly Page
- Report Inappropriate Content
04-26-2021
4:12 PM
Overview
Developing a multitarget application (MTA) in one project is a straightforward development process.
Nevertheless, there could be reasons to split one business solution into multiple projects:
- There are multiple teams working on an MTA project, with each team working on a different application of the MTA project.
- Multiple applications in the MTA having different lifecycle.
In the following blog post, I will show you how to split apart the managed approuter MTA and the front-end MTA of your business solution. You will still use the same xsuaa for all MTA projects and you won’t need to create a separate xsuaa for each front-end application.
This feature is available on SAP Business Technology Platform (BTP) from April 22nd, 2021.
First, I recommend taking a look at the straightforward HTML5 application development in one MTA project.
Solution Diagram
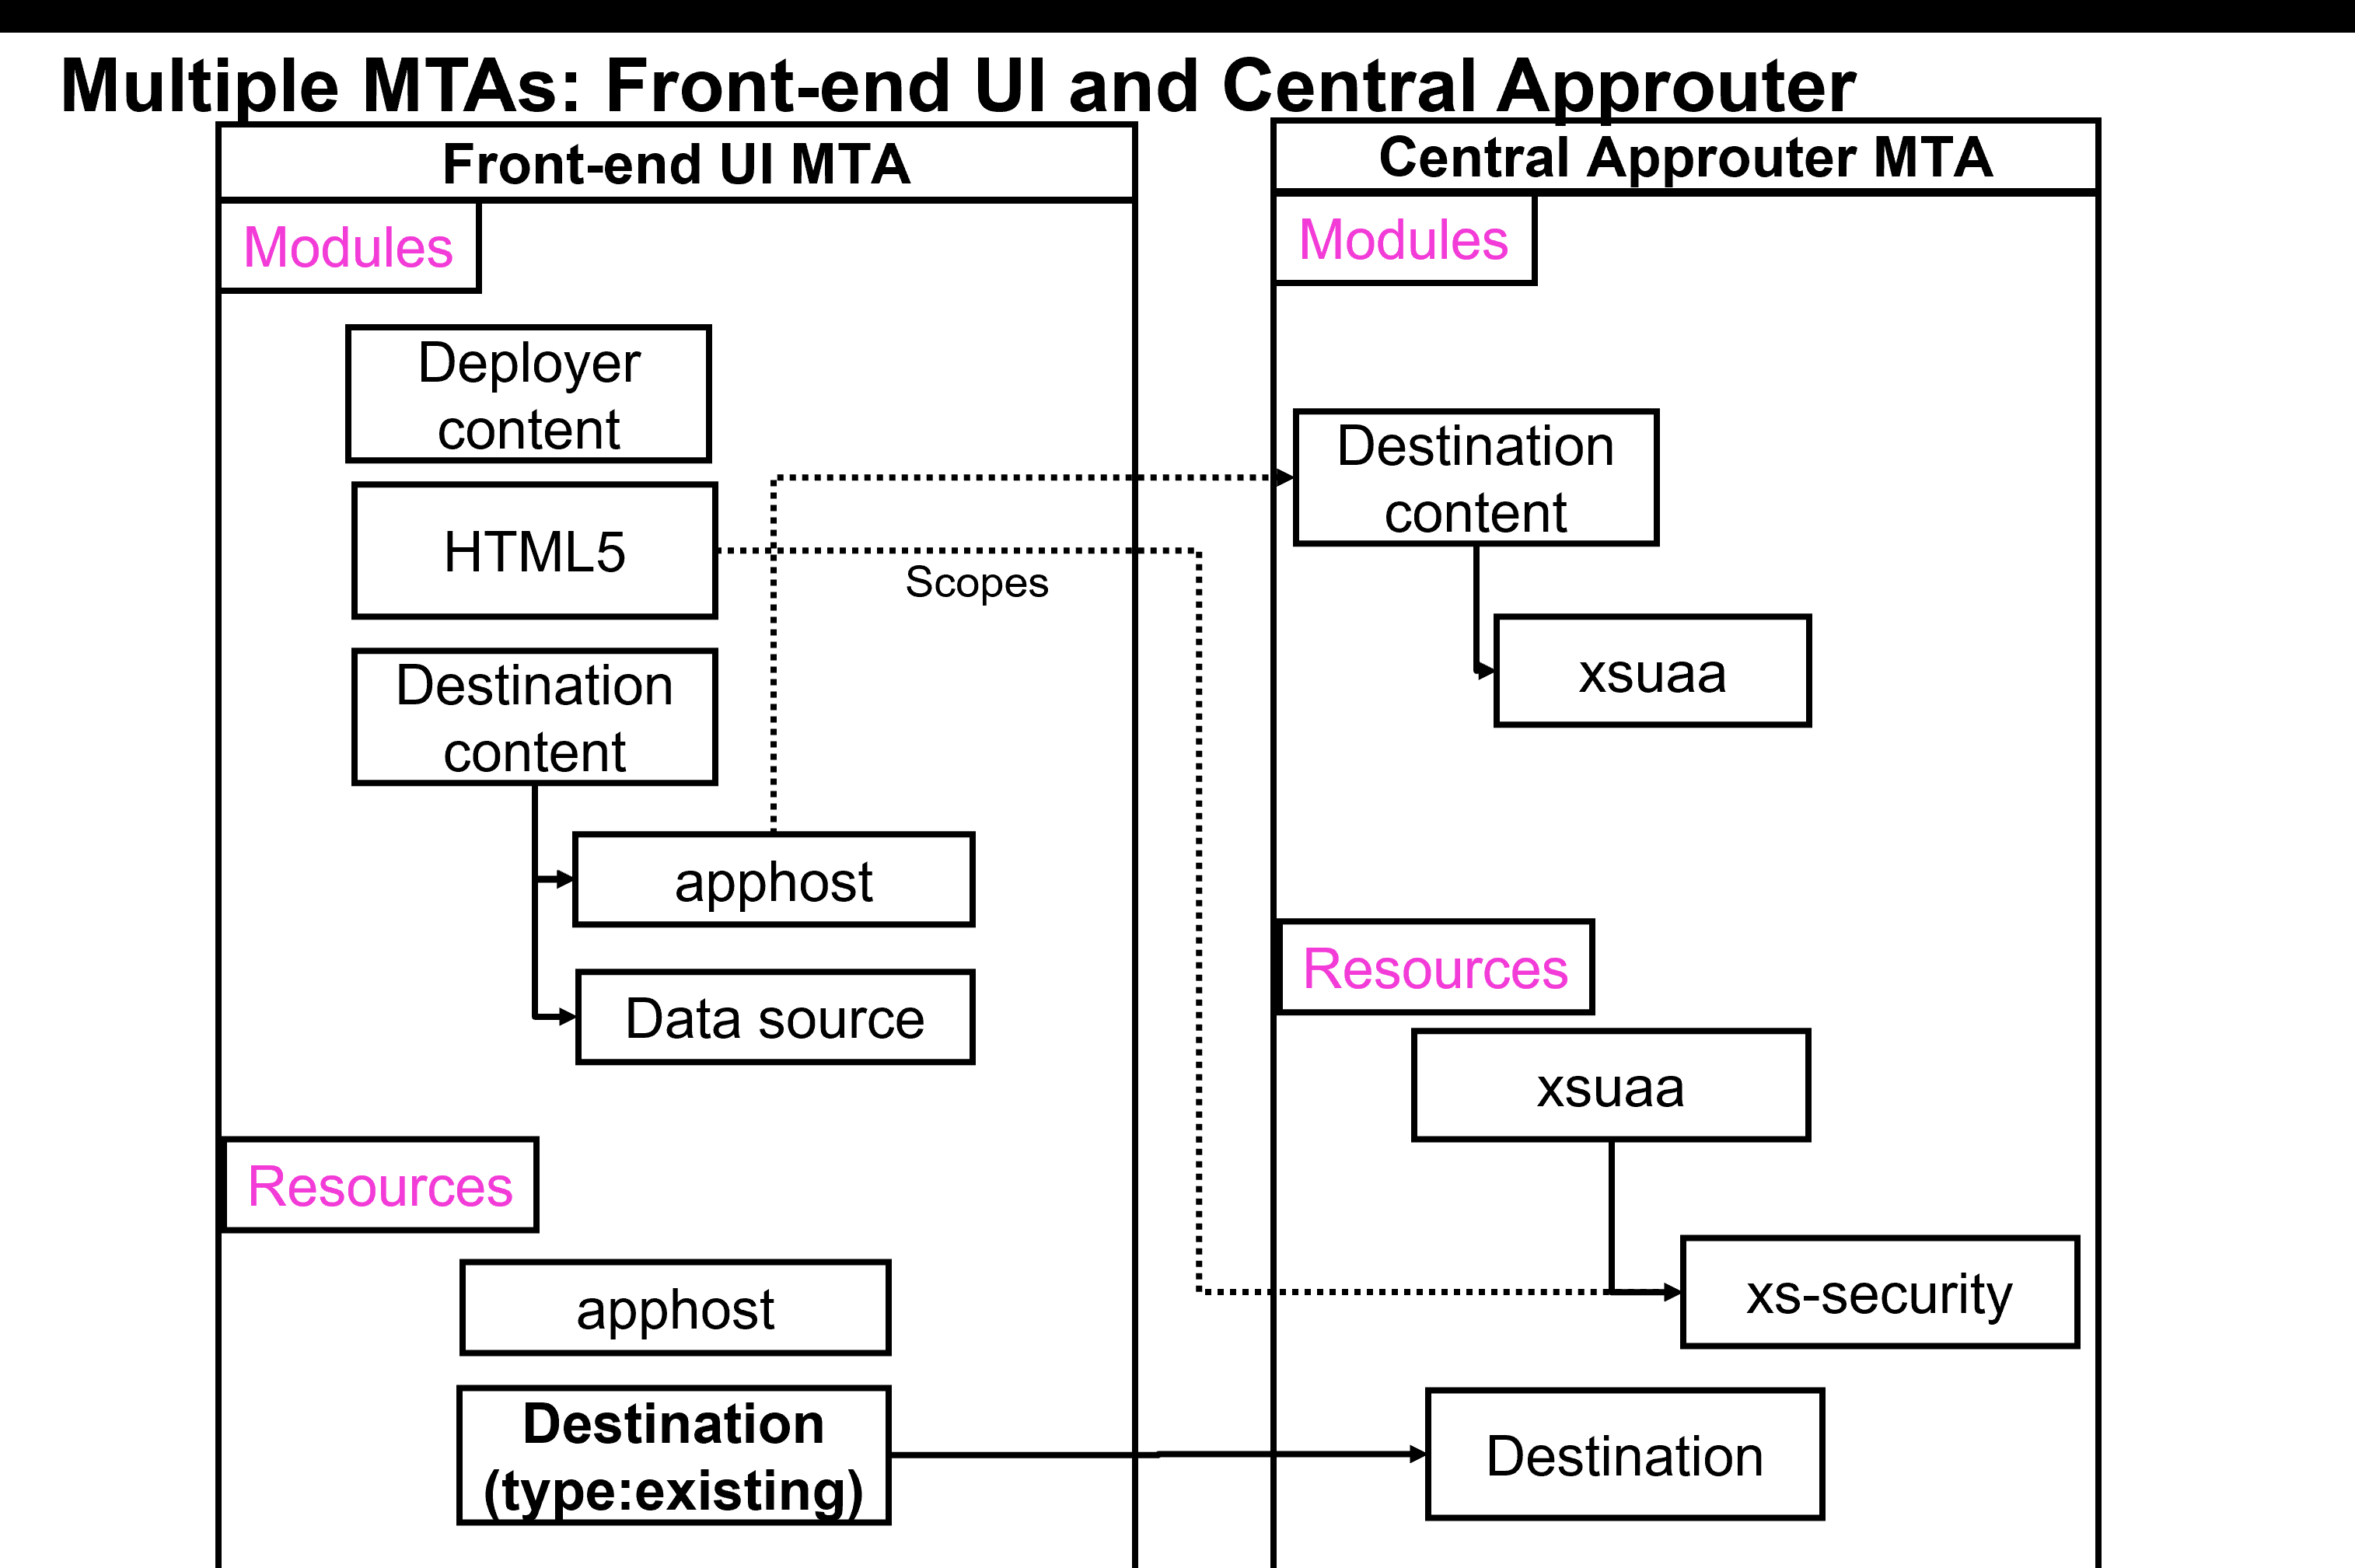
Central Approuter MTA (right side of the image):
- The central approuter MTA is the business solution entry point for the managed approuter.
- The central approuter MTA manages scopes and roles of all front-end applications using:
- One xsuaa instance
- An “xs-security json” file
- The central approuter MTA owns the destination instance and its destination content:
- Destination content to the xsuaa instance
- Destination content to all front-end apphost instances
Front-end UI MTA (left side of the image):
- The front-end MTA includes the front-end and destination modules.
- The front-end MTA owns the apphost instance.
- The front-end MTA uses the existing destination instance of the central MTA and updates the central MTA’s content during deployment.
- The front-end MTA also uses existing scopes and roles defined in the central MTA. If there is a new scope required by the front-end application, the central MTA should be updated manually.
Create a Central MTA Project
- Create a Basic Multitarget Application (MTA) from the template wizard.

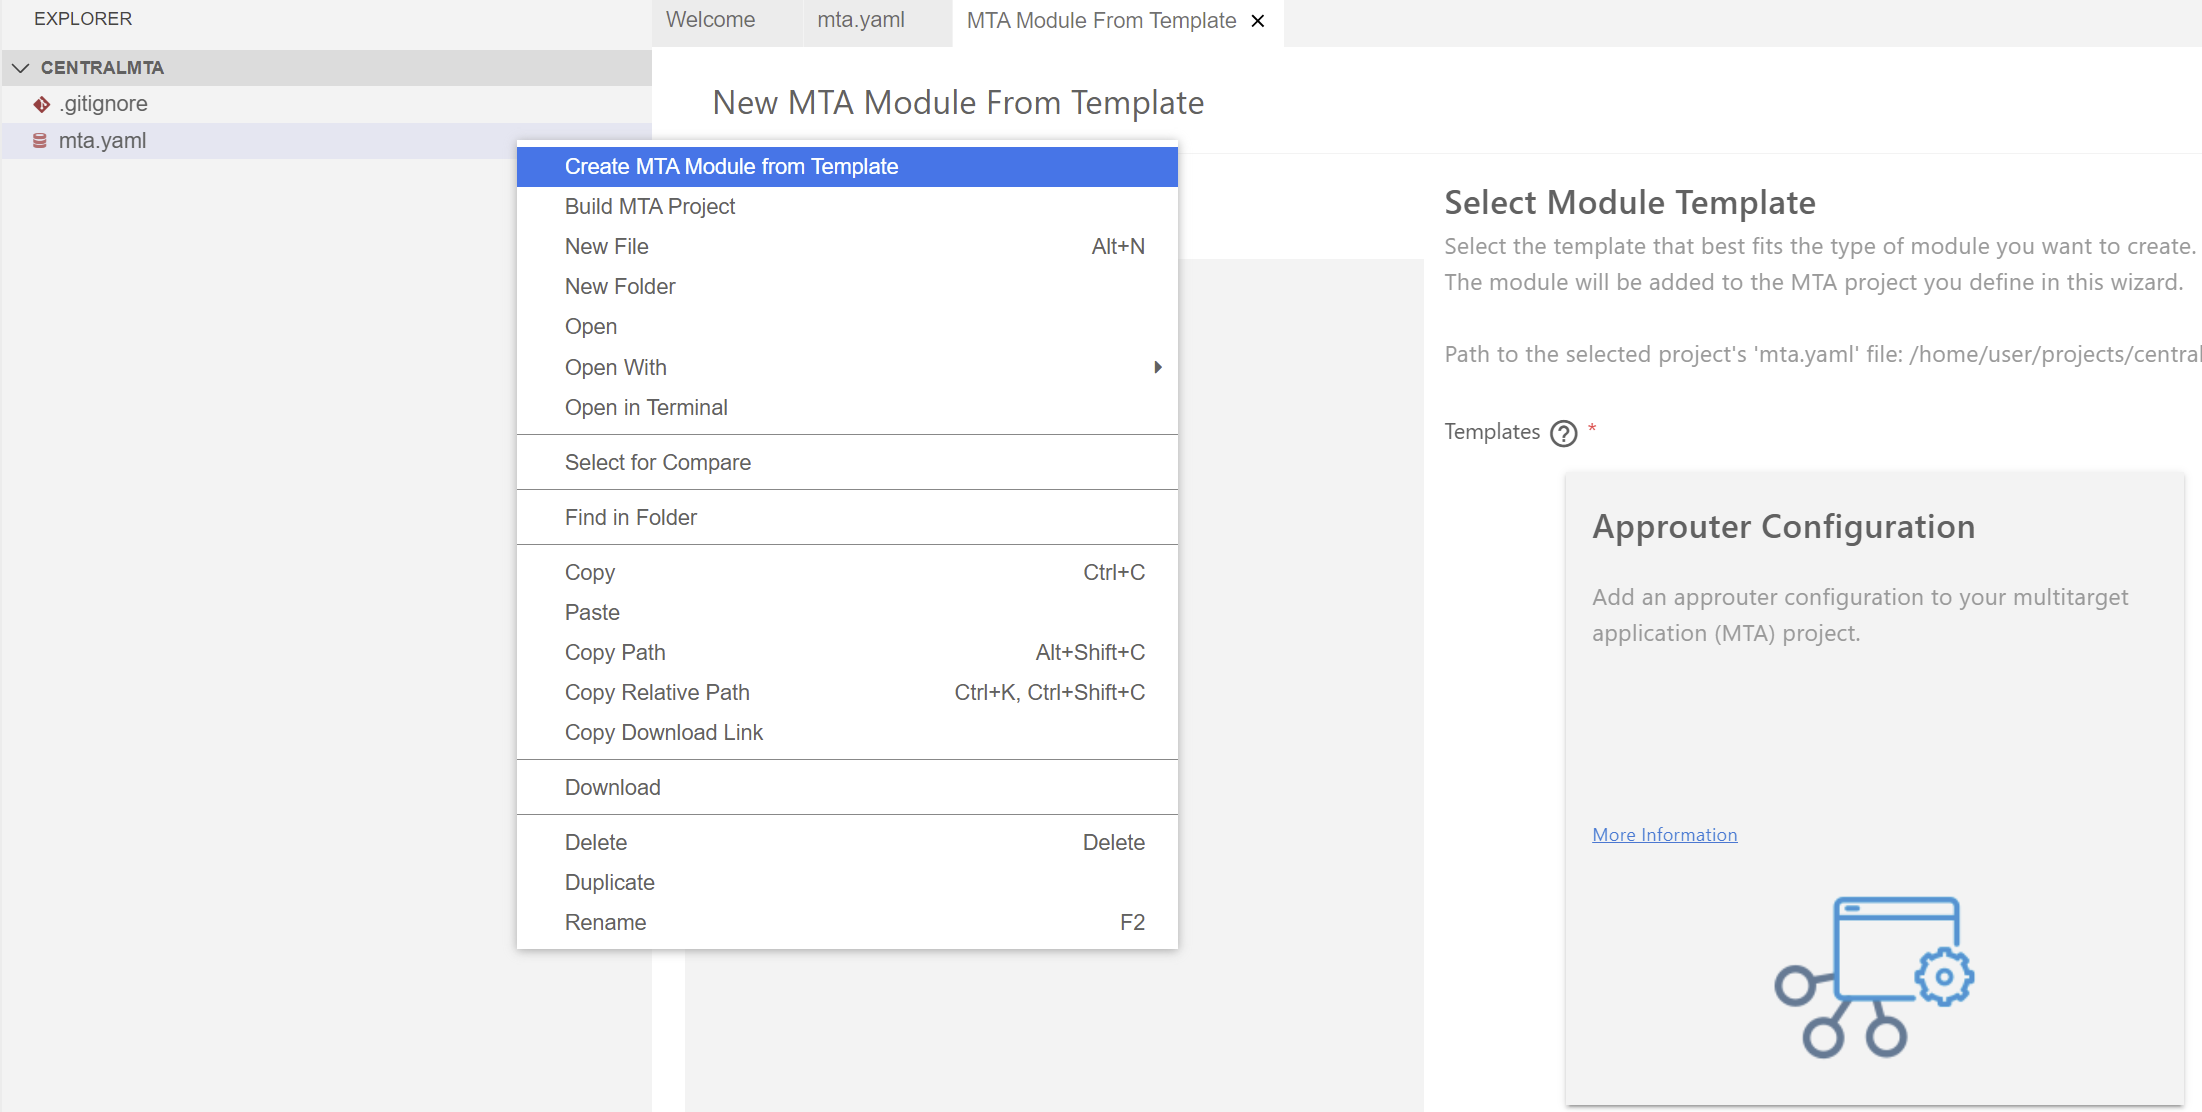
- Right-click the “mta.yaml” file of the MTA project and click Create MTA Module from Template, and select Approuter Configuration.
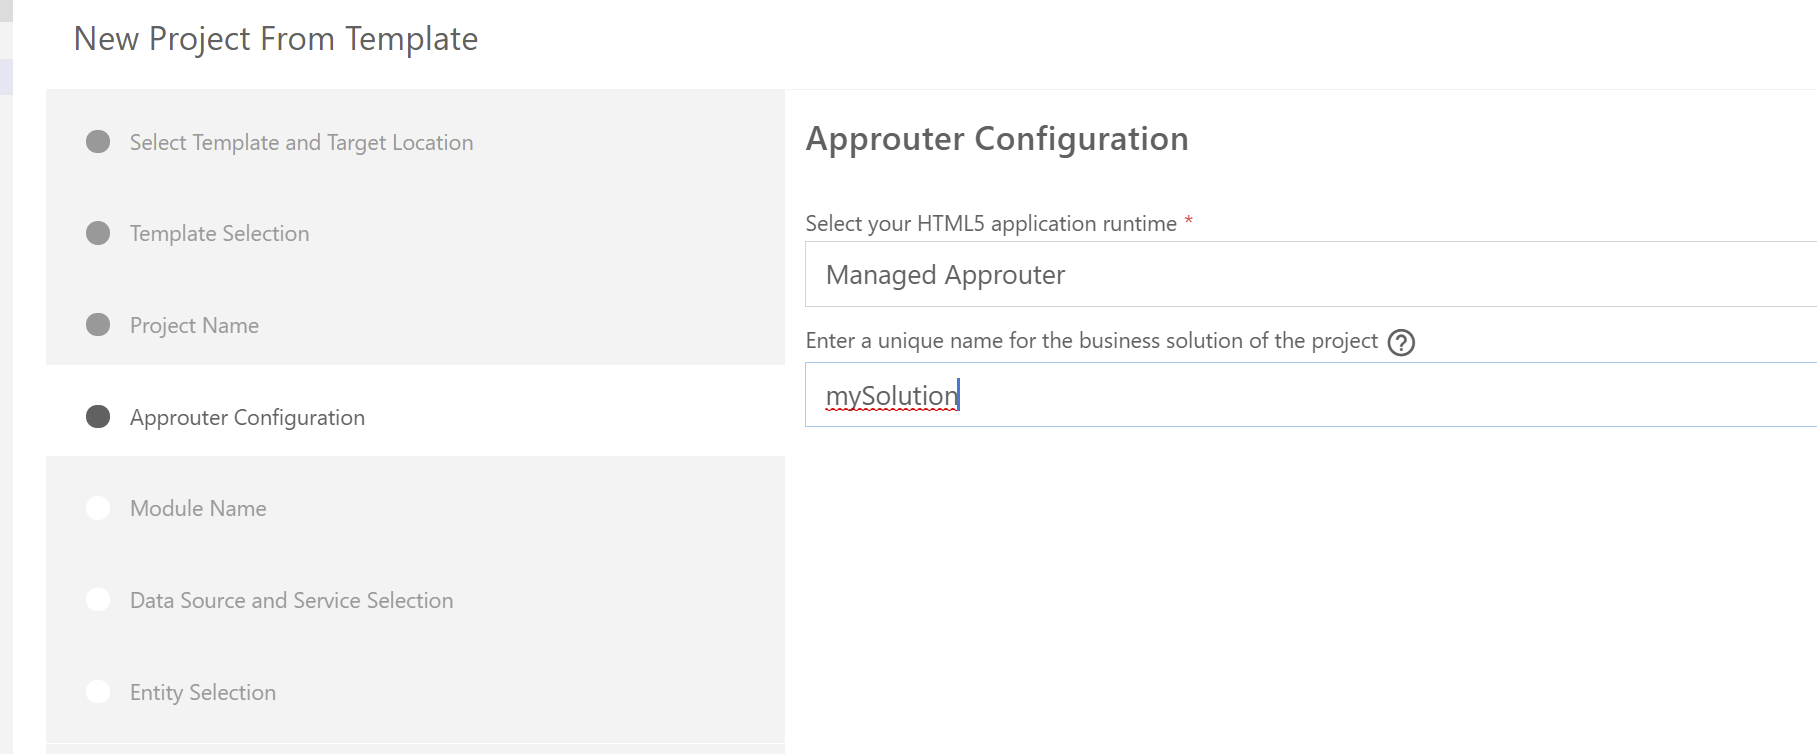
- Select the Managed Approuter option and enter the business solution name, for example, “mySolution”.
- Select No for the following question: Do you plan to add a UI?

- Open the MTA of the project and copy the name of the destination service locally.
You will use it later for the front-end projects.
Create Front-end HTML5 Projects
- Create two front-end applications (for example, UI1 and UI2).
You can create any type of HTML5 project. In this blog post, I created a Vue.js application using the HTML5 application blog.
- Make sure that you enter the same business solution name that you entered for the central approuter MTA.
- Your application is created and will open in a new workspace after all its dependencies are installed. (This may take a few seconds).
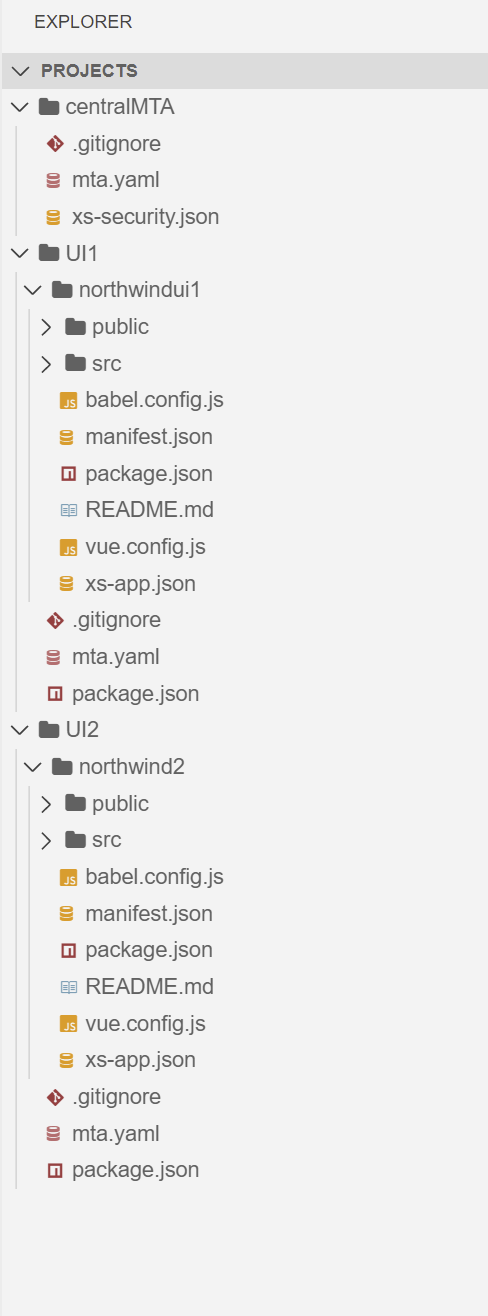
- You should now have one central MTA and two frontend applications (UI1, UI2).
- Open the “mta.yaml” files of the two front-end applications and perform the following updates:
- Replace the destination service name (line 66) with the central MTA destination name. For example, “centralMTA-destination-service”.
- Replace the type of destination service from “managed” to “existing” (line 60).
- Remove the “config” section from the destination parameters (lines 62-64).

- As a result, the destination in the "mta.yaml" looks like this:

- Remove the xsuaa resource (lines 74-80):

- Remove the xsuaa section from the destination module (lines 15-18, 27-31):
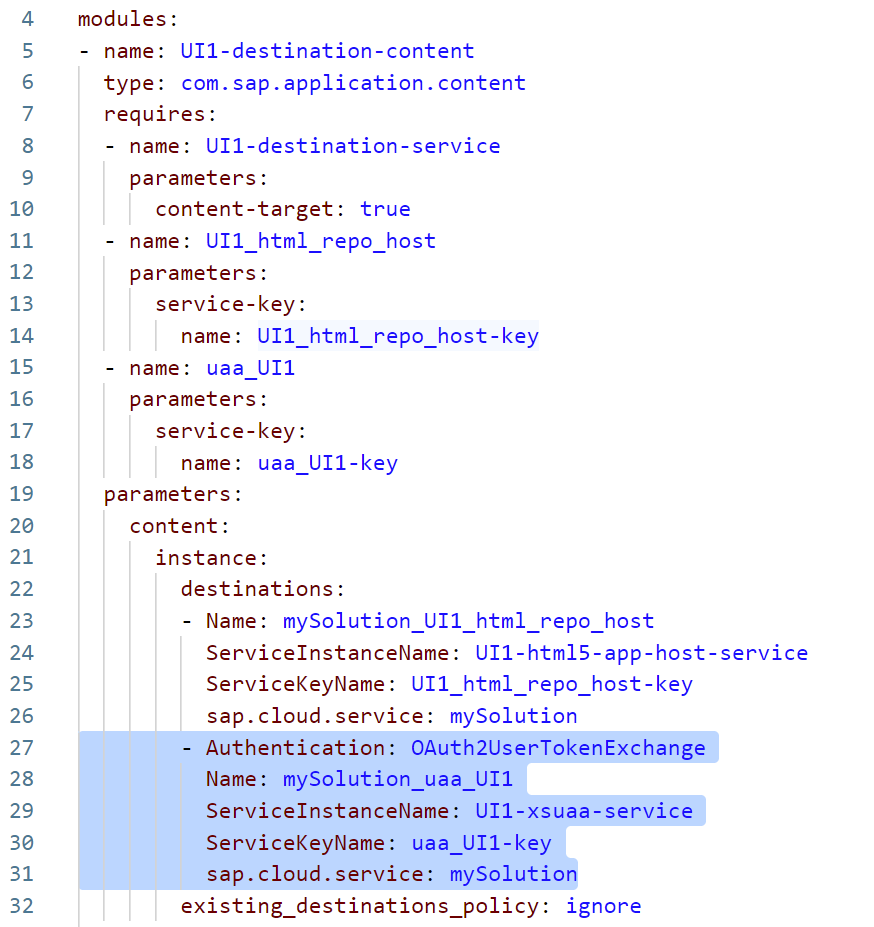
- Delete the “xs-security.json” file.
Build, Deploy, and Run Your Applications
First, build and deploy the central MTA and only then can you build and deploy the dependent front-end applications.
To deploy your applications to Cloud Foundry, perform these steps:
- Log in to the target Cloud Foundry space, where you want to deploy the application.
From the menu, click View > Find Command to open the command palette and enter your login credentials.
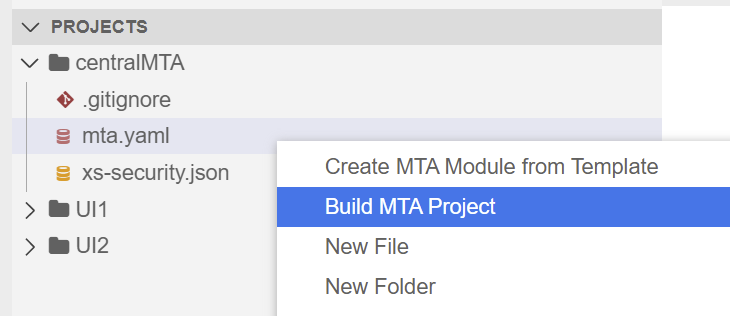
- Enter “MBT build” in the terminal, which generates your MTA archive file, or right-click on the project’s “mta.yaml” file and click Build MTA Project.
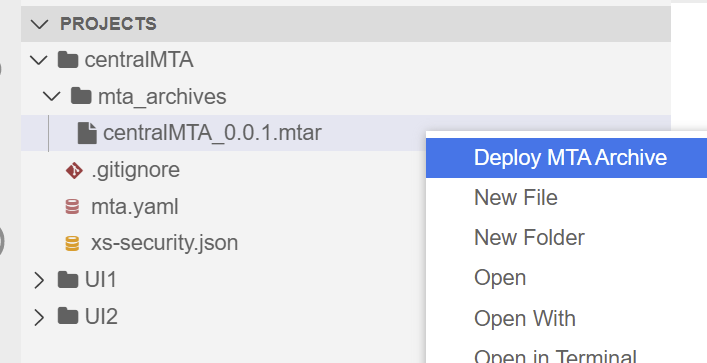
- Enter “CF deploy <mtar file name>” in the terminal, which deploys your application to the space that you logged into, or right-click on the mtar file and click Deploy MTA Archive.
- Perform the above steps to build and deploy the two front-end applications.
- From the SAP BTP cockpit, navigate to the HTML5 Applications menu and open your deployed applications, which are served by the destination and xsuaa of the central MTA.

Conclusion
You have separated the front-end development lifecycle into different MTA projects.
I will be happy to hear your feedback personally or here in the comments.
Use the Trial environment to take your first steps or take a look at all of the SAP Business Application Studio tutorials.
Labels:
15 Comments
You must be a registered user to add a comment. If you've already registered, sign in. Otherwise, register and sign in.
Labels in this area
-
ABAP CDS Views - CDC (Change Data Capture)
2 -
AI
1 -
Analyze Workload Data
1 -
BTP
1 -
Business and IT Integration
2 -
Business application stu
1 -
Business Technology Platform
1 -
Business Trends
1,658 -
Business Trends
107 -
CAP
1 -
cf
1 -
Cloud Foundry
1 -
Confluent
1 -
Customer COE Basics and Fundamentals
1 -
Customer COE Latest and Greatest
3 -
Customer Data Browser app
1 -
Data Analysis Tool
1 -
data migration
1 -
data transfer
1 -
Datasphere
2 -
Event Information
1,400 -
Event Information
72 -
Expert
1 -
Expert Insights
177 -
Expert Insights
340 -
General
1 -
Google cloud
1 -
Google Next'24
1 -
GraphQL
1 -
Kafka
1 -
Life at SAP
780 -
Life at SAP
14 -
Migrate your Data App
1 -
MTA
1 -
Network Performance Analysis
1 -
NodeJS
1 -
PDF
1 -
POC
1 -
Product Updates
4,575 -
Product Updates
384 -
Replication Flow
1 -
REST API
1 -
RisewithSAP
1 -
SAP BTP
1 -
SAP BTP Cloud Foundry
1 -
SAP Cloud ALM
1 -
SAP Cloud Application Programming Model
1 -
SAP Datasphere
2 -
SAP S4HANA Cloud
1 -
SAP S4HANA Migration Cockpit
1 -
Technology Updates
6,872 -
Technology Updates
472 -
Workload Fluctuations
1
Related Content
- Correlation id as part of Application logs in Technology Q&A
- How to Install SAP Cloud Connector on a Mac M2 chipset in Technology Q&A
- How to Install SAP Cloud Connector on a Mac M2 Processor in Technology Q&A
- SAC Analytic Application: Table calculation in Technology Q&A
- Folders are not cloned into Business Application Studio in Technology Q&A
Top kudoed authors
| User | Count |
|---|---|
| 17 | |
| 14 | |
| 12 | |
| 10 | |
| 9 | |
| 8 | |
| 7 | |
| 7 | |
| 6 | |
| 6 |