Thanks for diving back into your journey on becoming a Citizen Developer! As we discussed in the previous blog there are 4 main operations that we can perform with REST APIs: GET, POST PUT and DELETE. In this blog, we will look at how to configure out REST API in order to perform these operations.
I have created a backend database table in Xano, which is a scalable no code backend. The table that I created had the name "user", as well as, the following attributes:
- id: integer (this is automatically created by Xano)
- name: text type
- email: text type
Now in Build Apps, navigate to the data section in the icons on the top of the screen:

Scroll down to the " AppGyver classic data entities" section, select "CREATE DATA ENTITY" and choose REST API direct integration:

From here we can start to configure our API. You will see 6 different tabs:
- Base- this is where you will define where and what the API will be connecting to.The "Resource URL" defines exactly where the data is located, so we will set this to the endpoint URL of our database. The "Resource ID" identifies what it is we are looking at, so set this to the name of your table:

- Get Collection- this will retrieve all records in the table. In order to configure this we must start by setting our schema.Select the schema tab and add properties as per the attributes of your table. Make sure that these properties are written exactly as in your table:
 We can now test that this works. Select the Test tab and click on "RUN TEST". We should see all the existing records in the table as well as "Status: OK" if the test is successful:
- Get Record- this will retrieve one specific record in the table, which we will identify via unique attribute in the table. This means that for this specific attribute, no two records in the table can have the same value. In this case we will use the "id" attribute. We will set this in the config tab under the relative path as below:
 We can test this in a similar manner as before but be sure to the pass the id of a record which already exists in your table:
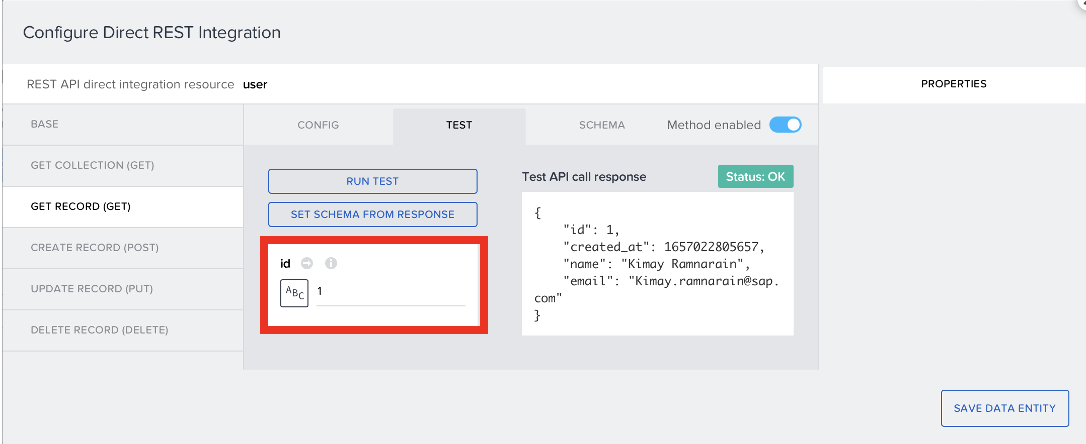
- Create Record- this will create a new record in the database table. Enable the create method and start by changing your schema to a custom schema in the schema tab. As before add new properties exactly as in your table:
 We can now test this as well by filling out the relevant fields of your custom object. Navigate to the Test tab and select the custom object:
 Fill out the relevant fields and be sure to save:
 Now run your test:
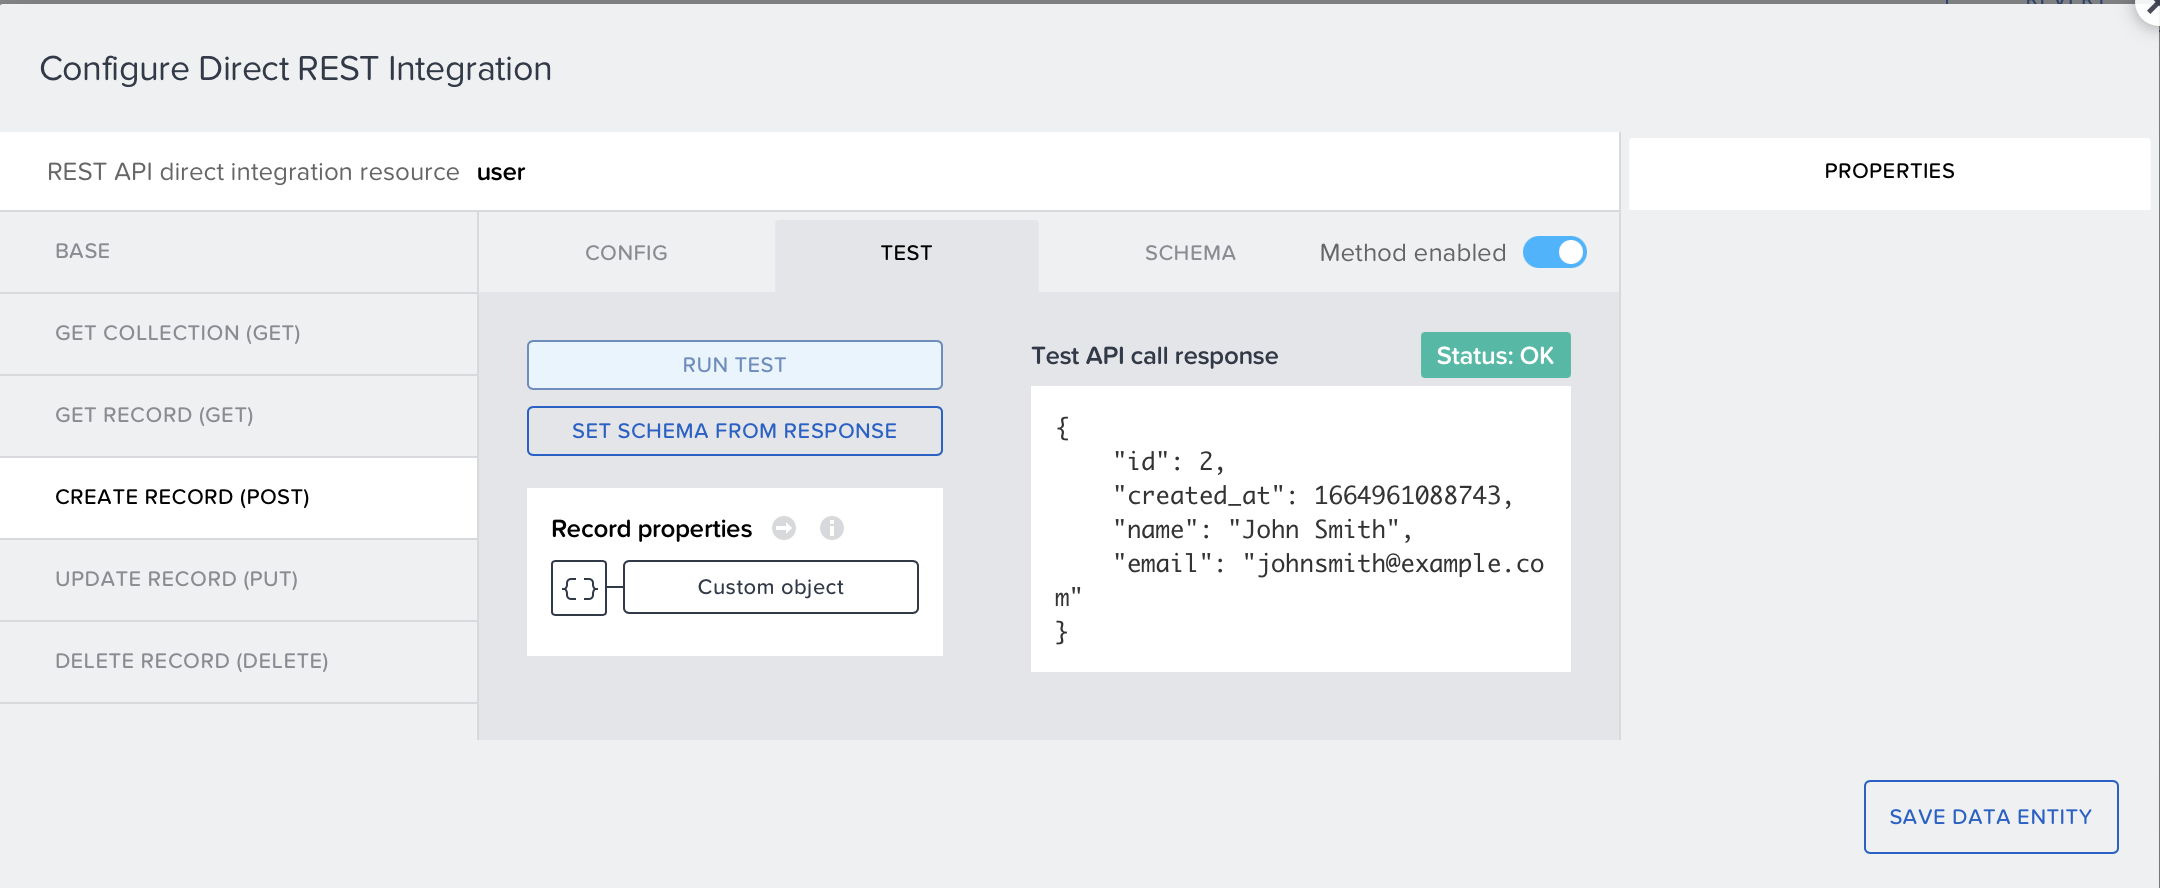 If you would like this entry to be added to your table, select the "SET SCHEMA FROM RESPONSE" option.
- Update Record-this will update an existing record in the database table. Once again, create a custom schema as we did with the Create Record Method. We have to identify which record we want to update via the record's ID. We will do this in the config tab:
 In the config tab, we also have to add the ID to our URL placeholder. Scroll down in the config tab and add a URL placeholder which identified the id as the key:
 The final step is make sure that the ID has to be specified. To do this scroll down in the properties section of the URL placeholder and make sure that this is not set to a static value:
 We can now test that this works. Fill out the field values of the custom object as we did with the Create Record method. The values that you put in these fields will be the new values of this record in your table:
 Now specify the ID of the record that you want to change and run your test:
- Delete Record- this will remove an existing record from your table. For this method no schema is needed. All we need to specify is which record we want to delete. To do this navigate to the config tab of this method and use the same configurations we used for the Update method:
 And make sure that your URL placeholder key is set to the ID and is also not set to static, as we did previously:
 Now, we can test our final Method:
SAP Build Apps aims to make configuring REST APIs as intuitive and reusable as possible for you, the Citizen Developer! But remember to unsure that you're using the correct syntax in your configurations.
Now that you can tackle REST APIs in SAP Build Apps, you have a great basis to progress in your Citizen Developer journey and explore all that the service has to offer!
Remember that the
Low-Code/No-Code learning journey is always available for more enablement!
