
- SAP Community
- Groups
- Interest Groups
- Application Development
- Blog Posts
- Module Pool Programming from Scratch using Radio B...
Application Development Blog Posts
Learn and share on deeper, cross technology development topics such as integration and connectivity, automation, cloud extensibility, developing at scale, and security.
Turn on suggestions
Auto-suggest helps you quickly narrow down your search results by suggesting possible matches as you type.
Showing results for
former_member10
Explorer
Options
- Subscribe to RSS Feed
- Mark as New
- Mark as Read
- Bookmark
- Subscribe
- Printer Friendly Page
- Report Inappropriate Content
06-22-2022
9:24 AM
This is my second blog post in this series. Here is the previous blog post Module Pool Programming from Scratch (Part-1). In the previous blog post we learned how to create transaction, screen, pushbutton, table fields in a basic module pool program.
In this blog post you will learn how to create and work on check box and radio buttons in screen.
How to Create Radio Button
Step 1: Open Layout of your screen and create a radio button by clicking on the “Radio Button” on the left toolbox and placing it on the screen wherever you want. Similarly, create two such radio buttons as given below.
Step 2: Now select all the radio buttons and then right click on the box and click on "Radio Button Group" then click on "define" to assign a radio button group to the radio button.
Step 3: Double click on the box and then assign a function code to the group which will be used for all the radio buttons in user command. Now save and activate the screen and then go to user command module.
Step 4: Now write code in user command for the radio buttons using function code as given below
Step 5: Define the names of radio buttons and activate the program.
Output
How to Create Checkbox
Step 1: Open Layout of your screen and create a check box by clicking on the “Check Box” on the left toolbox and placing it on the screen wherever you want and give text and function code which will be used in user command to provide a functionality to the code. Similarly, another checkbox as given below.
Step 2: Now save and activate the screen, and go to user command.
Step 3: Now write the code using function code for check box as given below.
Now define the names of check box and activate the program.
Output:
Refer to the code below for the whole program.
INCLUDE TOP
INCLUDE FORM
By following the steps you will be able to create basic Module Pool Program using Radio Buttons and Check box. I hope this blog post helped you as beginner. Since this blog is for beginners I have used forms in the future blog posts I will start using methods.
As we continue to learn more in this series about MPP, I will use this blog post to link all the parts of this series.
Follow my account sinelanwar22 to be notified of the next blog post. Please feel free to ask any questions you have in the comments section below.
Join the conversation about the ABAP programming by following the tag ABAP Development
Post questions and answer related to tag by following the tag Questions & Answers
Read other blog post on topic ABAP Development.
In this blog post you will learn how to create and work on check box and radio buttons in screen.
How to Create Radio Button
Step 1: Open Layout of your screen and create a radio button by clicking on the “Radio Button” on the left toolbox and placing it on the screen wherever you want. Similarly, create two such radio buttons as given below.

Step 2: Now select all the radio buttons and then right click on the box and click on "Radio Button Group" then click on "define" to assign a radio button group to the radio button.
Step 3: Double click on the box and then assign a function code to the group which will be used for all the radio buttons in user command. Now save and activate the screen and then go to user command module.

Step 4: Now write code in user command for the radio buttons using function code as given below
MODULE USER_COMMAND_0100 INPUT.
CASE SY-UCOMM.
WHEN 'FC_1'.
PERFORM GET_DATA.
WHEN 'FC2'.
LEAVE PROGRAM.
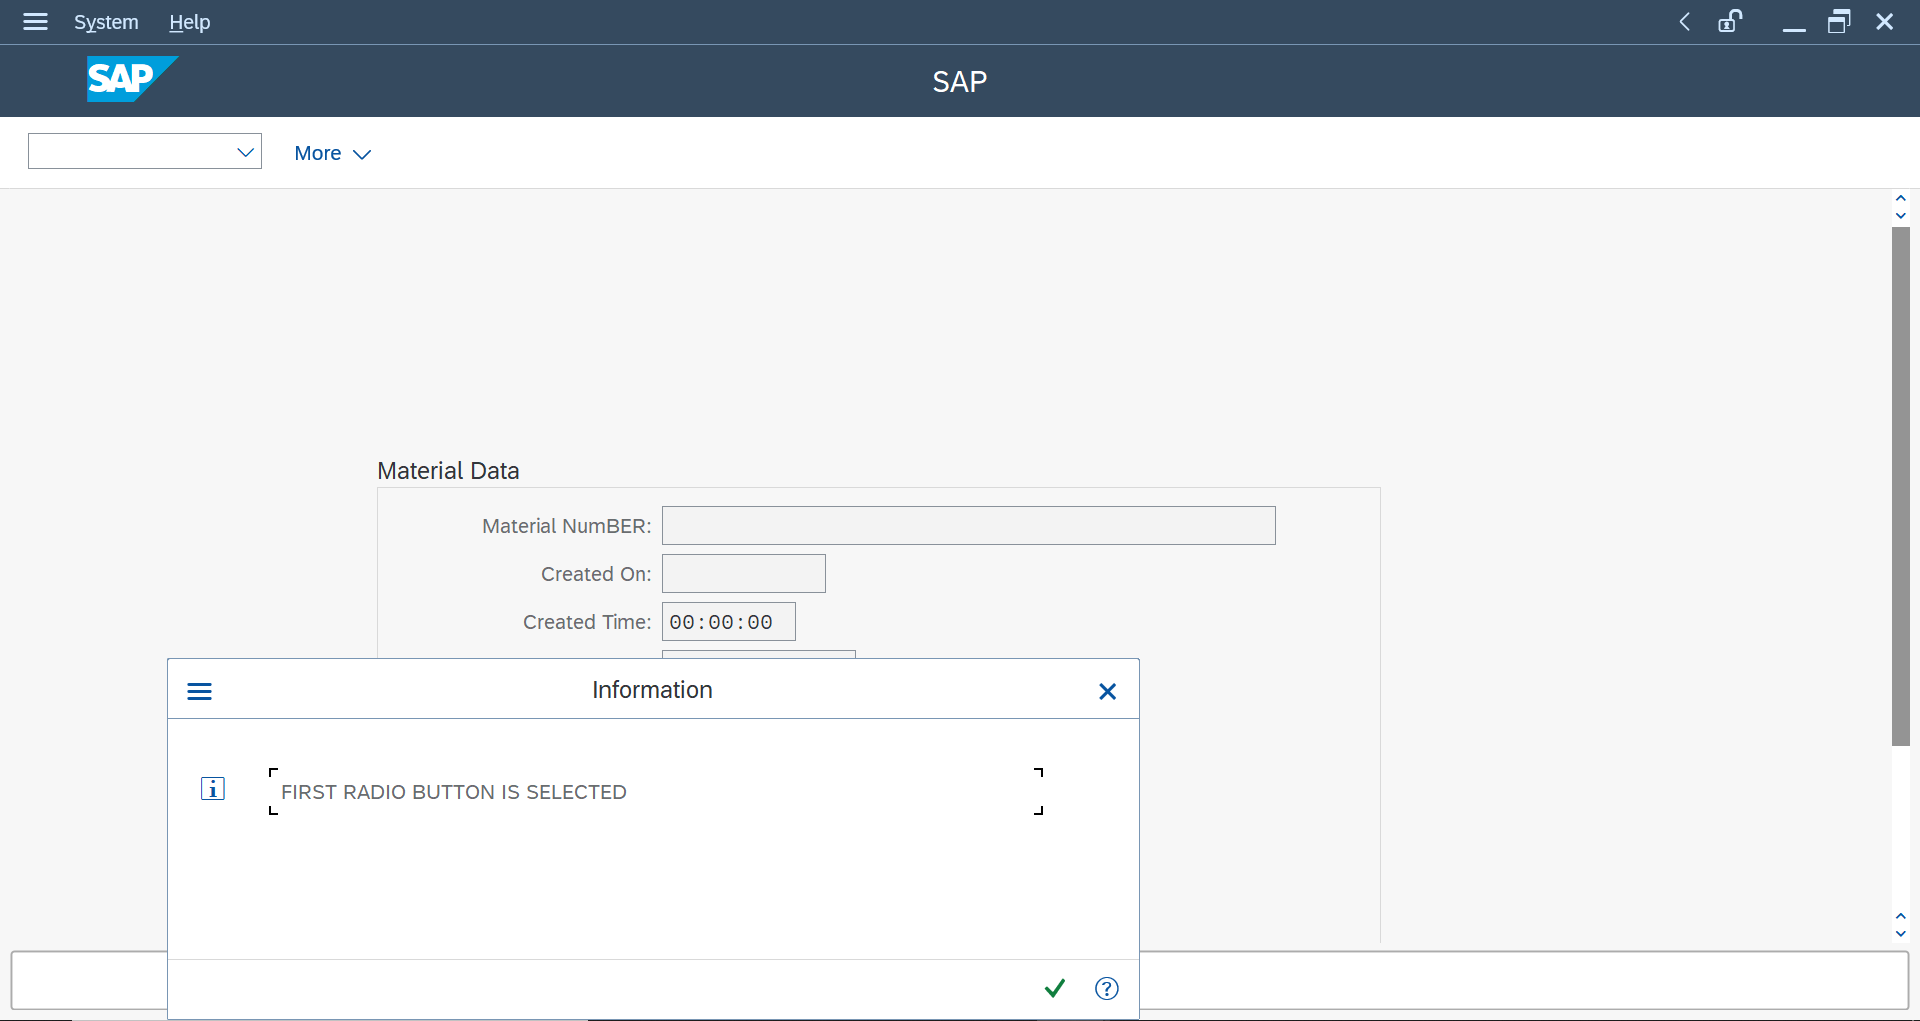
WHEN 'RB'.
IF RB1 = 'X'.
MESSAGE 'FIRST RADIO BUTTON IS SELECTED' TYPE 'I'.
ELSEIF RB2 = 'X'.
MESSAGE 'SECOND RADIO BUTTON IS SELECTED' TYPE 'I'.
ELSEIF RB3 = 'X'.
MESSAGE 'THIRD RADIO BUTTON IS SELECTED' TYPE 'I'.
ENDIF.
WHEN OTHERS.
ENDCASE.
ENDMODULE.Step 5: Define the names of radio buttons and activate the program.
Output

How to Create Checkbox
Step 1: Open Layout of your screen and create a check box by clicking on the “Check Box” on the left toolbox and placing it on the screen wherever you want and give text and function code which will be used in user command to provide a functionality to the code. Similarly, another checkbox as given below.

Step 2: Now save and activate the screen, and go to user command.
Step 3: Now write the code using function code for check box as given below.
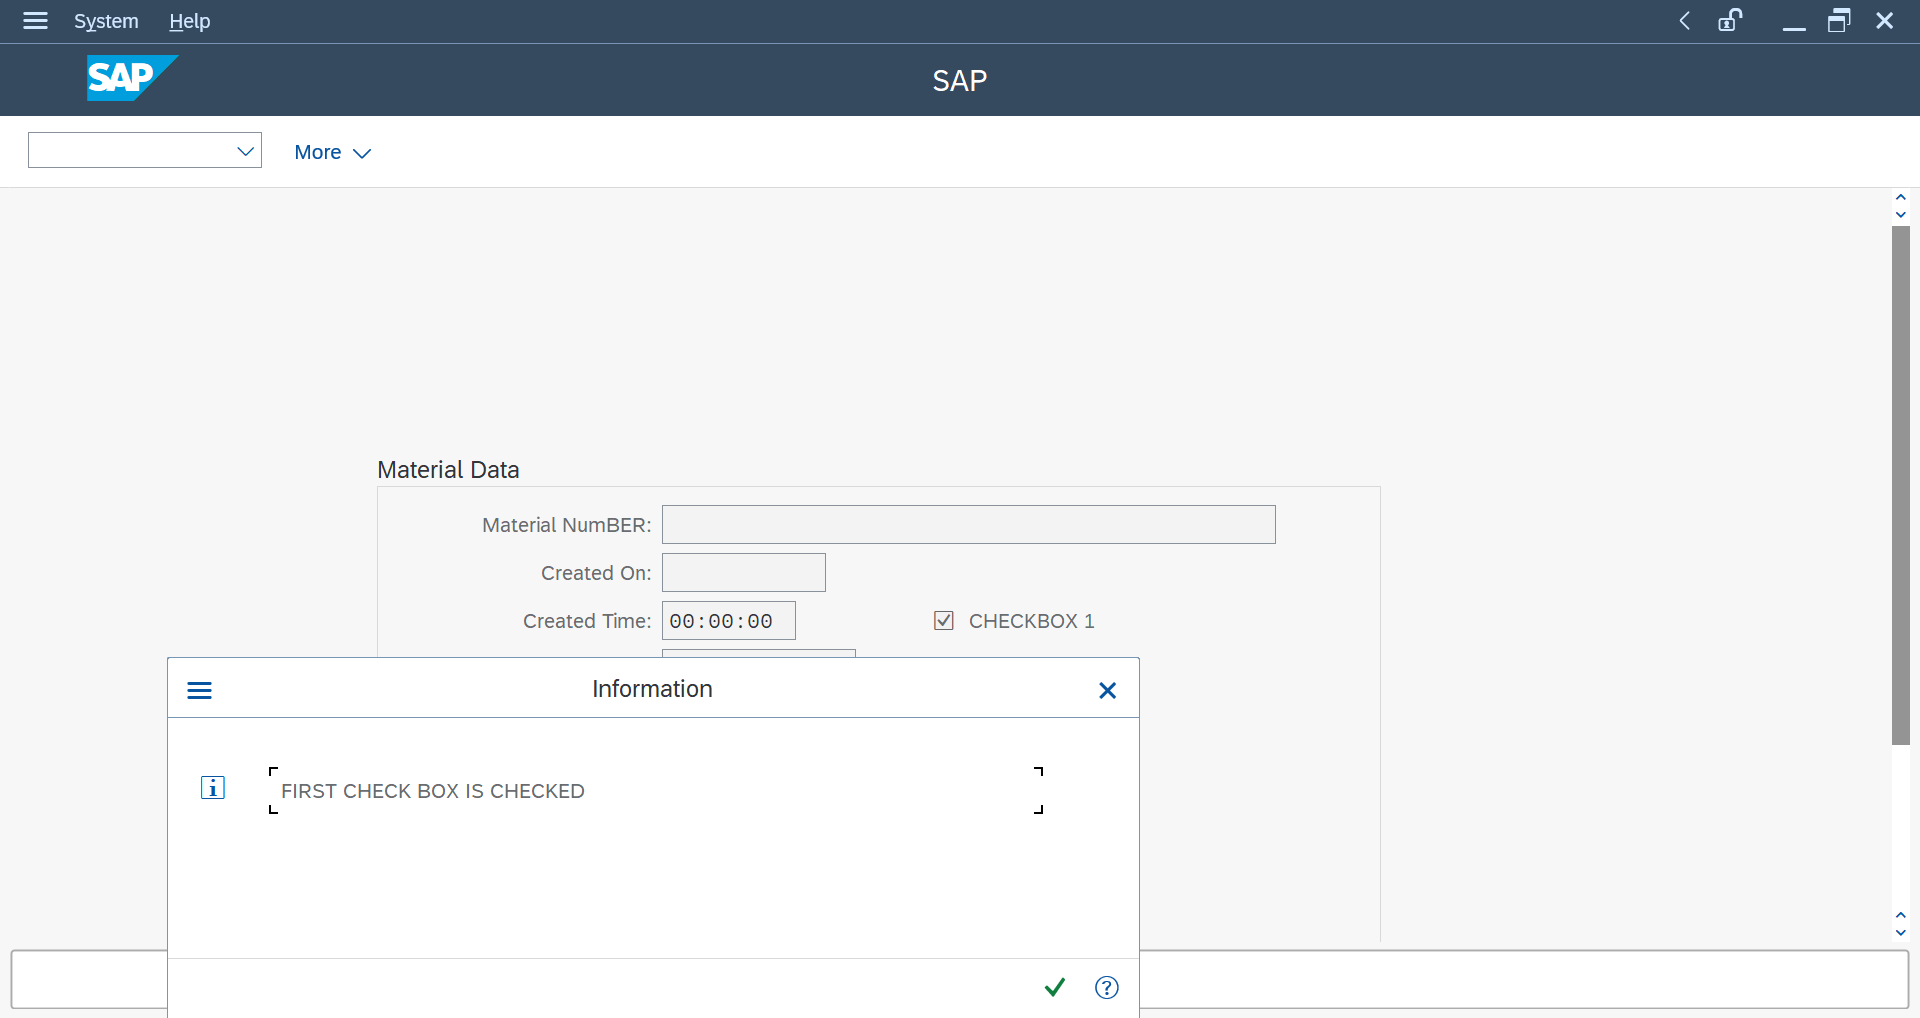
WHEN 'CHK1'.

        MESSAGE 'FIRST CHECK BOX IS CHECKED' TYPE 'I'.


WHEN 'CHK2'.

        MESSAGE 'SECOND CHECKBOX IS CHECKED' TYPE 'I'.
Now define the names of check box and activate the program.
Output:

Refer to the code below for the whole program.
*&---------------------------------------------------------------------*

*& Module Pool      Z1015035_MPP_MARA_

*&---------------------------------------------------------------------*

*&

*&---------------------------------------------------------------------*


INCLUDE ZMARATOP                                .    " Global Data

START-OF-SELECTION.

CALL SCREEN 100.


* INCLUDE ZMARAO01                                .  " PBO-Modules

* INCLUDE ZMARAI01                                .  " PAI-Modules

 INCLUDE ZMARAF01                                .  " FORM-Routines

*&---------------------------------------------------------------------*

*& Module STATUS_0100 OUTPUT

*&---------------------------------------------------------------------*

*&

*&---------------------------------------------------------------------*

MODULE STATUS_0100 OUTPUT.

* SET PF-STATUS 'xxxxxxxx'.

* SET TITLEBAR 'xxx'.

ENDMODULE.

*&---------------------------------------------------------------------*

*&      Module  USER_COMMAND_0100  INPUT

*&---------------------------------------------------------------------*

*       text

*----------------------------------------------------------------------*

MODULE USER_COMMAND_0100 INPUT.

  CASE SY-UCOMM.

    WHEN 'FC_1'.

      PERFORM GET_DATA.

    WHEN 'FC2'.

      LEAVE PROGRAM.

    WHEN 'RB'.

      IF RB1 = 'X'.

        MESSAGE 'FIRST RADIO BUTTON IS SELECTED' TYPE 'I'.

      ENDIF.

      IF RB2 = 'X'.

        MESSAGE 'SECOND RADIO BUTTON IS SELECTED' TYPE 'I'.

      ENDIF.

      IF RB3 = 'X'.

        MESSAGE 'THIRD RADIO BUTTON IS SELECTED' TYPE 'I'.

      ENDIF.

      WHEN 'CHK1'.

        MESSAGE 'FIRST CHECK BOX IS CHECKED' TYPE 'I'.


      WHEN 'CHK2'.

        MESSAGE 'SECOND CHECKBOX IS CHECKED' TYPE 'I'.


    WHEN OTHERS.

  ENDCASE.

ENDMODULE.
INCLUDE TOP
*&---------------------------------------------------------------------*

*& Include ZMARATOP                                 - Module Pool      Z1015035_MPP_MARA_

*&---------------------------------------------------------------------*

PROGRAM Z1015035_MPP_MARA_.

TABLES: MARA.

DATA:RB1,RB2,RB3, CHK1, CHK2.
INCLUDE FORM
*&---------------------------------------------------------------------*

*& Include          ZMARAF01

*&---------------------------------------------------------------------*


*&---------------------------------------------------------------------*

*& Form GET_DATA

*&---------------------------------------------------------------------*

*& text

*&---------------------------------------------------------------------*

*& -->  p1        text

*& <--  p2        text

*&---------------------------------------------------------------------*

FORM GET_DATA .

  SELECT

    SINGLE

    MATNR

    ERSDA

    CREATED_AT_TIME

    ERNAM

    MTART

    MATKL

    FROM MARA INTO CORRESPONDING FIELDS OF MARA WHERE MATNR = MARA-MATNR.


ENDFORM.
By following the steps you will be able to create basic Module Pool Program using Radio Buttons and Check box. I hope this blog post helped you as beginner. Since this blog is for beginners I have used forms in the future blog posts I will start using methods.
As we continue to learn more in this series about MPP, I will use this blog post to link all the parts of this series.
Follow my account sinelanwar22 to be notified of the next blog post. Please feel free to ask any questions you have in the comments section below.
Join the conversation about the ABAP programming by following the tag ABAP Development
Post questions and answer related to tag by following the tag Questions & Answers
Read other blog post on topic ABAP Development.
- SAP Managed Tags:
- ABAP Development
3 Comments
You must be a registered user to add a comment. If you've already registered, sign in. Otherwise, register and sign in.
Labels in this area
-
A Dynamic Memory Allocation Tool
1 -
ABAP
8 -
abap cds
1 -
ABAP CDS Views
14 -
ABAP class
1 -
ABAP Cloud
1 -
ABAP Development
4 -
ABAP in Eclipse
1 -
ABAP Keyword Documentation
2 -
ABAP OOABAP
2 -
ABAP Programming
1 -
abap technical
1 -
ABAP test cockpit
7 -
ABAP test cokpit
1 -
ADT
1 -
Advanced Event Mesh
1 -
AEM
1 -
AI
1 -
API and Integration
1 -
APIs
8 -
APIs ABAP
1 -
App Dev and Integration
1 -
Application Development
2 -
application job
1 -
archivelinks
1 -
Automation
4 -
BTP
1 -
CAP
1 -
CAPM
1 -
Career Development
3 -
CL_GUI_FRONTEND_SERVICES
1 -
CL_SALV_TABLE
1 -
Cloud Extensibility
8 -
Cloud Native
7 -
Cloud Platform Integration
1 -
CloudEvents
2 -
CMIS
1 -
Connection
1 -
container
1 -
Debugging
2 -
Developer extensibility
1 -
Developing at Scale
3 -
DMS
1 -
dynamic logpoints
1 -
Eclipse ADT ABAP Development Tools
1 -
EDA
1 -
Event Mesh
1 -
Expert
1 -
Field Symbols in ABAP
1 -
Fiori
1 -
Fiori App Extension
1 -
Forms & Templates
1 -
General
1 -
Getting Started
1 -
IBM watsonx
1 -
Integration & Connectivity
9 -
Introduction
1 -
JavaScripts used by Adobe Forms
1 -
joule
1 -
NodeJS
1 -
ODATA
3 -
OOABAP
3 -
Outbound queue
1 -
Product Updates
1 -
Programming Models
14 -
Restful webservices Using POST MAN
1 -
RFC
1 -
RFFOEDI1
1 -
SAP BAS
1 -
SAP BTP
1 -
SAP Build
1 -
SAP Build apps
1 -
SAP Build CodeJam
1 -
SAP CodeTalk
1 -
SAP Odata
1 -
SAP UI5
1 -
SAP UI5 Custom Library
1 -
SAPEnhancements
1 -
SapMachine
1 -
security
3 -
text editor
1 -
Tools
17 -
user experience
5
Top kudoed authors
| User | Count |
|---|---|
| 5 | |
| 5 | |
| 3 | |
| 3 | |
| 3 | |
| 2 | |
| 2 | |
| 1 | |
| 1 | |
| 1 |