
- SAP Community
- Products and Technology
- Financial Management
- Financial Management Blogs by SAP
- Building a New No-Code App for SAP TRM/PSCD with S...
Financial Management Blogs by SAP
Get financial management insights from blog posts by SAP experts. Find and share tips on how to increase efficiency, reduce risk, and optimize working capital.
Turn on suggestions
Auto-suggest helps you quickly narrow down your search results by suggesting possible matches as you type.
Showing results for
Product and Topic Expert
Options
- Subscribe to RSS Feed
- Mark as New
- Mark as Read
- Bookmark
- Subscribe
- Printer Friendly Page
- Report Inappropriate Content
08-23-2023
5:28 PM
SAP Build Apps is the low-code development platform available on the SAP BTP to create apps for the Web and native mobile. It is designed for anyone to quickly create apps without code regardless of role or skill.
In this blog I'm going to summarize the steps required to start building an App to interact with the SAP Tax and Revenue Management (SAP TRM) on-premise system, leveraging the OData services of the SAP Multichannel Foundation for the Public Sector (SAP MCF).
In order to get a good understanding of SAP Build Apps, I would recommend the following resources:
The objective is to create an application that will leverage the OData services of SAP MCF and provide access to the taxpayer data in a S/4HANA backend system.
The SAP MCF framework must be up and running with the SAP MCF OData services activated. For more information read the Installation and Configuration of Multichannel Foundation for Utilities and Public Sector
You must also be subscribed to SAP Build Apps on your SAP BTP, you can check the related prerequisites here.
Basically, at the end of this phase, you should have
First, let's create the SAP Build Apps project
Then enter
Your project has been created, and you can now save it.
You can now define the authentication method for the application by
The SAP BTP Authentication method is set.
Don't forget to save your project!
You can now define the system integration for the application by
You can now select the Data Entities that we are going to use in our demo app.
You can now enable the data entity and add the ContractAccounts Expand option. This will allow you to get the contract accounts linked to each AccountID (Business Partner)
You are now ready to start building your first SAP Build Apps!
In this step, you will need to have some business partners assigned to your user in the backend system. The link between the user and his/her "accounts" (= business partners) are maintained in table USAPPLREF, and can be managed in transaction code SU01:
As a first step, let's build a screen that will fetch the business partners assigned to my user and display their full name and account ID (business partner number)
So the layout is there but you need to add some logic now 🙂
You can see the logic in the subscreen at the bottom where the Accounts data will be fetched from the backend system and stored in the data variable Accounts.
Now let's connect the logic with the user interface
Now set the fields that you want to see in the item list
Repeat the same steps with the "Secondary Label"
Save your project!
You can now have a first look at your app, with data fetched from your user in the backend!
Congratulations, you have successfully displayed the business partners linked to your user!
In Part 2 of this blog, I explain how to fetch SAP TRM/PSCD data using the $expand functionality and implement further OData integrations (Contract Accounts, Contract Objects, Form Bundles, Invoices...)
Acknowledgment: I'd like to thank prashant4sap for his support in exploring SAP Appgyver with me earlier this year.
In this blog I'm going to summarize the steps required to start building an App to interact with the SAP Tax and Revenue Management (SAP TRM) on-premise system, leveraging the OData services of the SAP Multichannel Foundation for the Public Sector (SAP MCF).
In order to get a good understanding of SAP Build Apps, I would recommend the following resources:
- The SAP Build Apps service description on the SAP Discovery Center, especially the What's New and the Roadmap sections
- The SAP Build Apps - Service Guide
- The SAP Tutorials for Developers: I will explicitly refer to specific tutorials in the course of this blog.
- The blog 100 days of SAP low and no code
- The SAP Build Apps Community
- The SAP Learning Journey "Developing Apps with SAP Build Apps using Drag-and-Drop Simplicity"
Statement of work
The objective is to create an application that will leverage the OData services of SAP MCF and provide access to the taxpayer data in a S/4HANA backend system.
Prerequisites
The SAP MCF framework must be up and running with the SAP MCF OData services activated. For more information read the Installation and Configuration of Multichannel Foundation for Utilities and Public Sector
You must also be subscribed to SAP Build Apps on your SAP BTP, you can check the related prerequisites here.
Basically, at the end of this phase, you should have
- a backend on-premise system running SAP TRM/PSCD
- an (embedded) SAP Gateway exposing the SAP MCF Odata Services
- SAP Build Apps service running on your SAP BTP
Step 1 - Create your SAP Build Apps Project
First, let's create the SAP Build Apps project
- Go to the SAP Build Development environment
- Click on the button Create"
- Select "Build an Application"
- Select "Web & Mobile Application"

Access path to create the SAP Build Apps Project
Then enter
- The project name
- A short description of the project
- Click on the button "Create"
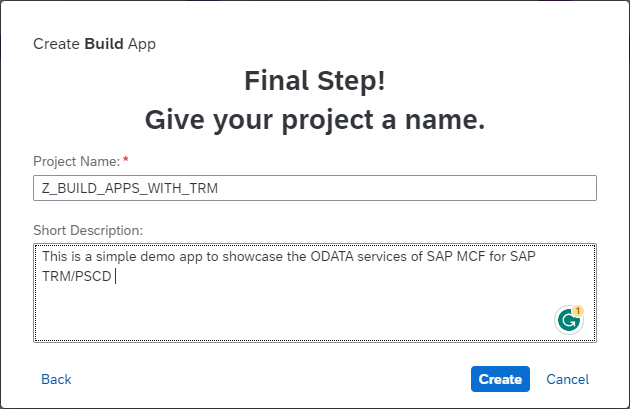
Giving your project a name
Your project has been created, and you can now save it.

Saving your project
Step 2 - Setting the Authentication method
You can now define the authentication method for the application by
- Clicking on the "Auth" button in the toolbar at the top of the screen
- Selecting the "SAP BTP Authentication" method. This method supports user propagation to the S/4HANA backend system.
- Click "OK"

Setting the authentication method
The SAP BTP Authentication method is set.
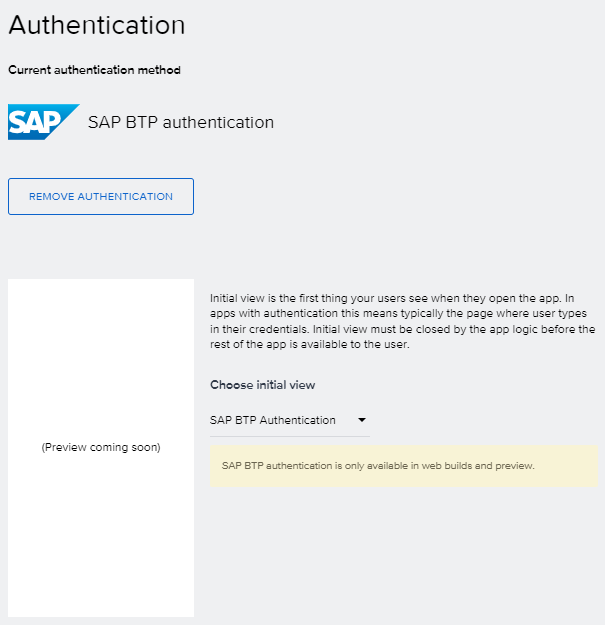
The authentication method is confirmed
Don't forget to save your project!
Step 3 - Setting up the system integration
You can now define the system integration for the application by
- Clicking on the "Data" button in the toolbar at the top of the screen
- Click on the "Add Integration" button
- In the SAP Systems box, click on "BTP Destinations"
- Select your SAP BTP destination (in our example s4p800mcf")

Setting the SAP BTP Authentication
You can now select the Data Entities that we are going to use in our demo app.
- Select the data entity "Accounts"
- Click the button "Install Integration"

Adding the Accounts data entity integration
You can now enable the data entity and add the ContractAccounts Expand option. This will allow you to get the contract accounts linked to each AccountID (Business Partner)
- Click on "Enable Data entity"
- Switch on the "ContractAccounts" in the Expand section
- Save your project

Enabling the data entity
You are now ready to start building your first SAP Build Apps!
Step 4 - Building the User Interface with no code
Additional prerequisite
In this step, you will need to have some business partners assigned to your user in the backend system. The link between the user and his/her "accounts" (= business partners) are maintained in table USAPPLREF, and can be managed in transaction code SU01:
- Enter your user and click "Maintain"
- In the menu, click on Goto - References
- Add the lines with the reference to the business partners numbers (with the leading zeros)
- Save twice

Linking the business partners to my user
You can now start building your application
As a first step, let's build a screen that will fetch the business partners assigned to my user and display their full name and account ID (business partner number)
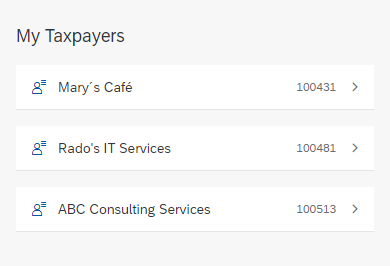
List of business partners assigned to my user
- Click on the "UI Canvas" button in the toolbar at the top of the screen
- Click on Title1 "Headline" and rename it "My Taxpayers"
- Click on the Text1 "Lorem ip..." and delete it (click on the button "Remove")
- Drag and Drop an "Icon list item" component below the "My Taxpayers" title

Dragging and Dropping the Icon list item component
So the layout is there but you need to add some logic now 🙂
- Switch from the "View" to the "Variables" display
- Click on Data Variables
- Click on "Add Data Variable" and select "Accounts"
- Rename your Data Variable from "Accounts1" to "Accounts"
- Save!

Defining your data variable for the collection of data records Accounts
You can see the logic in the subscreen at the bottom where the Accounts data will be fetched from the backend system and stored in the data variable Accounts.
Now let's connect the logic with the user interface
- Switch back from the "Variables " to the "View" display
- Select the icon list item component
- Click on the "Repeat with" property
- Select "Data and Variables"
- Select "Data Variable"
- Select "Accounts"
- Click "Save"
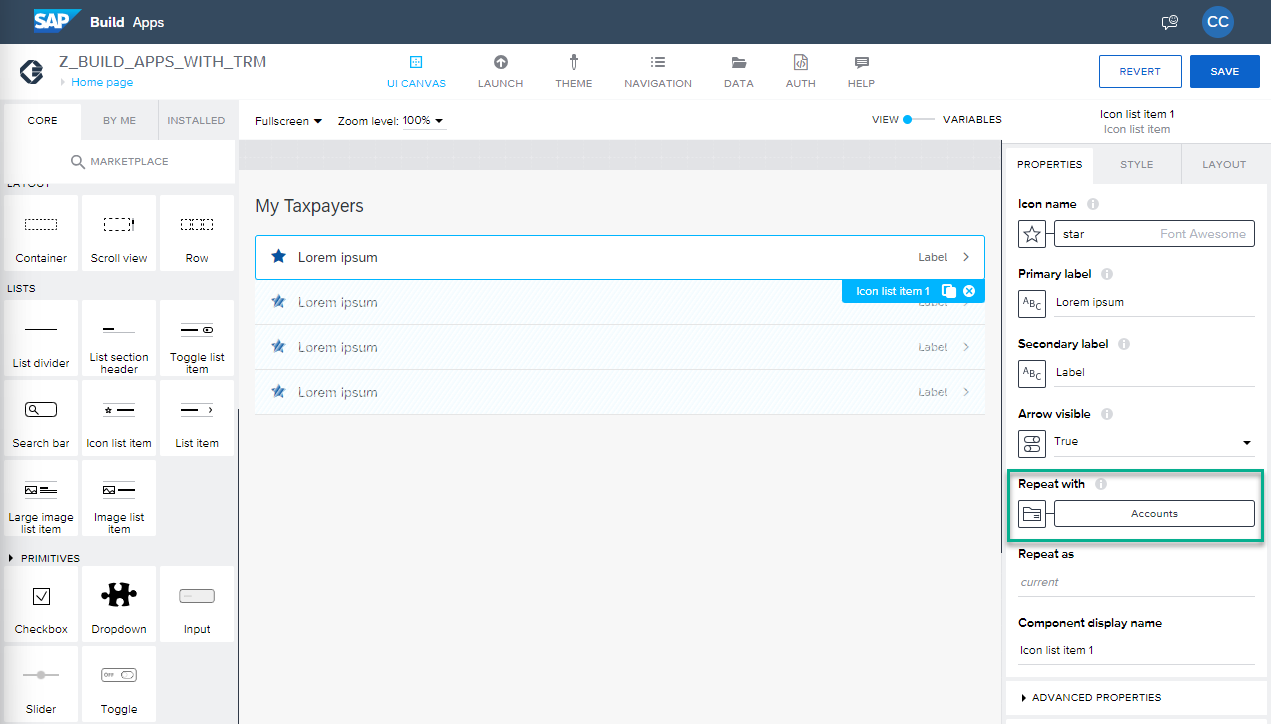
Linking the logic and the user interface
Now set the fields that you want to see in the item list
- Click on the "Primary Label" property
- Click on Formula
- Click on the Formula field and delete the content
- Click on "Currently repeated data items"
- Select "repeated.current.FullName" and click "Enter +"
- Click on "Save" twice
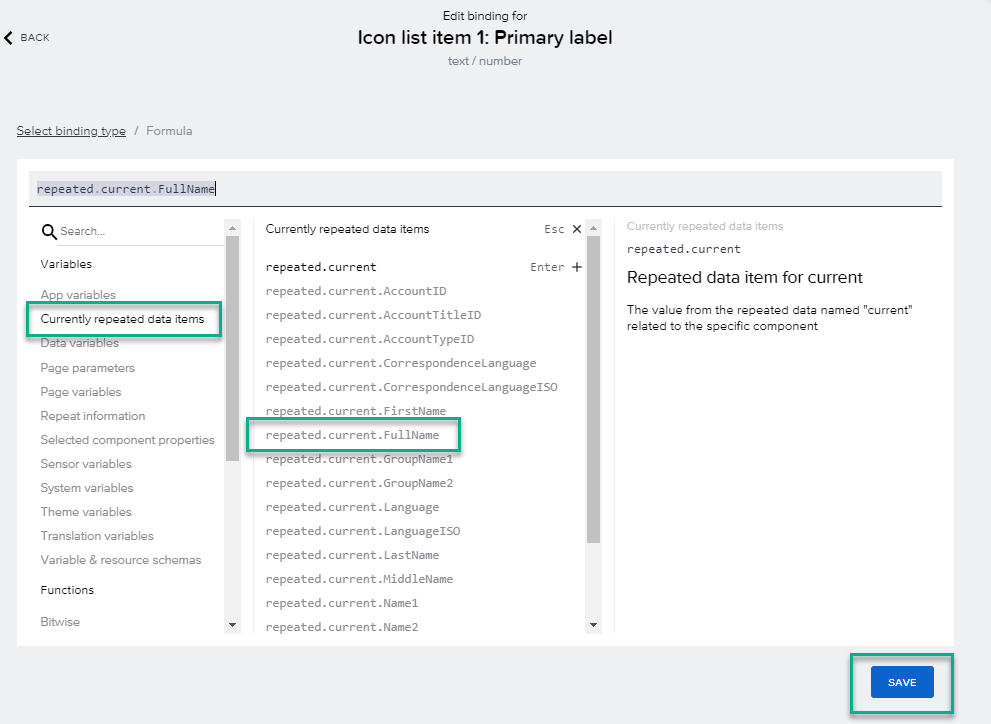
Setting the value to display in the user interface
Repeat the same steps with the "Secondary Label"
- Click on the "Secondary Label" property
- Click on Formula
- Click on the Formula field and delete the content
- Click on "Currently repeated data items"
- Select "repeated.current.AccountID" and click "Enter +"
- Click on "Save" twice
Save your project!
Step 5 - Previewing your App
You can now have a first look at your app, with data fetched from your user in the backend!
- Click on the "Launch" button in the toolbar at the top of the screen
- Click on "Open Preview Portal" in the "Preview your App" section
- Click on "Open web preview"
- Open your SAP Build Apps

Opening your SAP Build Apps in Preview mode
Congratulations, you have successfully displayed the business partners linked to your user!

My first SAP Build App using SAP TRM data!
In Part 2 of this blog, I explain how to fetch SAP TRM/PSCD data using the $expand functionality and implement further OData integrations (Contract Accounts, Contract Objects, Form Bundles, Invoices...)
Acknowledgment: I'd like to thank prashant4sap for his support in exploring SAP Appgyver with me earlier this year.
Labels:
2 Comments
You must be a registered user to add a comment. If you've already registered, sign in. Otherwise, register and sign in.
Labels in this area
-
Business Trends
145 -
Business Trends
16 -
Event Information
35 -
Event Information
9 -
Expert Insights
8 -
Expert Insights
31 -
Life at SAP
48 -
Product Updates
521 -
Product Updates
66 -
Technology Updates
196 -
Technology Updates
11
Related Content
- GRC Tuesdays: Automate compliance with anti-forced labour regulations in Financial Management Blogs by SAP
- Climate Change Risk Scenario Analysis in SAP PaPM - 1/3: Climate Risk Management Introduction in Financial Management Blogs by SAP
- SAP Sustainability for Financial Services - Portfolio and Solutions in Financial Management Blogs by SAP
- Field Status Variant & Field Status Group in Financial Management Blogs by Members
- Get peace of mind for evolving compliance requirements with SAP advanced compliance automation in Financial Management Blogs by SAP
Top kudoed authors
| User | Count |
|---|---|
| 1 | |
| 1 | |
| 1 | |
| 1 | |
| 1 | |
| 1 | |
| 1 |