Warning: This blog post describes a quick work-around for those developers wishing to minimally connect to cloud based HANA instances. These instances are required to use an encrypted connection while most on-premise installations of HANA by default don't require an encrypted connection. Once this capability is made available in Business Application Studio we can remove this post as it will be completely redundant. Please avoid linking to it directly.
-Andrew
Assuming that you have subscribed to SAP Business Application Studio and have given the Business_Application_Studio_Developer roll collection to your authorized user, create a new Dev Space with a type of SAP Cloud Business Application. If you need help follow this blog post for details.
https://blogs.sap.com/2020/03/06/sap-business-application-studio-trial-in-sap-cloud-platform-assigni...
I have only tested this in the US10 Cloud Foundry landscape. Your landscape may behave differently.

Once your Dev Space is up and running, click on it's name to open it.

Check the version of Business Application Studio by clicking on the Help About menu item.

If the version stated is greater than 1.100.0-20200325202049, first follow the SQL Tools new connection wizard to see if it will allow you to connect to a cloud based HANA instance requiring an encrypted connection. If it doesn't then continue below.
Open a New Terminal.

In the terminal window copy, paste and execute each of the following lines in order.
mkdir -p ~/.ssl


cd ~/.ssl


wget --no-check-certificate https://dl.cacerts.digicert.com/DigiCertGlobalRootCA.crt


openssl x509 -inform der -in DigiCertGlobalRootCA.crt -out ~/.ssl/DigiCertGlobalRootCA.pem


cd ~
This gets the proper certificate required for providing an encrypted connection, converts it to the proper format, and places it the the proper location so that the sql connection configuration can find it.
Before any sql connection has been created, the json object that contains the list of possible connections has not yet been created, so we will first use the connection wizard to create a placeholder connection that we will then subsequently replace with the correct version.
Follow these steps.
Select the SQL Tools icon, Click on No Connections, and select SAP Hana.

Fill in the required fields with some value, I used aaa, until you're allowed to save the connection.

Now we're going to edit the settings file to manually replace the just created connection. If you have other connections already defined, just merge the following example into the existing ones.
Look for the section called "sqltools.connections" and replace its contents with the following.
Make sure to replace the values marked with <> with ones that match your HANA instance.
If you don't know your <> values, use the "cf env" command on a module that is bound to your HDI container or create a service key for your HDI container.
"sqltools.connections": [

  {

     "dialect": "SAPHana",

     "port": <your HANA instance server port>,

     "server": "<your HANA instance server hostname>",

     "name": "<a name for the connection>",

     "database": "<your HANA instance server schema name>",

     "username": "<your HANA instance server user(not hdi_user)>",

     "password": "<your HANA instance server password(not hdi_password)>",

     "hanaOptions": {

         "encrypt": true,

         "sslValidateCertificate": true,

         "sslCryptoProvider": "openssl",

         "sslTrustStore": "/home/user/.ssl/DigiCertGlobalRootCA.pem"

      },

      "isActive": false,

      "isConnected": false

  }

]

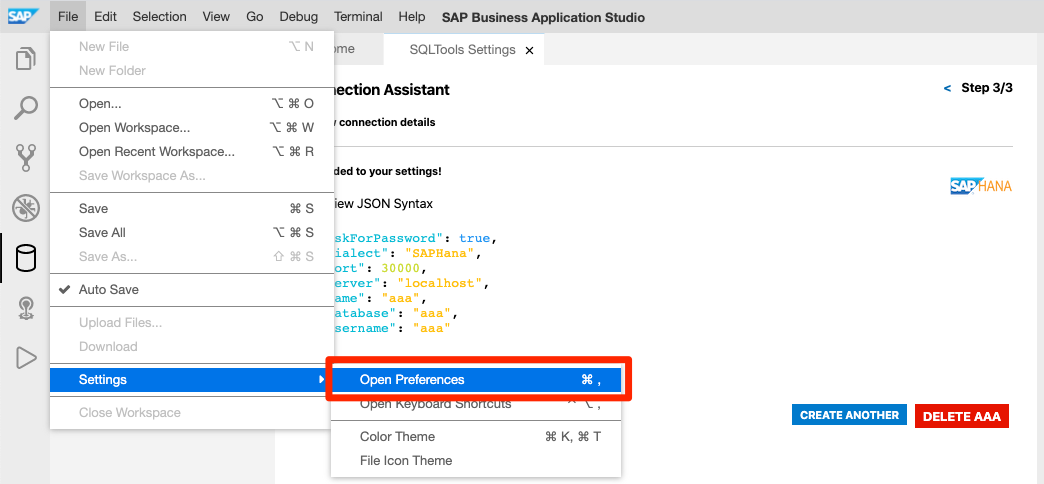
Save the preference file with File -> Save.
You now see your connection in the connections menu. If you don't, try clicking around or create another connection with bogus values using the new connection wizard. There seems to be a bug that prevents the regeneration of this connection list. Once you see it, click on the connection icon.

If this is the first time you've created a HANA connection, you will be prompted to install the HANA drivers.

Once the drivers have been installed, click the button to connect to your HANA instance.

If all goes well, you should see a confirmation message.

You can now expand the connection details.

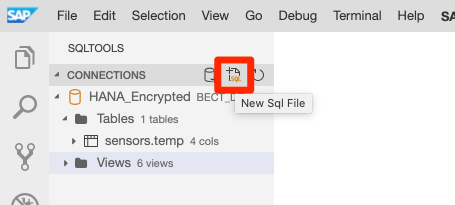
Open a new sql file and run any free form query.
You have to select your sql statement and right click to select the "Run Selected Query" context menu item.

At this point you should see the results of your query in the window.
Hopefully this blog post helps out for the time being.
-Andrew
