This is a submission of the
Enhance your bot building with templates blog post series.
If you are familiar with SAP Intelligent RPA, you may know that you can run both scheduled bots (digital worker) and attended bots (digital assistant).
With the SAP Intelligent RPA, you can run your attended bots from the agent in the systray.
In some scenarios, you may want the bot to run when the user clicks on a button for instance. Instead of running it from the systray.
In this blog, I’ll show step by step, how to run your bot from a Fiori Tile. You can apply the same steps to run the bot from a Fiori button, a classic html button, or any clickable element that is supported by SAP Intelligent RPA.
You can find the git project
here
Pre-Requisites:
- You have SAP Intelligent RPA licence or you have created a trial account to use SAP Intelligent RPA. If not, you can get an account by following the instructions here:
- You have installed on-premise component of SAP Intelligent RPA and all required components. If not check this link :
- Ensure the extension of SAP Intelligent RPA is enabled in your browser.
Step 1: Create a project
Open Desktop Studio. Go to File> New Project. Fill in the required fields and save.

Step 2: Create a simple workflow
(Optional if you have already created a workflow)
In the Workflow tab, under GLOBAL, right click > New Workflow and save.

In the activities tab add activity MsgBox like below and save.

Step 3: Capture the Fiori Web page
In this example I am using the Generic Tile Sample available
here for download.
If you prefer not to use Fiori elements, you can capture any other web page element and use it in the same way.
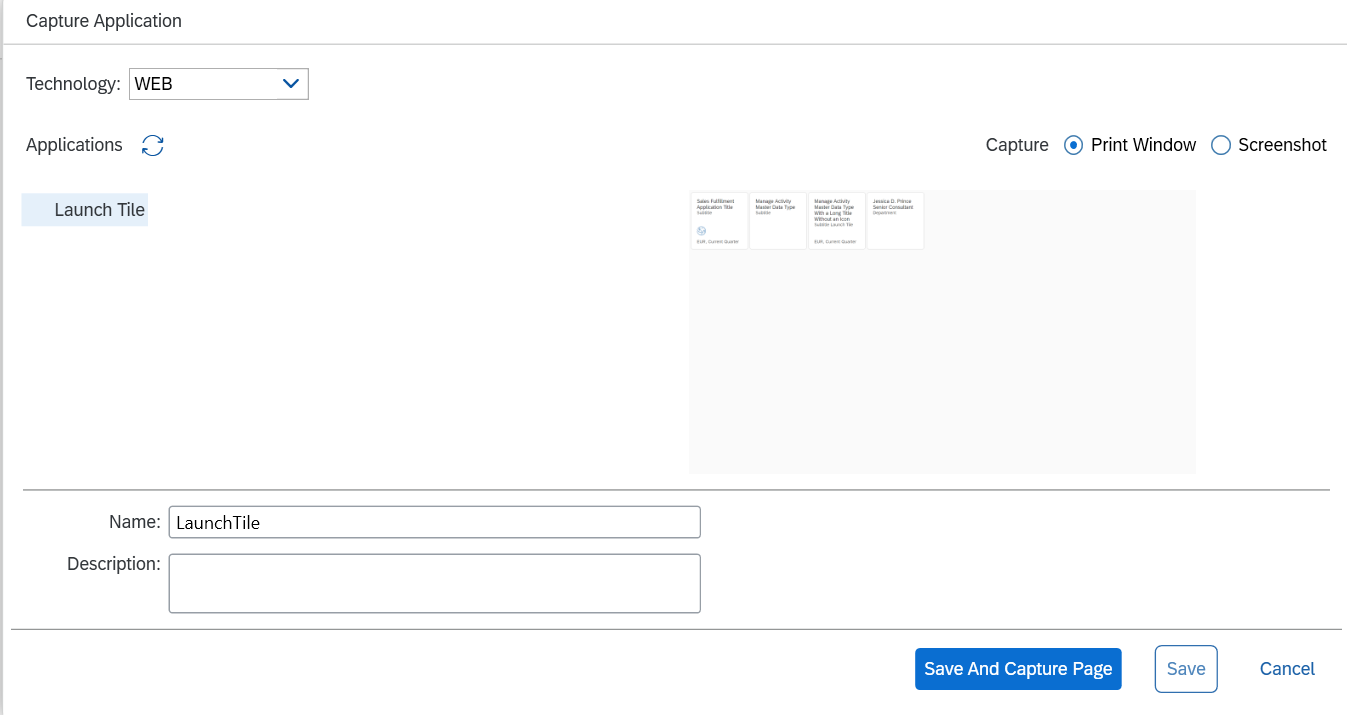
In Desktop Studio, Go to Application tab, New application, capture the application by clicking Save and then double click to capture the page, click Save and Capture.
I choose custom type for the application as SAP UI5 as this is a Fiori App. I then capture the Fiori tile.

Step 4: Add CLICK Track Event and Build your project
Select the tile item, go to Track Events and check the click event.

Click on Build to build the project.
NB: in my git project I am identifying more sub-elements of the fiori tile to ensure the start event is triggered anywhere the user clicks.
Step 5:
In the Scripts tab, add the code below under the GLOBAL step. Here I am placing the code in the global script. But it can be anywhere as long as it’s outside the scenario script.
// Start Scenario from Fiori element

LaunchTile.pLaunchTile.events.oTile.CLICK.on(function(ev) {

	        startScenario();

	    });


function startScenario(){


	        var rootData = ctx.dataManagers.rootData.create();

	        GLOBAL.scenarios.simpleBot.start(rootData);

	}

Step 6: Test your bot
Now I run the project in debug mode. When I click on the fiori tile, the scenario ‘simpleBot’ starts and shows a pop-up.

Conclusion
Now you learned how to trigger a bot from a Fiori Element.
In a productive scenario, this could be a solution to trigger a bot in the same machine where the user triggers the bot by clicking a button.
If you want to go further and inject a button in your view. Please check this amazing
webinar by my colleague
alexisgaillot.
