
- SAP Community
- Products and Technology
- Human Capital Management
- HCM Blogs by Members
- Retirement Due Date Alert using Custom MDF Object
Human Capital Management Blogs by Members
Gain valuable knowledge and tips on SAP SuccessFactors HCM suite and human capital management market from member blog posts. Share your insights with a post of your own.
Turn on suggestions
Auto-suggest helps you quickly narrow down your search results by suggesting possible matches as you type.
Showing results for
KumarSF
Participant
Options
- Subscribe to RSS Feed
- Mark as New
- Mark as Read
- Bookmark
- Subscribe
- Printer Friendly Page
- Report Inappropriate Content
07-02-2020
11:54 AM
1 Mission/requirement
The requirement is to send an alert message to Manager and HRBP before 90 and 30 days respectively for an employee.
This can be achieved in two ways
- Create a custom field Retirement Date and populate at the time of Hiring/onboarding
- Using a Custom MDF object to store and trigger the alert.
In this document, 2nd method is used to trigger the alert before the retirement due date.
2 Retirement Due Date Alert
A Retirement Due Date alert is used to provide a heads up to the manager & HRBP in the form of a to-do alert and a mail notification 30 and 90 Days before the employee’s Retirement Due Date respectively.
Here is a list of Objects and steps needed to create the alert.
1. A Custom MDF Object
A custom MDF object to store employee's original date of birth and Retirement Due Date which is calculated using a Business Rule
2. Workflow Notifying the Manager and HRBP
When conditions in the alert rule are met, the workflow created here will be triggered to notify the manager and HRBP about the upcoming Retirement Due Date.
3. Custom Alert Message
Create a unique alert message used for alerting the Manager and HRBP about employee’s Retirement Due Date. This message is shown in a to-do tile and in the form of a notification email.
4. Creating an onSave Rule to Populate the Retirement Due Date of This Year
This rule is assigned to the custom MDF object as an onSave rule, populating the Retirement Due Date based on employees' original date of birth.
5. Creating a Post Save Rule to Trigger Workflow and Alert
Create this rule and assign it to the custom MDF object to trigger the workflow as well as the alert message.
6. Assigning the Rules to the Custom MDF Object
The onSave and Post Save rules created must be assigned to the custom MDF object to ensure that Retirement Due Date data is processed for all the instances of that object.
7. Scheduling an Integration Job to Fetch Retirement Due Date Data
A scheduled integration job automatically fetches data of two fields in Biographical Information and passes the data to mapped fields of the MDF object.
8. Running an EC Alerts and Notifications Job in Provisioning
When you start an EC Alerts and Notifications job in Provisioning, it first queues up and then gets executed, triggering all pending alerts.
9. Verifying That the Retirement Due Date Alert Has Been Successfully Created
By checking the to-do tile or incoming emails, you can verify that the Retirement Due Date alert has been successfully created.
2.1 Creating a Custom MDF Object
A custom MDF object is created which can store employee's original date of birth and populate Retirement Due Date with help of a business rule.
MDF Creation Process:
- Go to Configure Object Definitions and choose to create a new object.
- Name the object, set Effective Dating to None and Data Type of externalCode to User.
- Add two date fields and give them meaningful names, in this case used the below names and what each of the fields is expected to store.
| Field | Usage | Data Type |
| Cust_EMP_DOB | Stores the data of birth | Date |
| Cust_RetirementDate | Stores the Retirement Due Date, calculated and stored with help of a Business Rule from the original date of birth | Date |


Note: The custom MDF object is created here, the Save Rules and Post Save Rules have to be added once the required Business Rules are created.
2.2 Creating a Workflow Notifying the Manager and HRBP
When conditions in the alert rule are met, the workflow will be triggered to notify the employee, manager and HRBP about the upcoming Retirement Due Date.
Workflow Creation Procedure:
- Go to Manage Organization, Pay and Job Structures, and choose to create a workflow.
- Name the workflow appropriately, in our case named as “ALT_Retirement_WF”
- Choose Role as Approver Type and HRBP as Approver Role for Step 1. A To-do item will be updated by adding an approver here (The To-do item will be created to all the Approvers here in the workflow, set the approvers as per requirement)
- Select HRBP, Manager and self appropriately under CC Role Type and CC Role (They will only get a notification mail)
- Keep values of other fields unchanged and save the workflow.

2.3 Creating a Custom Alert Message
Create the alert message which will be sent to the Employee, Manager and HRBP regarding the upcoming Retirement Date of an employee.
Alert Message Creation Process:
- Go to Manage Data and choose to create an alert message.
- As we are setting up two alerts (30 and 90 Days) before retirement date, two alerts were created.
- Name the alert message, here in this example we used - ALT_Retirment_Before30 Days & ALT_Retirment_Before90 Days
- Specify a unique external code and keep Active as the effective status.
- Use the [[SUBJECT_USER]] in your message header and description to personalize your message.

2.4 Creating an onSave Rule to Populate the Retirement Due Date
This rule is assigned to the custom MDF object as an onSave rule, populating the Retirement Due Date based on employees' date of birth.
Business Rule(onSave) creation procedure:
- Go to Configure Business Rules and choose to create a Metadata Framework MDF) rule.
- Name the rule, choose the custom MDF object (CuctomRetirement_Date) already created as the base object and choose Evaluate as the purpose.
- Add client specific conditions in the if statement eg: Based on DOJ the retirement date to be calculated 60 Years and 65 years etc.
- Define the Then statement as follows
- If the retirement age is 60 years:

- If the retirement age is 65 years:

2.5 Creating a Post Save Rule to Trigger Workflow and Alert
A Post Save Rule is created and assigned to the custom MDF object to trigger the workflow as well as the alert message created in earlier steps.
Business Rule (Post Save) creation procedure:
- Go to Configure Business Rules and choose to create a Metadata Framework (MDF) rule.
- Name the rule, choose the custom MDF object created earlier as the base object and choose “Alert” as the purpose.
- Define the If and Then statements as follows for 30days alert

- Define the If and Then statements as follows for 90 days alert

2.6 Assigning the Rules to the Custom MDF Object
The onSave and Post Save rules created must be assigned to the custom MDF object to ensure that Retirement Due Date Rules are processed for all the instances of that object.
Procedure to Assign Post Save Rule to MDF Object
- Go to Configure Object Definitions
- Search for the MDF object you created in the first step
- Assign the following two rules to the MDF Object
○ The onSave rule: Choose it in the Save Rules dropdown list.
○ The Post Save rule: Choose it in the Post Save Rules dropdown list.
- Save the changes to your object definition.

2.7 Scheduling an Integration Job to Fetch Birth Date to calculate Retirement Date
A scheduled integration job automatically fetches data of two fields in Biographical Information and passes the data to mapped fields of the MDF object i.e the Employee DOB and Employee ID
Creating a Schedule to run Integration Job
- Go to Integration Centre and chose My Integrations – Create More Integration Types
- In the window that appears, choose Scheduled as the trigger type, SuccessFactors as the source type, SuccessFactors as the source destination, and OData v2 as the format
- In the next page, select Biographical Information (PerPerson).
- Name the integration job.
- Prepare for the mapping by choosing the elements or actions highlighted below:

6. Choose the plus sign icon under Destination Fields to add your custom MDF object i.e. CUST_CustomRetirement_Date
7. Map the following two pairs of fields. You can drag the fields in the left column and drop them on their counterparts in the right column.
○ Date Of Birth (dateOfBirth) DateTime > Emp_DOB (cust_EMP_DOB) DateTime
○ User ID (userID) String(100) under employmentNav (to Employment Details (EmpEmployment)) > externalCode String(100)

- In the scheduling step, choose daily frequency and select an appropriate time, ideally a time when the system workload is less/minimal.
- Save and Run the Job
2.8 Running an EC Alerts and Notifications Job in Provisioning
When you start an EC Alerts and Notifications job in Provisioning, it first queues up and then gets executed, triggering all pending alerts.
Procedure to Run the Alerts and Notifications Job
1. Go to Provisioning > Managing Job > SchedulerManage Scheduled Jobs
2. Find an EC alerts and notifications job and run it now.
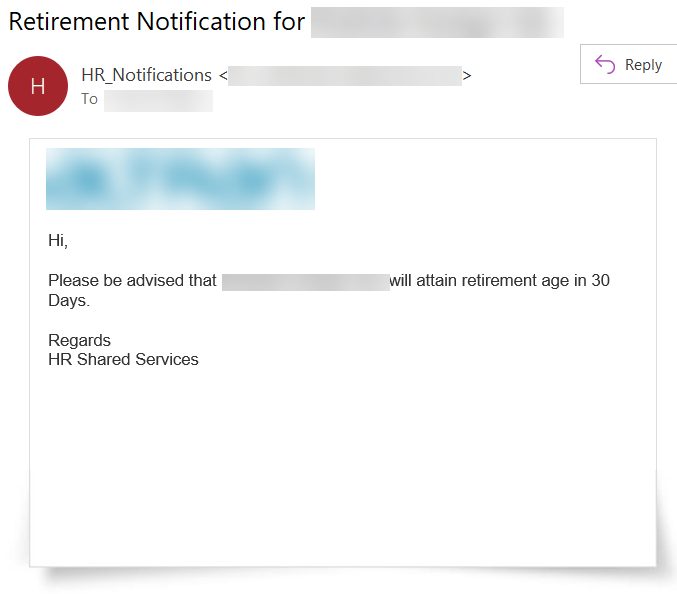
2.9 Sample Mail Alert post the creation of Alert
When the Alerts and Notifications Job is run, the matching records will have a To Do item created and an email message will be sent to Employee, Manager and HRBP.
The sample of email alert attached below:
The To Do alert is created as below:

Kindly note – For a large number of employees, integration center will full purge the data and create new data on a daily basis. Thus might take time for the job to run hence it is recommended to schedule the job when the server load is minimal.
Thank you for reading the blog (My first attempt), request your feedback on the above configuration. Kindly let me know in case of any limitation which I will try to overcome in future.
Regards,
Vinod Bachu
- SAP Managed Tags:
- SAP SuccessFactors Employee Central
20 Comments
You must be a registered user to add a comment. If you've already registered, sign in. Otherwise, register and sign in.
Labels in this area
-
1H 2024 Product Release
5 -
2H 2023 Product Release
1 -
ACCRUAL TRANSFER
1 -
Advanced Workflow
1 -
AI
1 -
AI & Skills Ontology
1 -
Anonymization
1 -
BTP
1 -
Business Rules
1 -
Canvas Report
1 -
Career Development
1 -
Certificate-Based Authentication
1 -
Cloud Platform Integration
1 -
Compensation
1 -
Compensation Information Management
1 -
Compensation Management
1 -
Compliance
2 -
Content
1 -
Conversational AI
2 -
Custom Data Collection
1 -
custom portlet
1 -
Data & Analytics
1 -
Data Integration
1 -
Dayforce
1 -
deep link
1 -
deeplink
1 -
Delimiting Pay Components
1 -
Deprecation
1 -
Employee Central
1 -
Employee Central Global Benefits
1 -
Employee Central Payroll
1 -
employee profile
1 -
Employee Rehires
1 -
external terminal
1 -
external time events
1 -
Generative AI
2 -
Getting Started
1 -
Global Benefits
1 -
Guidelines
1 -
h12024
1 -
H2 2023
1 -
HR
2 -
HR Data Management
1 -
HR Transformation
1 -
ilx
1 -
Incentive Management Setup (Configuration)
1 -
Integration Center
2 -
Integration Suite
1 -
internal mobility
1 -
Introduction
1 -
learning
3 -
LMS
2 -
LXP
1 -
Massively MDF attachments download
1 -
Mentoring
1 -
Metadata Framework
1 -
Middleware Solutions
1 -
OCN
1 -
OData APIs
1 -
ONB USA Compliance
1 -
Onboarding
2 -
Opportunity Marketplace
1 -
Pay Component Management
1 -
Platform
1 -
portlet
1 -
POSTMAN
1 -
Predictive AI
2 -
Recruiting
1 -
recurring payments
1 -
Role Based Permissions (RBP)
2 -
SAP Build CodeJam
1 -
SAP Build Marketplace
1 -
SAP CPI (Cloud Platform Integration)
1 -
SAP HCM (Human Capital Management)
2 -
SAP HR Solutions
2 -
SAP Integrations
1 -
SAP release
1 -
SAP successfactors
5 -
SAP SuccessFactors Customer Community
1 -
SAP SuccessFactors OData API
1 -
SAP Workzone
1 -
SAP-PAYROLL
1 -
skills
1 -
Skills Management
1 -
sso deeplink
1 -
Stories in People Analytics
3 -
Story Report
1 -
SuccessFactors
3 -
SuccessFactors Employee central home page customization.
1 -
SuccessFactors Onboarding
1 -
successfactors onboarding i9
1 -
Table Report
1 -
talent
1 -
Talent Intelligence Hub
2 -
talentintelligencehub
1 -
talents
1 -
Tax
1 -
Tax Integration
1 -
TIH
1 -
Time Accounts
1 -
Workflows
1 -
XML Rules
1
- « Previous
- Next »
Related Content
- SAP Companion - Guided Tour step automation issue in Human Capital Management Q&A
- Sending Email notifications for Time Valuation Alerts in Human Capital Management Blogs by SAP
- Set up Pension Payout with EC - EC Payroll P2P integration in Human Capital Management Q&A
- How to download the object data from SAP SuccessFactors Territory and Quota via Express Data Loader in Human Capital Management Blogs by SAP
- Simplifying Employee and Manager Experiences with Employee Central Quick Actions in Human Capital Management Blogs by SAP
Top kudoed authors
| User | Count |
|---|---|
| 3 | |
| 3 | |
| 3 | |
| 2 | |
| 2 | |
| 1 | |
| 1 | |
| 1 | |
| 1 | |
| 1 |