
- SAP Community
- Groups
- Interest Groups
- Artificial Intelligence and Machine Learning
- Blogs
- Retrain and Deploy the Image Classification Model ...
Artificial Intelligence and Machine Learning Blogs
Explore AI and ML blogs. Discover use cases, advancements, and the transformative potential of AI for businesses. Stay informed of trends and applications.
Turn on suggestions
Auto-suggest helps you quickly narrow down your search results by suggesting possible matches as you type.
Showing results for
former_member31
Explorer
Options
- Subscribe to RSS Feed
- Mark as New
- Mark as Read
- Bookmark
- Subscribe
- Printer Friendly Page
- Report Inappropriate Content
09-29-2018
5:45 PM
Hello Everyone ,
In this blog we are going to learn how to leverage capabilities of machine learning foundation offered by SAP . In the below use case we will show step by step approach of uploading data to cloud foundry by cloud foundry CLI and testing via postman.
What is SAP Leonardo Platform ?
SAP Leonardo Machine Learning foundation provides a platform for machine learning models, applications and services.
Background :
There is a large amount of enterprise data within SAP systems. Currently, there are many solutions focused on providing analytical results based on this data. With SAP Leonardo Machine Learning foundation, you can smartly utilize this enterprise data as training data for the implementation of Machine Learning services, in order to enable business applications to be intelligent in their purpose. This means they learn from historical data of manual tasks in order to automate them.
The Machine Learning technology can be quickly incorporated into existing SAP or non-SAP solutions using the Machine Learning services provided by SAP Leonardo Machine Learning. SAP Leonardo Machine Learning foundation provides the core components that are the basic building blocks required to create new Machine Learning services
Retraining Image Classifier Model
SAP Leonardo has 2 API’s related to Image: Image classification and Image feature extraction. In the following use case we have retrained the Image classification API. Retraining any API involves mainly 5 processes:
Prerequisites :
Global Account with Machine Learning Services enabled .
Log on to SAP Cloud Platform and navigate to the following cloud foundry environment.

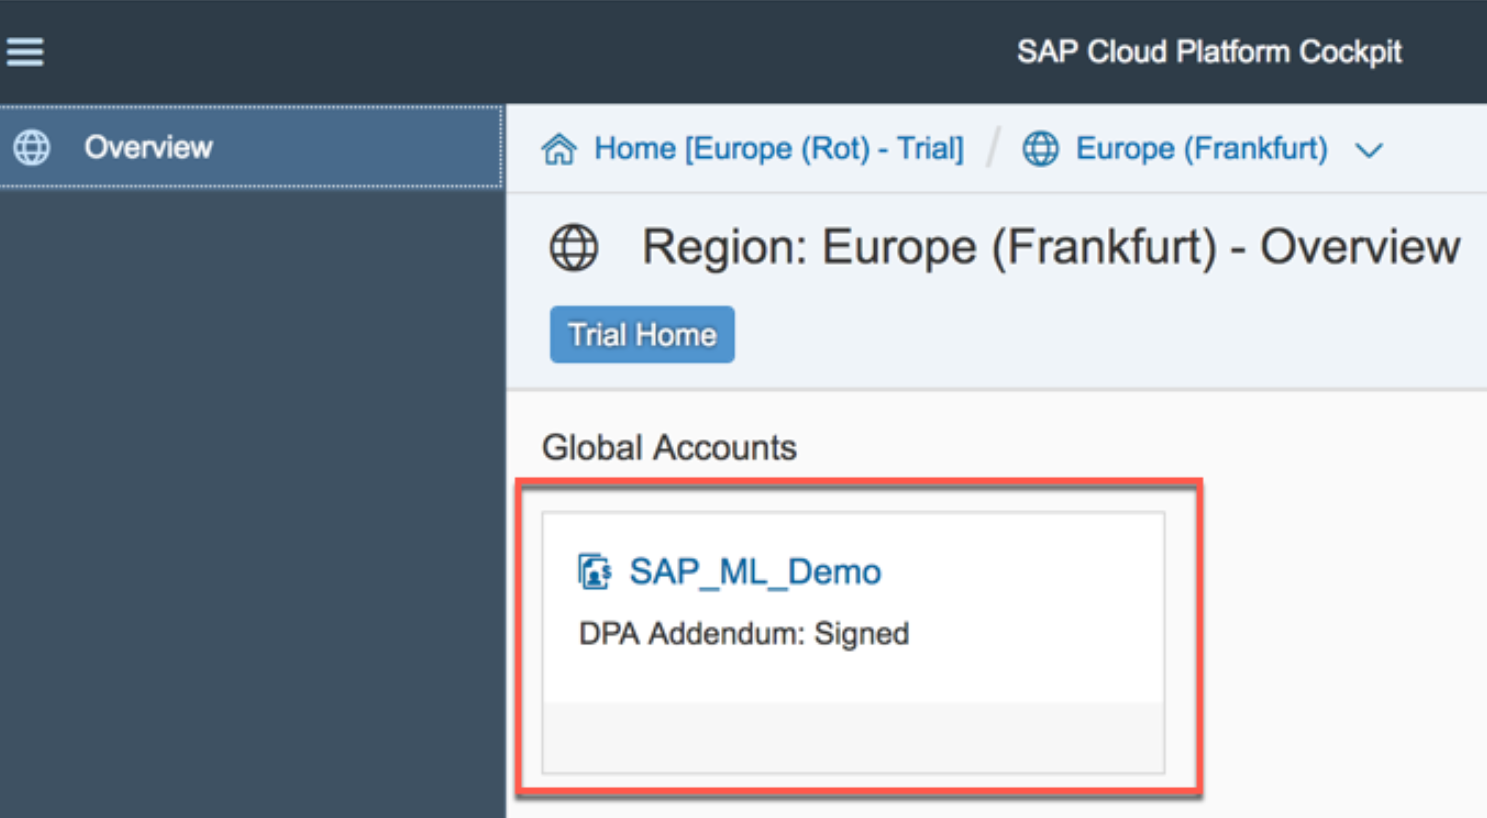
Click on your global account .
Click on the Sub account/Organization

Here you can see some your Cloud Foundry details like the name of your Organization, the number of Spaces and the API endpoint. Click on the number of Spaces

Click on the space tile , In our case it is training .

Once you are inside the space, you will find service marketplace on your left under services .

Here we need to enable ml-foundation for the global account .
Data Preparation :
For pushing the data into the cloud foundry we need to have following .
SAPML CF CLI plugin must be installed on your local desktop.
CLI plugin is an extension of standard CF plugin. We have added a subcommand called sapml to easily interact with our ML Foundation APIs. Download the plugin file related to your platform from the below links and save it in a proper location on your machine.
Uploading the data into the Cloud Foundry:
Step 1: Open command prompt.

Step 2 : Login into Cloud foundry CLI by using command cf login and enter your ID and System Credentials . Once you are logged in successfully , It will ask you to select organisation in case if you have multiple org inside your global account.
Step 3 : Run the following command

This command will get available API’s .
Step 4 : Once we get available configurations in your global account , Now we have to set the correct values for your SAPML configuration.
Example : For retraining the image classifier model we need auth_server , job api , retraining api .These details are can be retrieved from “cf sapml config get “ command or from service key tab from cloud foundry as shown above.
Run the following the commands in order to set the respective API for retraining the model

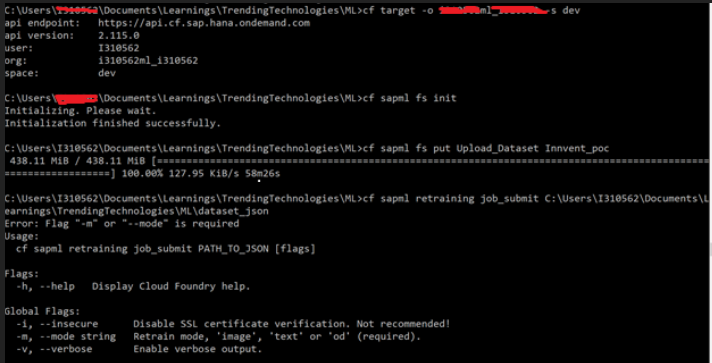
Step 5 : Initialize the cloud filesystem with the command by running following command .
cf sapml fs init
Step 6 : Uploading the data to the cloud foundry by running the following command .
In our case it was Upload_dataset folder which has 3 sub folders(training ,testing ,validation) inside it , So we navigate to the location where Upload_dataset is available and run the below command by giving new folder name .
Note: folder is created in the cloud foundry with name which is suggested by you in the place of <NewFolderName>.
cf sapml fs put Upload_Dataset <NewFoldername>

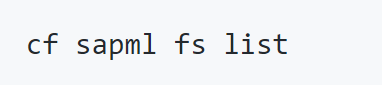
Step 7: List the root directory with the command.
Cf sapml fs list will show all the available list of file systems in the respective cloud foundry account .
Step 8 : Display the subfolders of the already available "<new Folder>" training data in the cloud foundry .
cf sapml fs list <newfolder>/
Deploy the Retrained model to your service instance
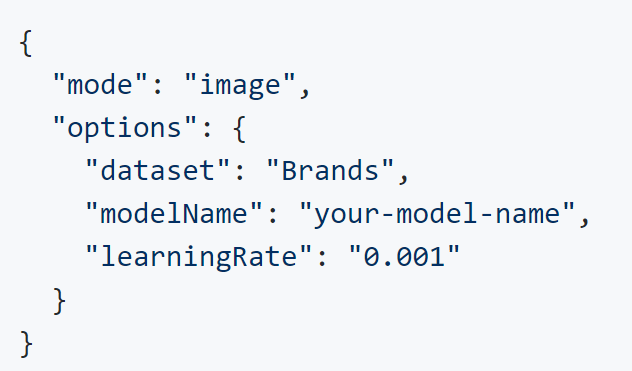
Step 9 : Now prepare a configuration file for retraining. Open your favourite text editor and create a new file name dataset.json
Let me give you a bit of explanation about the content of this file. Mode "image" means, that we retrain the pre-trained Image Classification service. There are other retrainable services in the future, where this mode value needs to be set accordingly. You need to specify the data set name and a model name. As our folder structure has the root name "Brands", we choose the value "Brands" for our dataset. Give it a new model name of your choice and save it (e.g. brands-xx). You can add optional retrain parameters (e.g. learning rate). Once finished editing, remember to save the file.
Step 10: Start the retrain process using the SAPML CLI command

Command for submitting job : cf sapml retraining job_submit -m image <json folder location>
Example : In our case , we pointed to json location and executed the command as shown below
--------------------------------------------------------------------------------------------------------------------------------------
cf sapml retraining job_submit -m image C:\Users\test\Documents\Learnings\TrendingTechnologies\ML\dataset.json
--------------------------------------------------------------------------------------------------------------------------------------
C:\Users\test\Documents\Learnings\TrendingTechnologies\ML>cf sapml retraining job_submit -m image C:\test\I310562\Documents\Learnings\TrendingTechnologies\ML\dataset.json
After command is executed, Job success message comes with id .
Job submitted successfully with id "innventpoc-2018-09-01t1055z046763".
Step 11 : Checking retraining service :
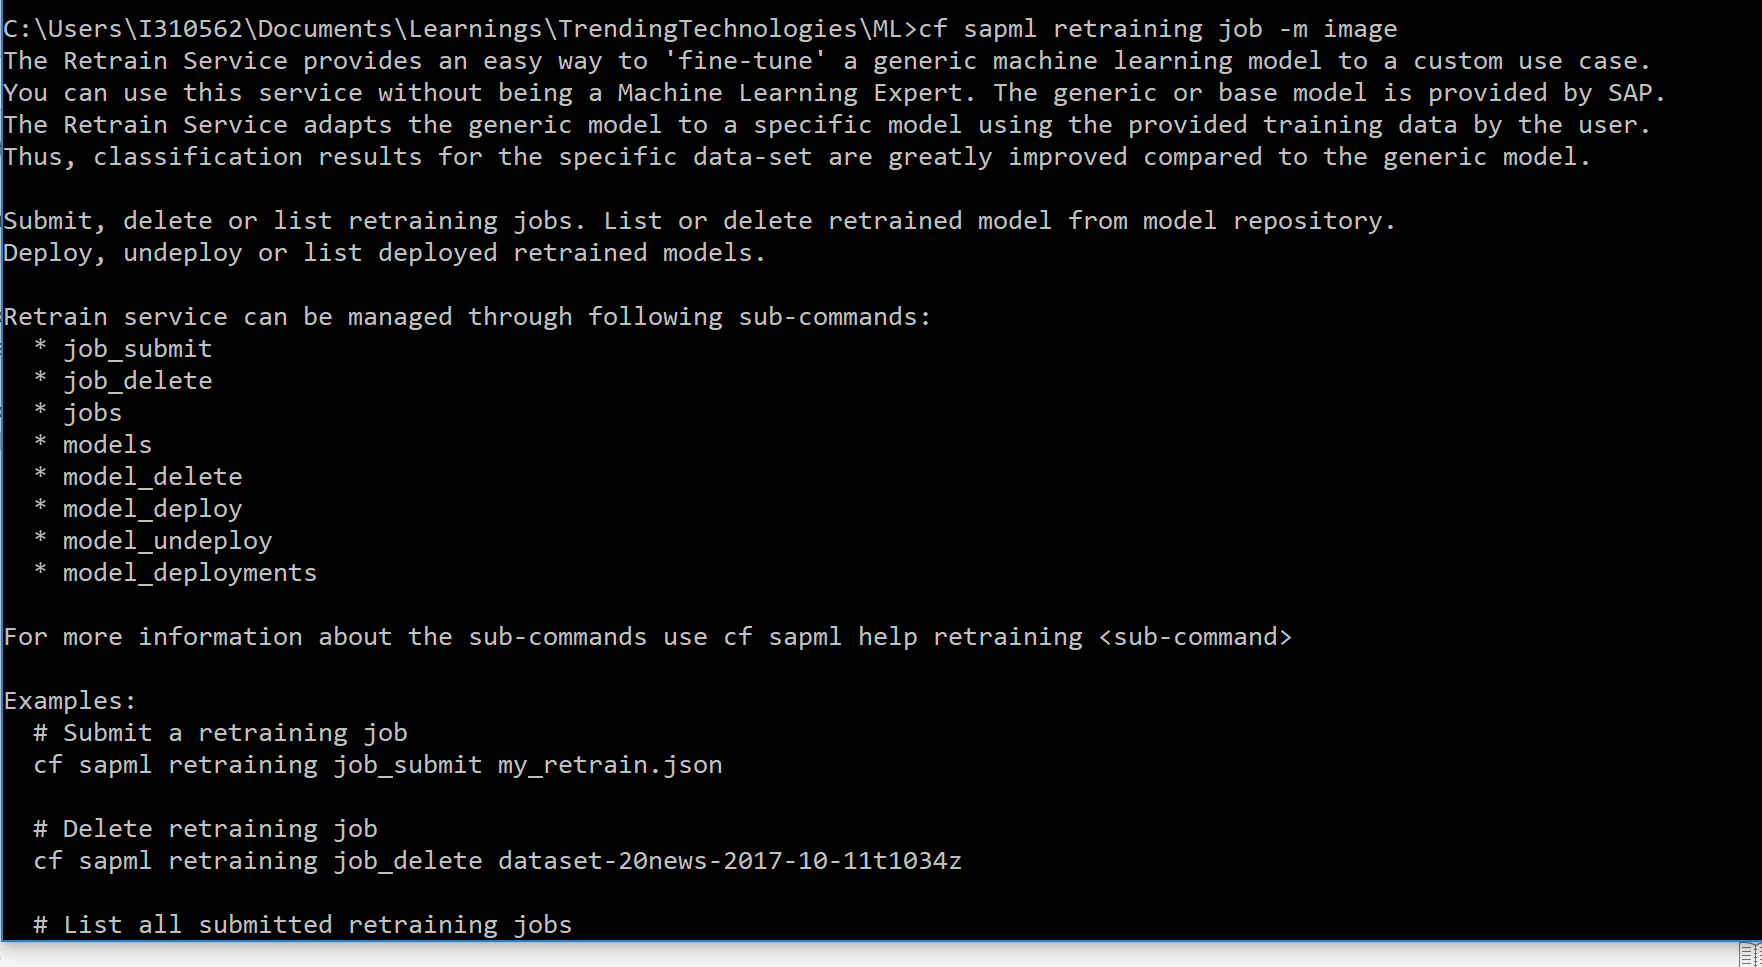
Step 12: Checking the Job Status by executing the following command.
cf sapml retraining job -m image

Try executing the same command till you get success message .

Succeeded
Step 13 : Checking FS list to check job id


Step 14 : Downloading the retraining log.
Execute the following command to get retraining log on to your local machine .

Step 15 : Checking downloaded retraining log
Downloaded successfully

Step 16 :Now deploy the retraining model by specifying the model name

Step 17 : Checking the deployment status
C:\Users\test\Documents\Learnings\TrendingTechnologies\ML>cf sapml retraining model_deployments -m image

ID MODEL NAME MODEL VERSION HOST PORT STATUS DESCRIPTION
ms-286125d9-8692-448b-a155-6bd22471471c Innvent 1 ms-286125d9-8692-448b-a155-6bd22471471c.byom.internalprod.eu-central-1.aws.ml.hana.ondemand.com 443 SUCCEEDED Model is deployed and ready to serve
Step 18 : Enter the command cf service-key <instance name> <service key> to display your service key and make sure that everything is available.

Copy the
"clientid": "sb-3be33a65-7afa-43a9-9275-2728c40de5cd!b3191|ml-foundation-xsuaa-std!b313",
"clientsecret": "pi+B18+xEQJnLQYPe20BVTz/7a8=",
Copying the rest of the part
{
"appname": "3be33a65-7afa-43a9-9275-2728c40de5cd!b3191|ml-foundation-xsuaa-std!b313",
"clientid": "sb-3be33a65-7afa-43a9-9275-2728c40de5cd!b3191|ml-foundation-xsuaa-std!b313",
"clientsecret": "pi+B18+xEQJnLQYPe20BVTz/7a8=",
"identityzone": "i310562",
"identityzoneid": "b8514e90-92ca-4a69-94fc-8afe29bf4400",
"serviceurls": {
"DEPLOYMENT_API_URL": "https://mlfinternalproduction-deployment-api.cfapps.sap.hana.ondemand.com",
"IMAGE_CLASSIFICATION_URL": "https://mlfinternalproduction-image-classifier.cfapps.sap.hana.ondemand.com/api/v2/image/classificat...",
"IMAGE_FEATURE_EXTRACTION_URL": "https://mlfinternalproduction-image-feature-extractor.cfapps.sap.hana.ondemand.com/api/v2/image/feat...",
"IMAGE_OCR_URL": "https://mlfinternalproduction-fs-ocr.cfapps.sap.hana.ondemand.com/api/v2/image/ocr",
"IMAGE_RETRAIN_API_URL": "https://mlfinternalproduction-retrain-image-api.cfapps.sap.hana.ondemand.com/api/v2/image/retraining",
"JOB_SUBMISSION_API_URL": "https://training.internalprod.eu-central-1.aws.ml.hana.ondemand.com",
"MODEL_REPO_URL": "https://mlfinternalproduction-model-api.cfapps.sap.hana.ondemand.com",
"NN_SEARCH_RETRAIN_API_URL": "https://mlfinternalproduction-retrain-ann-api.cfapps.sap.hana.ondemand.com//api/v2/tabular/ann/index...",
"NN_SEARCH_URL": "https://mlfinternalproduction-nn-search.cfapps.sap.hana.ondemand.com/api/v2/tabular/ann",
"SIMILARITY_SCORING_URL": "https://mlfinternalproduction-similarity-scoring.cfapps.sap.hana.ondemand.com/api/v2/similarity-scor...",
"TEXT_CLASSIFIER_URL": "https://mlfinternalproduction-text-classifier.cfapps.sap.hana.ondemand.com/api/v2/text/classificatio...",
"TEXT_LINEAR_RETRAIN_API_URL": "https://mlfinternalproduction-retrain-text-linear-api.cfapps.sap.hana.ondemand.com/api/v2/text/retra...",
"TOPIC_DETECTION_URL": "https://mlfinternalproduction-topic-detection.cfapps.sap.hana.ondemand.com/api/v2/text/topic-detecti...",
"TRANSLATION_URL": "https://mlfinternalproduction-machine-translation.cfapps.sap.hana.ondemand.com/api/v2/text/translati..."
},
"url": "https://test.authentication.sap.hana.ondemand.com"
}
You should have following parameters for testing your model
Authentication URL : https://test.authentication.sap.hana.ondemand.com
Client ID :
Client Secret
Classification URL : https://mlfinternalproduction-image-classifier.cfapps.sap.hana.ondemand.com/api/v2/image/classificat...
Step 19 :
Generating Token & Testing from postman
We can either use below link or it is also possible via postman
https://get_token.cfapps.eu10.hana.ondemand.com/

Step 20 : Generating token through post man
Setup environment

Header data comes automatically

Authorization - > Select basic authorization
Give Client id , ClientSecret ( As shown in above steps)
Username - Clientid
Password -Client Secret key
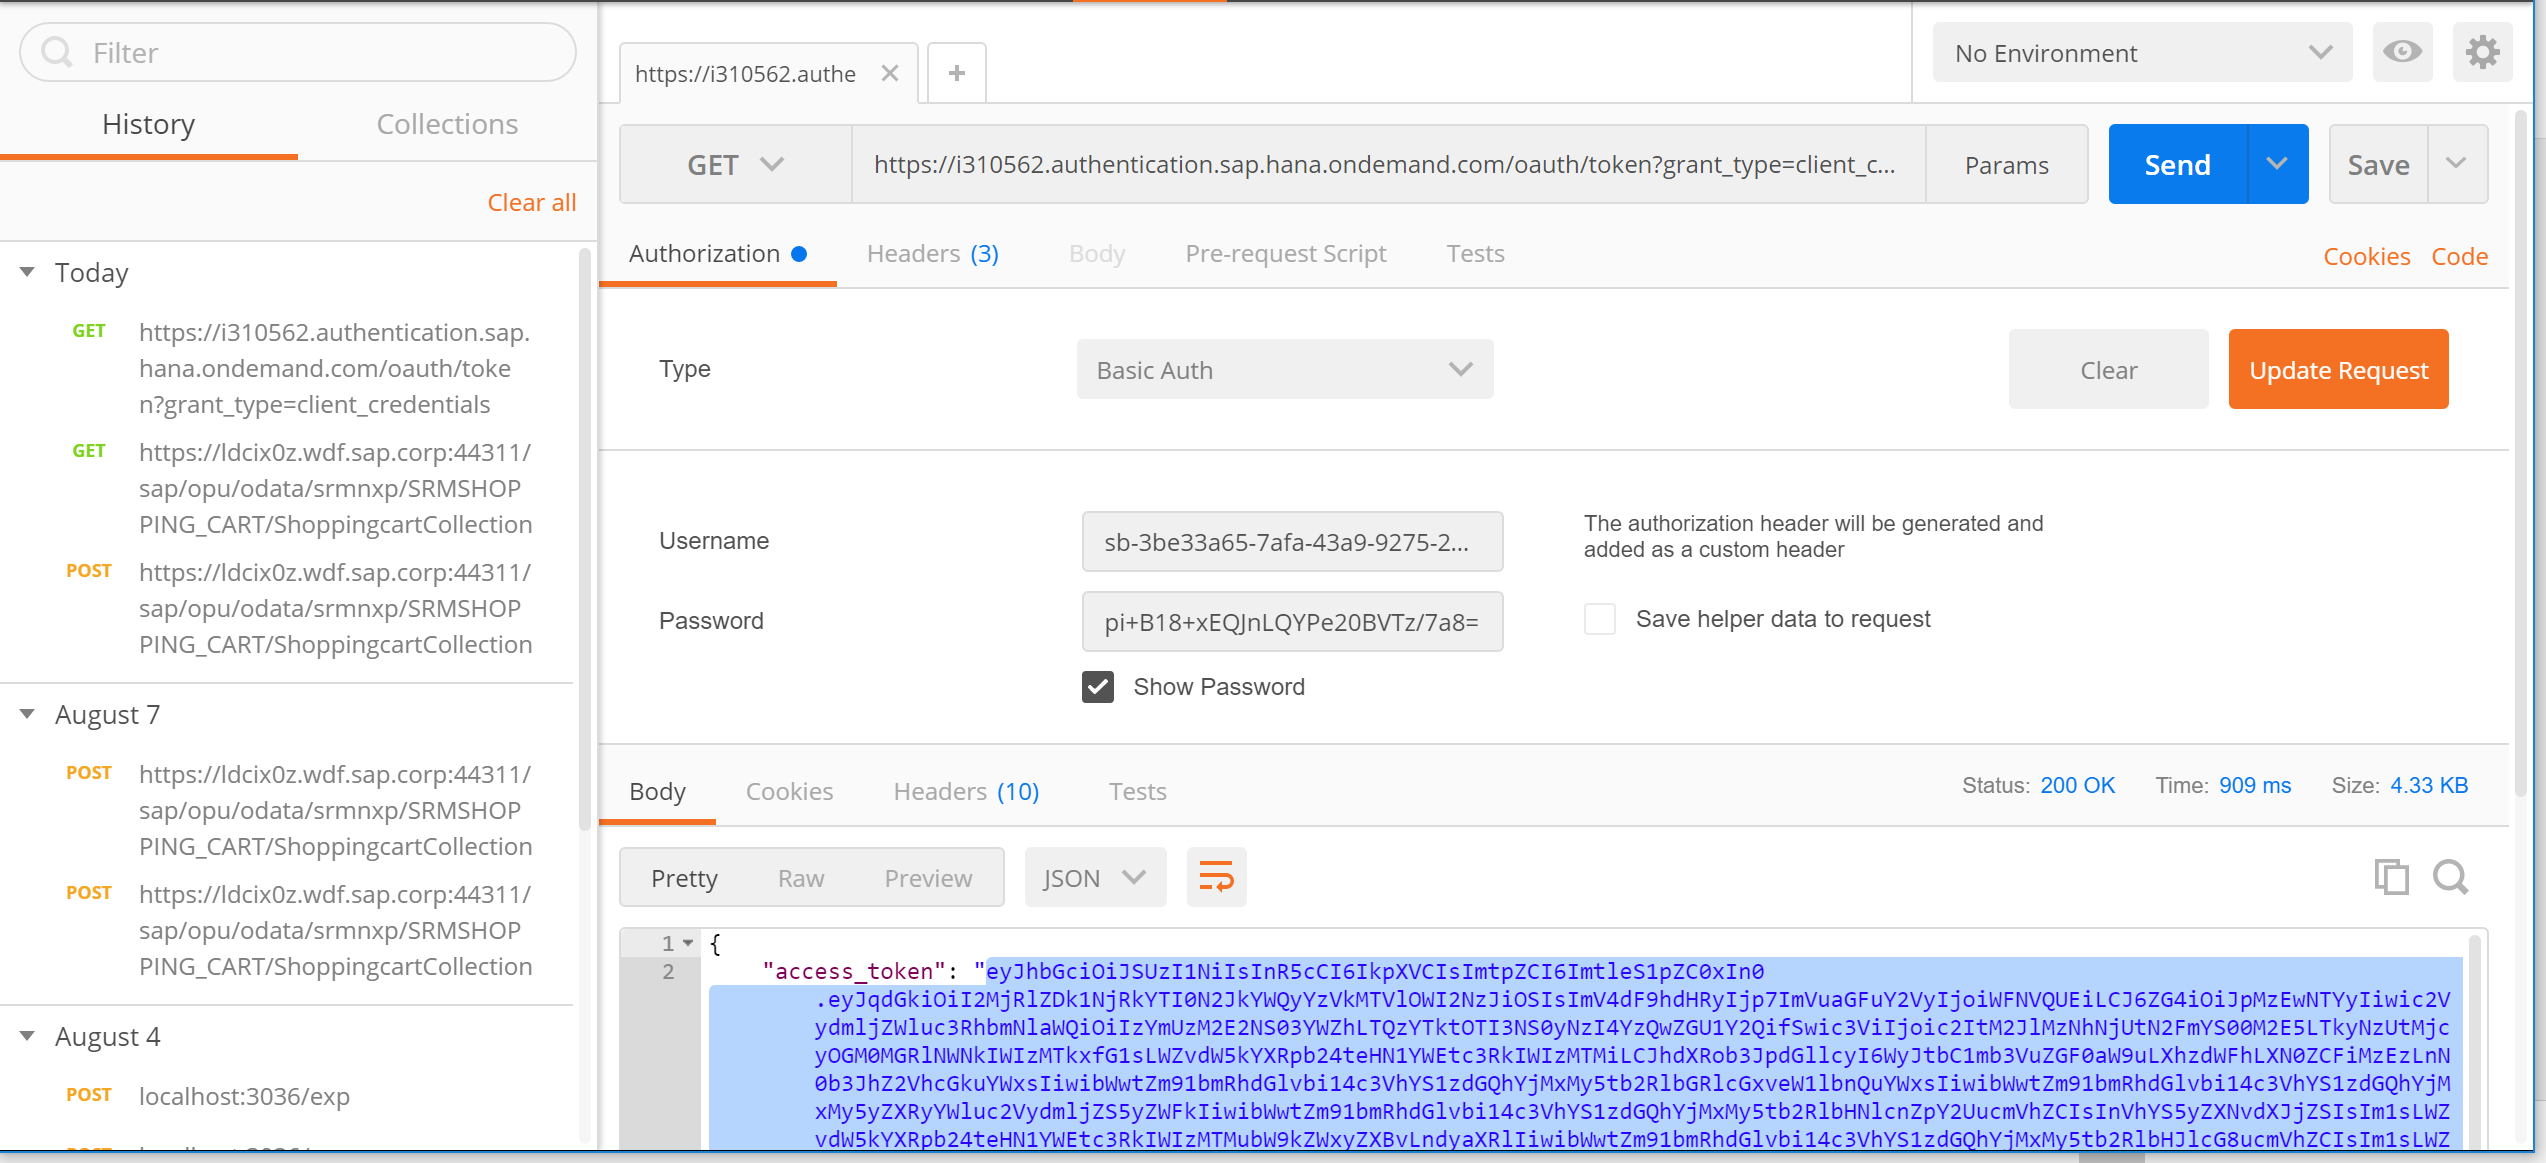
Following Token is generated as shown below.
eyJhbGciOiJSUzI1NiIsInR5cCI6IkpXVCIsImtpZCI6ImtleS1pZC0xIn0.eyJqdGkiOiI2MjRlZDk1NjRkYTI0N2JkYWQyYzVkMTVlOWI2NzJiOSIsImV4dF9hdHRyIjp7ImVuaGFuY2VyIjoiWFNVQUEiLCJ6ZG4iOiJpMzEwNTYyIiwic2VydmljZWluc3RhbmNlaWQiOiIzYmUzM2E2NS03YWZhLTQzYTktOTI3NS0yNzI4YzQwZGU1Y2QifSwic3ViIjoic2ItM2JlMzNhNjUtN2FmYS00M2E5LTkyNzUtMjcyOGM0MGRlNWNkIWIzMTkxfG1sLWZvdW5kYXRpb24teHN1YWEtc3RkIWIzMTMiLCJhdXRob3JpdGllcyI6WyJtbC1mb3VuZGF0aW9uLXhzdWFhLXN0ZCFiMzEzLnN0b3JhZ2VhcGkuYWxsIiwibWwtZm91bmRhdGlvbi14c3VhYS1zdGQhYjMxMy5tb2RlbGRlcGxveW1lbnQuYWxsIiwibWwtZm91bmRhdGlvbi14c3VhYS1zdGQhYjMxMy5yZXRyYWluc2VydmljZS5yZWFkIiwibWwtZm91bmRhdGlvbi14c3VhYS1zdGQhYjMxMy5tb2RlbHNlcnZpY2UucmVhZCIsInVhYS5yZXNvdXJjZSIsIm1sLWZvdW5kYXRpb24teHN1YWEtc3RkIWIzMTMubW9kZWxyZXBvLndyaXRlIiwibWwtZm91bmRhdGlvbi14c3VhYS1zdGQhYjMxMy5tb2RlbHJlcG8ucmVhZCIsIm1sLWZvdW5kYXRpb24teHN1YWEtc3RkIWIzMTMubW9kZWxtZXRlcmluZy5yZWFkIiwibWwtZm91bmRhdGlvbi14c3VhYS1zdGQhYjMxMy5yZXRyYWluc2VydmljZS53cml0ZSIsIm1sLWZvdW5kYXRpb24teHN1YWEtc3RkIWIzMTMuaW5mZXJlbmNlIiwibWwtZm91bmRhdGlvbi14c3VhYS1zdGQhYjMxMy5mdW5jdGlvbmFsc2VydmljZS5hbGwiLCJtbC1mb3VuZGF0aW9uLXhzdWFhLXN0ZCFiMzEzLmpvYmFwaS5hbGwiXSwic2NvcGUiOlsibWwtZm91bmRhdGlvbi14c3VhYS1zdGQhYjMxMy5zdG9yYWdlYXBpLmFsbCIsIm1sLWZvdW5kYXRpb24teHN1YWEtc3RkIWIzMTMubW9kZWxkZXBsb3ltZW50LmFsbCIsIm1sLWZvdW5kYXRpb24teHN1YWEtc3RkIWIzMTMucmV0cmFpbnNlcnZpY2UucmVhZCIsIm1sLWZvdW5kYXRpb24teHN1YWEtc3RkIWIzMTMubW9kZWxzZXJ2aWNlLnJlYWQiLCJ1YWEucmVzb3VyY2UiLCJtbC1mb3VuZGF0aW9uLXhzdWFhLXN0ZCFiMzEzLm1vZGVscmVwby53cml0ZSIsIm1sLWZvdW5kYXRpb24teHN1YWEtc3RkIWIzMTMubW9kZWxyZXBvLnJlYWQiLCJtbC1mb3VuZGF0aW9uLXhzdWFhLXN0ZCFiMzEzLm1vZGVsbWV0ZXJpbmcucmVhZCIsIm1sLWZvdW5kYXRpb24teHN1YWEtc3RkIWIzMTMucmV0cmFpbnNlcnZpY2Uud3JpdGUiLCJtbC1mb3VuZGF0aW9uLXhzdWFhLXN0ZCFiMzEzLmluZmVyZW5jZSIsIm1sLWZvdW5kYXRpb24teHN1YWEtc3RkIWIzMTMuZnVuY3Rpb25hbHNlcnZpY2UuYWxsIiwibWwtZm91bmRhdGlvbi14c3VhYS1zdGQhYjMxMy5qb2JhcGkuYWxsIl0sImNsaWVudF9pZCI6InNiLTNiZTMzYTY1LTdhZmEtNDNhOS05Mjc1LTI3MjhjNDBkZTVjZCFiMzE5MXxtbC1mb3VuZGF0aW9uLXhzdWFhLXN0ZCFiMzEzIiwiY2lkIjoic2ItM2JlMzNhNjUtN2FmYS00M2E5LTkyNzUtMjcyOGM0MGRlNWNkIWIzMTkxfG1sLWZvdW5kYXRpb24teHN1YWEtc3RkIWIzMTMiLCJhenAiOiJzYi0zYmUzM2E2NS03YWZhLTQzYTktOTI3NS0yNzI4YzQwZGU1Y2QhYjMxOTF8bWwtZm91bmRhdGlvbi14c3VhYS1zdGQhYjMxMyIsImdyYW50X3R5cGUiOiJjbGllbnRfY3JlZGVudGlhbHMiLCJyZXZfc2lnIjoiYTBhZDMzMGYiLCJpYXQiOjE1MzU4MDMwMTksImV4cCI6MTUzNTg0NjIxOSwiaXNzIjoiaHR0cDovL2kzMTA1NjIubG9jYWxob3N0OjgwODAvdWFhL29hdXRoL3Rva2VuIiwiemlkIjoiYjg1MTRlOTAtOTJjYS00YTY5LTk0ZmMtOGFmZTI5YmY0NDAwIiwiYXVkIjpbIm1sLWZvdW5kYXRpb24teHN1YWEtc3RkIWIzMTMubW9kZWxtZXRlcmluZyIsIm1sLWZvdW5kYXRpb24teHN1YWEtc3RkIWIzMTMuam9iYXBpIiwidWFhIiwibWwtZm91bmRhdGlvbi14c3VhYS1zdGQhYjMxMy5mdW5jdGlvbmFsc2VydmljZSIsIm1sLWZvdW5kYXRpb24teHN1YWEtc3RkIWIzMTMucmV0cmFpbnNlcnZpY2UiLCJtbC1mb3VuZGF0aW9uLXhzdWFhLXN0ZCFiMzEzLnN0b3JhZ2VhcGkiLCJtbC1mb3VuZGF0aW9uLXhzdWFhLXN0ZCFiMzEzLm1vZGVsZGVwbG95bWVudCIsIm1sLWZvdW5kYXRpb24teHN1YWEtc3RkIWIzMTMubW9kZWxzZXJ2aWNlIiwibWwtZm91bmRhdGlvbi14c3VhYS1zdGQhYjMxMyIsIm1sLWZvdW5kYXRpb24teHN1YWEtc3RkIWIzMTMubW9kZWxyZXBvIiwic2ItM2JlMzNhNjUtN2FmYS00M2E5LTkyNzUtMjcyOGM0MGRlNWNkIWIzMTkxfG1sLWZvdW5kYXRpb24teHN1YWEtc3RkIWIzMTMiXX0.j1cl8Cq2Imc4r2GrW4FJ4eMTzQD_0o5nc0HbwKn9sGUEe2XCbShXnSB3k2a7rdIwtp9GQ5wgfsKIU7zjtHKYTrodf6wRSdROtFwTaAZifhddljDbUcOwqjygh802z58HaNLTDr9_etvFlUuO8eJCIVujx7vECn3jQx9lJE2ggS5MzblG3FDV86ncyrSUey1rusYL2TfFgf3V9ek79tbBwKIEFyjj1N0yT2SNGJCF2wbrU3PsgF5qCVvxTMWsa_h4j__i1M9gRI0-RJm7IZHHtv4QhgxdflgM4wi-y4Ryw5LHjVXYDsFZU-rDPO0jt_o4UHNWFQzBrYmt9Co9AVQO8A
Step 21 : Testing the api through post man
Once we have token generated , now next step is to test the image classification API by posting image through postman. In the header add authorization column and give bearer followed by the token . Also add the content type is equal to application/json as shown below .
Classification api url :
https://mlfinternalproduction-image-classifier.cfapps.sap.hana.ondemand.com/api/v2/image/classificat...


output :

Hope this helps in leveraging the capabilities of SAP Leonardo Machine Learning Foundation.
In this blog we are going to learn how to leverage capabilities of machine learning foundation offered by SAP . In the below use case we will show step by step approach of uploading data to cloud foundry by cloud foundry CLI and testing via postman.
What is SAP Leonardo Platform ?
SAP Leonardo Machine Learning foundation provides a platform for machine learning models, applications and services.
Background :
There is a large amount of enterprise data within SAP systems. Currently, there are many solutions focused on providing analytical results based on this data. With SAP Leonardo Machine Learning foundation, you can smartly utilize this enterprise data as training data for the implementation of Machine Learning services, in order to enable business applications to be intelligent in their purpose. This means they learn from historical data of manual tasks in order to automate them.
The Machine Learning technology can be quickly incorporated into existing SAP or non-SAP solutions using the Machine Learning services provided by SAP Leonardo Machine Learning. SAP Leonardo Machine Learning foundation provides the core components that are the basic building blocks required to create new Machine Learning services
Retraining Image Classifier Model
SAP Leonardo has 2 API’s related to Image: Image classification and Image feature extraction. In the following use case we have retrained the Image classification API. Retraining any API involves mainly 5 processes:
- Creation of your Service Instance
- Uploading the data to file system
- Retrain the model using the uploaded data.
- Deploy the Retrained model to your service instance.
- Testing from postman
Prerequisites :
Global Account with Machine Learning Services enabled .
Log on to SAP Cloud Platform and navigate to the following cloud foundry environment.
Click on your global account .
Click on the Sub account/Organization
Here you can see some your Cloud Foundry details like the name of your Organization, the number of Spaces and the API endpoint. Click on the number of Spaces
Click on the space tile , In our case it is training .
Once you are inside the space, you will find service marketplace on your left under services .
Here we need to enable ml-foundation for the global account .
Data Preparation :
- The data set will be a folder which consists of 3 folders inside: test, training, validation.
- The whole dataset should be divided into the proportion 80-10-10 among training, test and validation folders respectively.
- All the categories among which you want to divide your dataset should be there in all 3 folders. For eg: if flowers are to be categorized among 4 categories, lily, roses, orchids and carnations then test, training and validation folders should have all 4 folders inside it.
For pushing the data into the cloud foundry we need to have following .
SAPML CF CLI plugin must be installed on your local desktop.
CLI plugin is an extension of standard CF plugin. We have added a subcommand called sapml to easily interact with our ML Foundation APIs. Download the plugin file related to your platform from the below links and save it in a proper location on your machine.
Uploading the data into the Cloud Foundry:
Step 1: Open command prompt.
Step 2 : Login into Cloud foundry CLI by using command cf login and enter your ID and System Credentials . Once you are logged in successfully , It will ask you to select organisation in case if you have multiple org inside your global account.
Step 3 : Run the following command
This command will get available API’s .
Step 4 : Once we get available configurations in your global account , Now we have to set the correct values for your SAPML configuration.
Example : For retraining the image classifier model we need auth_server , job api , retraining api .These details are can be retrieved from “cf sapml config get “ command or from service key tab from cloud foundry as shown above.
Run the following the commands in order to set the respective API for retraining the model
Step 5 : Initialize the cloud filesystem with the command by running following command .
cf sapml fs init
Step 6 : Uploading the data to the cloud foundry by running the following command .
In our case it was Upload_dataset folder which has 3 sub folders(training ,testing ,validation) inside it , So we navigate to the location where Upload_dataset is available and run the below command by giving new folder name .
Note: folder is created in the cloud foundry with name which is suggested by you in the place of <NewFolderName>.
cf sapml fs put Upload_Dataset <NewFoldername>
Step 7: List the root directory with the command.
Cf sapml fs list will show all the available list of file systems in the respective cloud foundry account .
Step 8 : Display the subfolders of the already available "<new Folder>" training data in the cloud foundry .
cf sapml fs list <newfolder>/
Deploy the Retrained model to your service instance
Step 9 : Now prepare a configuration file for retraining. Open your favourite text editor and create a new file name dataset.json
Let me give you a bit of explanation about the content of this file. Mode "image" means, that we retrain the pre-trained Image Classification service. There are other retrainable services in the future, where this mode value needs to be set accordingly. You need to specify the data set name and a model name. As our folder structure has the root name "Brands", we choose the value "Brands" for our dataset. Give it a new model name of your choice and save it (e.g. brands-xx). You can add optional retrain parameters (e.g. learning rate). Once finished editing, remember to save the file.
Step 10: Start the retrain process using the SAPML CLI command
Command for submitting job : cf sapml retraining job_submit -m image <json folder location>
Example : In our case , we pointed to json location and executed the command as shown below
--------------------------------------------------------------------------------------------------------------------------------------
cf sapml retraining job_submit -m image C:\Users\test\Documents\Learnings\TrendingTechnologies\ML\dataset.json
--------------------------------------------------------------------------------------------------------------------------------------
C:\Users\test\Documents\Learnings\TrendingTechnologies\ML>cf sapml retraining job_submit -m image C:\test\I310562\Documents\Learnings\TrendingTechnologies\ML\dataset.json
After command is executed, Job success message comes with id .
Job submitted successfully with id "innventpoc-2018-09-01t1055z046763".
Step 11 : Checking retraining service :
Step 12: Checking the Job Status by executing the following command.
cf sapml retraining job -m image
Try executing the same command till you get success message .
Succeeded
Step 13 : Checking FS list to check job id
Step 14 : Downloading the retraining log.
Execute the following command to get retraining log on to your local machine .
Step 15 : Checking downloaded retraining log
Downloaded successfully
Step 16 :Now deploy the retraining model by specifying the model name
Step 17 : Checking the deployment status
C:\Users\test\Documents\Learnings\TrendingTechnologies\ML>cf sapml retraining model_deployments -m image
ID MODEL NAME MODEL VERSION HOST PORT STATUS DESCRIPTION
ms-286125d9-8692-448b-a155-6bd22471471c Innvent 1 ms-286125d9-8692-448b-a155-6bd22471471c.byom.internalprod.eu-central-1.aws.ml.hana.ondemand.com 443 SUCCEEDED Model is deployed and ready to serve
Step 18 : Enter the command cf service-key <instance name> <service key> to display your service key and make sure that everything is available.
Copy the
"clientid": "sb-3be33a65-7afa-43a9-9275-2728c40de5cd!b3191|ml-foundation-xsuaa-std!b313",
"clientsecret": "pi+B18+xEQJnLQYPe20BVTz/7a8=",
Copying the rest of the part
{
"appname": "3be33a65-7afa-43a9-9275-2728c40de5cd!b3191|ml-foundation-xsuaa-std!b313",
"clientid": "sb-3be33a65-7afa-43a9-9275-2728c40de5cd!b3191|ml-foundation-xsuaa-std!b313",
"clientsecret": "pi+B18+xEQJnLQYPe20BVTz/7a8=",
"identityzone": "i310562",
"identityzoneid": "b8514e90-92ca-4a69-94fc-8afe29bf4400",
"serviceurls": {
"DEPLOYMENT_API_URL": "https://mlfinternalproduction-deployment-api.cfapps.sap.hana.ondemand.com",
"IMAGE_CLASSIFICATION_URL": "https://mlfinternalproduction-image-classifier.cfapps.sap.hana.ondemand.com/api/v2/image/classificat...",
"IMAGE_FEATURE_EXTRACTION_URL": "https://mlfinternalproduction-image-feature-extractor.cfapps.sap.hana.ondemand.com/api/v2/image/feat...",
"IMAGE_OCR_URL": "https://mlfinternalproduction-fs-ocr.cfapps.sap.hana.ondemand.com/api/v2/image/ocr",
"IMAGE_RETRAIN_API_URL": "https://mlfinternalproduction-retrain-image-api.cfapps.sap.hana.ondemand.com/api/v2/image/retraining",
"JOB_SUBMISSION_API_URL": "https://training.internalprod.eu-central-1.aws.ml.hana.ondemand.com",
"MODEL_REPO_URL": "https://mlfinternalproduction-model-api.cfapps.sap.hana.ondemand.com",
"NN_SEARCH_RETRAIN_API_URL": "https://mlfinternalproduction-retrain-ann-api.cfapps.sap.hana.ondemand.com//api/v2/tabular/ann/index...",
"NN_SEARCH_URL": "https://mlfinternalproduction-nn-search.cfapps.sap.hana.ondemand.com/api/v2/tabular/ann",
"SIMILARITY_SCORING_URL": "https://mlfinternalproduction-similarity-scoring.cfapps.sap.hana.ondemand.com/api/v2/similarity-scor...",
"TEXT_CLASSIFIER_URL": "https://mlfinternalproduction-text-classifier.cfapps.sap.hana.ondemand.com/api/v2/text/classificatio...",
"TEXT_LINEAR_RETRAIN_API_URL": "https://mlfinternalproduction-retrain-text-linear-api.cfapps.sap.hana.ondemand.com/api/v2/text/retra...",
"TOPIC_DETECTION_URL": "https://mlfinternalproduction-topic-detection.cfapps.sap.hana.ondemand.com/api/v2/text/topic-detecti...",
"TRANSLATION_URL": "https://mlfinternalproduction-machine-translation.cfapps.sap.hana.ondemand.com/api/v2/text/translati..."
},
"url": "https://test.authentication.sap.hana.ondemand.com"
}
You should have following parameters for testing your model
Authentication URL : https://test.authentication.sap.hana.ondemand.com
Client ID :
Client Secret
Classification URL : https://mlfinternalproduction-image-classifier.cfapps.sap.hana.ondemand.com/api/v2/image/classificat...
Step 19 :
Generating Token & Testing from postman
We can either use below link or it is also possible via postman
https://get_token.cfapps.eu10.hana.ondemand.com/
Step 20 : Generating token through post man
Setup environment
Header data comes automatically
Authorization - > Select basic authorization
Give Client id , ClientSecret ( As shown in above steps)
Username - Clientid
Password -Client Secret key
Following Token is generated as shown below.
eyJhbGciOiJSUzI1NiIsInR5cCI6IkpXVCIsImtpZCI6ImtleS1pZC0xIn0.eyJqdGkiOiI2MjRlZDk1NjRkYTI0N2JkYWQyYzVkMTVlOWI2NzJiOSIsImV4dF9hdHRyIjp7ImVuaGFuY2VyIjoiWFNVQUEiLCJ6ZG4iOiJpMzEwNTYyIiwic2VydmljZWluc3RhbmNlaWQiOiIzYmUzM2E2NS03YWZhLTQzYTktOTI3NS0yNzI4YzQwZGU1Y2QifSwic3ViIjoic2ItM2JlMzNhNjUtN2FmYS00M2E5LTkyNzUtMjcyOGM0MGRlNWNkIWIzMTkxfG1sLWZvdW5kYXRpb24teHN1YWEtc3RkIWIzMTMiLCJhdXRob3JpdGllcyI6WyJtbC1mb3VuZGF0aW9uLXhzdWFhLXN0ZCFiMzEzLnN0b3JhZ2VhcGkuYWxsIiwibWwtZm91bmRhdGlvbi14c3VhYS1zdGQhYjMxMy5tb2RlbGRlcGxveW1lbnQuYWxsIiwibWwtZm91bmRhdGlvbi14c3VhYS1zdGQhYjMxMy5yZXRyYWluc2VydmljZS5yZWFkIiwibWwtZm91bmRhdGlvbi14c3VhYS1zdGQhYjMxMy5tb2RlbHNlcnZpY2UucmVhZCIsInVhYS5yZXNvdXJjZSIsIm1sLWZvdW5kYXRpb24teHN1YWEtc3RkIWIzMTMubW9kZWxyZXBvLndyaXRlIiwibWwtZm91bmRhdGlvbi14c3VhYS1zdGQhYjMxMy5tb2RlbHJlcG8ucmVhZCIsIm1sLWZvdW5kYXRpb24teHN1YWEtc3RkIWIzMTMubW9kZWxtZXRlcmluZy5yZWFkIiwibWwtZm91bmRhdGlvbi14c3VhYS1zdGQhYjMxMy5yZXRyYWluc2VydmljZS53cml0ZSIsIm1sLWZvdW5kYXRpb24teHN1YWEtc3RkIWIzMTMuaW5mZXJlbmNlIiwibWwtZm91bmRhdGlvbi14c3VhYS1zdGQhYjMxMy5mdW5jdGlvbmFsc2VydmljZS5hbGwiLCJtbC1mb3VuZGF0aW9uLXhzdWFhLXN0ZCFiMzEzLmpvYmFwaS5hbGwiXSwic2NvcGUiOlsibWwtZm91bmRhdGlvbi14c3VhYS1zdGQhYjMxMy5zdG9yYWdlYXBpLmFsbCIsIm1sLWZvdW5kYXRpb24teHN1YWEtc3RkIWIzMTMubW9kZWxkZXBsb3ltZW50LmFsbCIsIm1sLWZvdW5kYXRpb24teHN1YWEtc3RkIWIzMTMucmV0cmFpbnNlcnZpY2UucmVhZCIsIm1sLWZvdW5kYXRpb24teHN1YWEtc3RkIWIzMTMubW9kZWxzZXJ2aWNlLnJlYWQiLCJ1YWEucmVzb3VyY2UiLCJtbC1mb3VuZGF0aW9uLXhzdWFhLXN0ZCFiMzEzLm1vZGVscmVwby53cml0ZSIsIm1sLWZvdW5kYXRpb24teHN1YWEtc3RkIWIzMTMubW9kZWxyZXBvLnJlYWQiLCJtbC1mb3VuZGF0aW9uLXhzdWFhLXN0ZCFiMzEzLm1vZGVsbWV0ZXJpbmcucmVhZCIsIm1sLWZvdW5kYXRpb24teHN1YWEtc3RkIWIzMTMucmV0cmFpbnNlcnZpY2Uud3JpdGUiLCJtbC1mb3VuZGF0aW9uLXhzdWFhLXN0ZCFiMzEzLmluZmVyZW5jZSIsIm1sLWZvdW5kYXRpb24teHN1YWEtc3RkIWIzMTMuZnVuY3Rpb25hbHNlcnZpY2UuYWxsIiwibWwtZm91bmRhdGlvbi14c3VhYS1zdGQhYjMxMy5qb2JhcGkuYWxsIl0sImNsaWVudF9pZCI6InNiLTNiZTMzYTY1LTdhZmEtNDNhOS05Mjc1LTI3MjhjNDBkZTVjZCFiMzE5MXxtbC1mb3VuZGF0aW9uLXhzdWFhLXN0ZCFiMzEzIiwiY2lkIjoic2ItM2JlMzNhNjUtN2FmYS00M2E5LTkyNzUtMjcyOGM0MGRlNWNkIWIzMTkxfG1sLWZvdW5kYXRpb24teHN1YWEtc3RkIWIzMTMiLCJhenAiOiJzYi0zYmUzM2E2NS03YWZhLTQzYTktOTI3NS0yNzI4YzQwZGU1Y2QhYjMxOTF8bWwtZm91bmRhdGlvbi14c3VhYS1zdGQhYjMxMyIsImdyYW50X3R5cGUiOiJjbGllbnRfY3JlZGVudGlhbHMiLCJyZXZfc2lnIjoiYTBhZDMzMGYiLCJpYXQiOjE1MzU4MDMwMTksImV4cCI6MTUzNTg0NjIxOSwiaXNzIjoiaHR0cDovL2kzMTA1NjIubG9jYWxob3N0OjgwODAvdWFhL29hdXRoL3Rva2VuIiwiemlkIjoiYjg1MTRlOTAtOTJjYS00YTY5LTk0ZmMtOGFmZTI5YmY0NDAwIiwiYXVkIjpbIm1sLWZvdW5kYXRpb24teHN1YWEtc3RkIWIzMTMubW9kZWxtZXRlcmluZyIsIm1sLWZvdW5kYXRpb24teHN1YWEtc3RkIWIzMTMuam9iYXBpIiwidWFhIiwibWwtZm91bmRhdGlvbi14c3VhYS1zdGQhYjMxMy5mdW5jdGlvbmFsc2VydmljZSIsIm1sLWZvdW5kYXRpb24teHN1YWEtc3RkIWIzMTMucmV0cmFpbnNlcnZpY2UiLCJtbC1mb3VuZGF0aW9uLXhzdWFhLXN0ZCFiMzEzLnN0b3JhZ2VhcGkiLCJtbC1mb3VuZGF0aW9uLXhzdWFhLXN0ZCFiMzEzLm1vZGVsZGVwbG95bWVudCIsIm1sLWZvdW5kYXRpb24teHN1YWEtc3RkIWIzMTMubW9kZWxzZXJ2aWNlIiwibWwtZm91bmRhdGlvbi14c3VhYS1zdGQhYjMxMyIsIm1sLWZvdW5kYXRpb24teHN1YWEtc3RkIWIzMTMubW9kZWxyZXBvIiwic2ItM2JlMzNhNjUtN2FmYS00M2E5LTkyNzUtMjcyOGM0MGRlNWNkIWIzMTkxfG1sLWZvdW5kYXRpb24teHN1YWEtc3RkIWIzMTMiXX0.j1cl8Cq2Imc4r2GrW4FJ4eMTzQD_0o5nc0HbwKn9sGUEe2XCbShXnSB3k2a7rdIwtp9GQ5wgfsKIU7zjtHKYTrodf6wRSdROtFwTaAZifhddljDbUcOwqjygh802z58HaNLTDr9_etvFlUuO8eJCIVujx7vECn3jQx9lJE2ggS5MzblG3FDV86ncyrSUey1rusYL2TfFgf3V9ek79tbBwKIEFyjj1N0yT2SNGJCF2wbrU3PsgF5qCVvxTMWsa_h4j__i1M9gRI0-RJm7IZHHtv4QhgxdflgM4wi-y4Ryw5LHjVXYDsFZU-rDPO0jt_o4UHNWFQzBrYmt9Co9AVQO8A
Step 21 : Testing the api through post man
Once we have token generated , now next step is to test the image classification API by posting image through postman. In the header add authorization column and give bearer followed by the token . Also add the content type is equal to application/json as shown below .
Classification api url :
https://mlfinternalproduction-image-classifier.cfapps.sap.hana.ondemand.com/api/v2/image/classificat...
output :
Hope this helps in leveraging the capabilities of SAP Leonardo Machine Learning Foundation.
- SAP Managed Tags:
- Machine Learning
7 Comments
You must be a registered user to add a comment. If you've already registered, sign in. Otherwise, register and sign in.
Labels in this area
-
Agents
4 -
AI
5 -
AI Launchpad
2 -
Artificial Intelligence
2 -
Artificial Intelligence (AI)
3 -
Brainstorming
1 -
BTP
1 -
Business AI
2 -
Business Trends
1 -
Business Trends
1 -
Cloud Foundry
1 -
Data and Analytics (DA)
1 -
Design and Engineering
1 -
forecasting
1 -
GenAI
1 -
Generative AI
5 -
Generative AI Hub
4 -
Graph
1 -
Language Models
1 -
LlamaIndex
1 -
LLM
2 -
LLMs
2 -
Machine Learning
1 -
Machine learning using SAP HANA
1 -
Mistral AI
1 -
NLP (Natural Language Processing)
1 -
open source
1 -
OpenAI
1 -
Python
2 -
RAG
2 -
Retrieval Augmented Generation
1 -
SAP Build Process Automation
1 -
SAP HANA
1 -
SAP HANA Cloud
1 -
Technology Updates
1 -
User Experience
1 -
user interface
1 -
Vector Database
3 -
Vector DB
1 -
Vector Similarity
1