Agent Performance Management's (APM) intuitive and customizable User Interface allows for easy data entry with validation to ensure data integrity.
However, repetitive manual updates are tedious and can introduce human error into your data. APM has a Bulk Change feature that allows 1 or more fields to be changed for selected or specified records from the Entity Search screen.
A common use case is to terminate Producers/Agents for a specific FMO or Agency. As one step of the termination process, each producer record is terminated by putting a Termination Date and a Cancellation Reason on each Producer's record. Let's walk through this example using using the Bulk Change functionality in APM.
Navigate to the Producer Search Screen
Manager>Producers>Producer Search
From the Producer Search screen, use the Search criteria to identify the records that we want to terminate. In this example, we want to terminate Producers/Agents tied to the fictional SAP agency. The best way to link these agents to the SAP Agency from the Producer Search screen is through the contact email field. We can search for agents where email address is like "%SAP.com%'
Hint: Use the Screen Customization to adjust the Search screen to fine tune the search
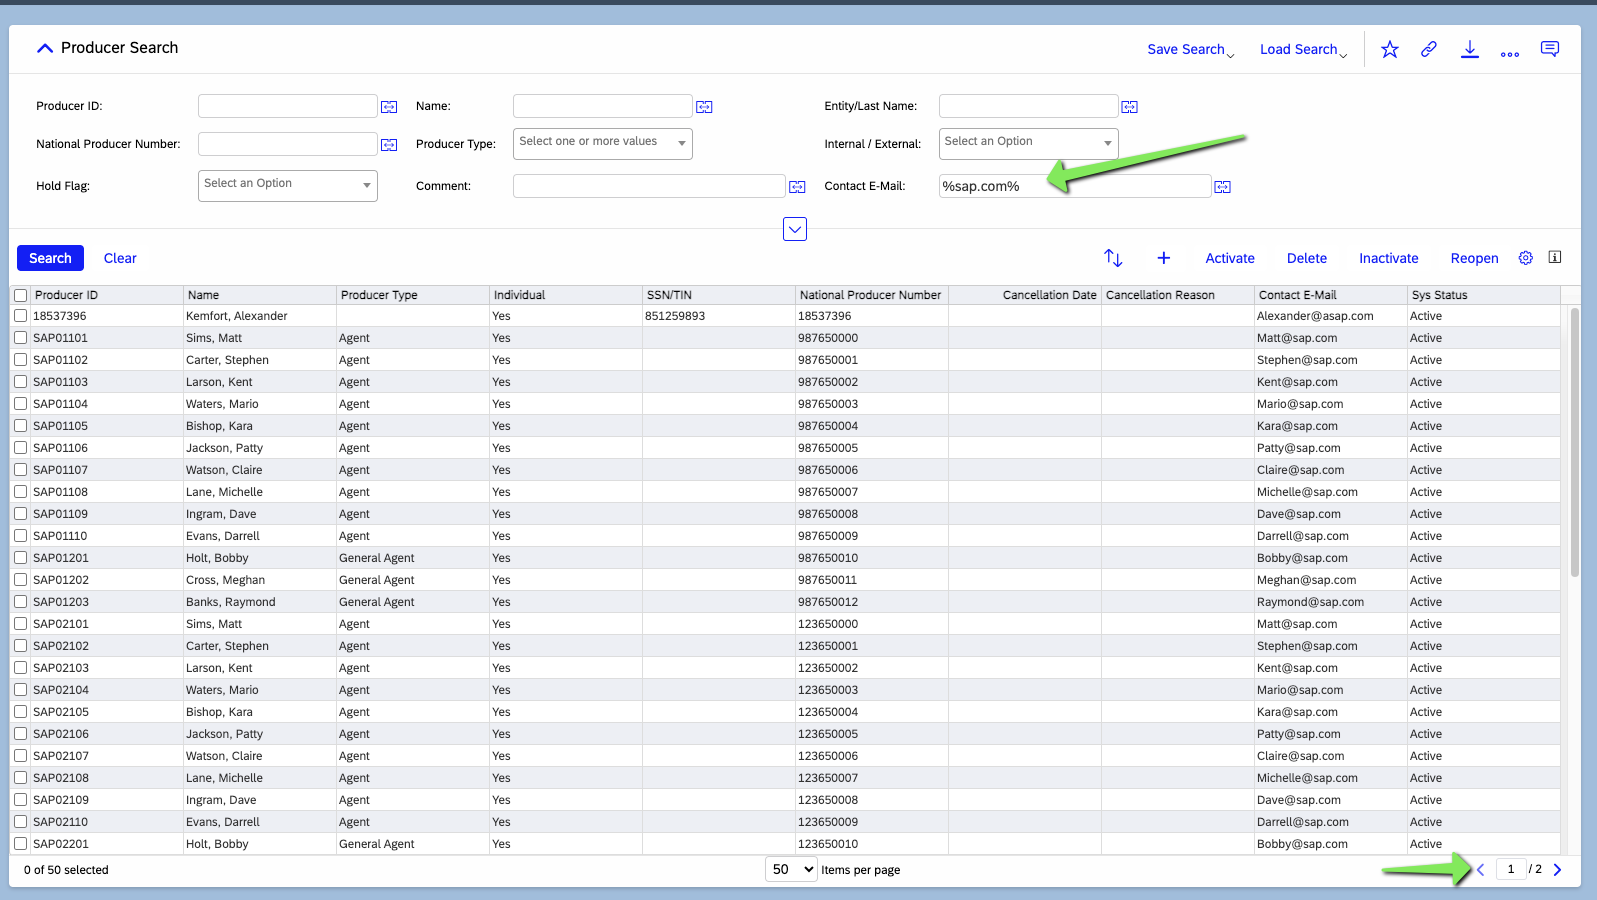
Producer Search Results
TIP: If the search results span multiple pages, you can customize the screen to increase the number of rows displayed on 1 screen so you can only do 1 Bulk Update.
Once you have all the records on a single page or decide to Bulk Update one page at a time, review each row to ensure the row has been correctly included.
Select the square at the top left of the screen to select every row on the screen.
In the screenshot below, the first row has been incorrectly included in the desired results. The email address is "@asap.com" which fits our search criteria of "like %sap.com" but is not what we want to include in the Bulk Change.
Select the square to deselect the row.
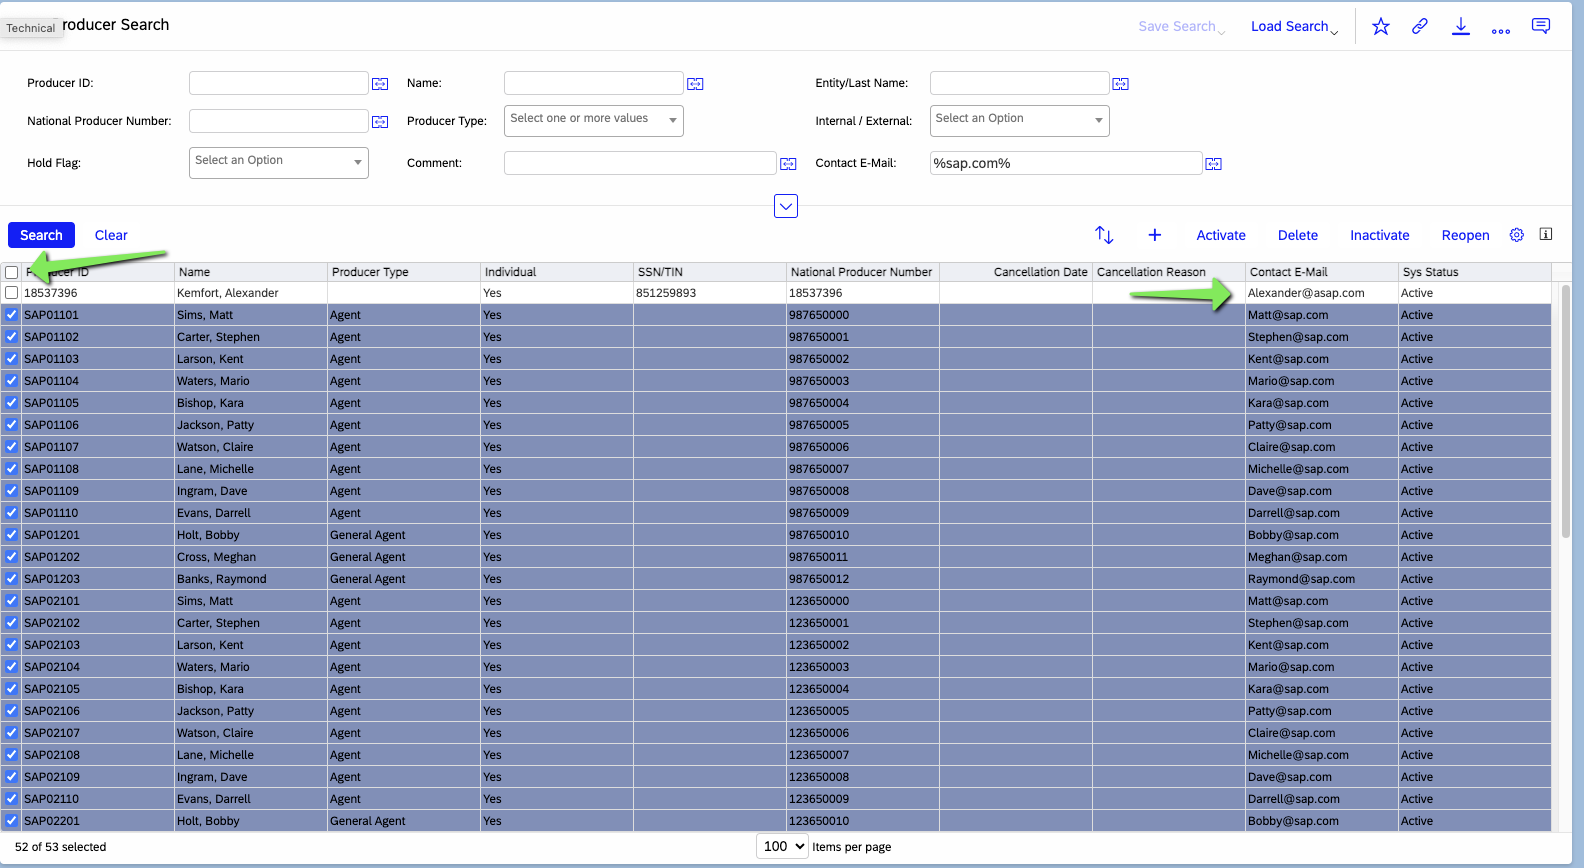
Selected Producer Records
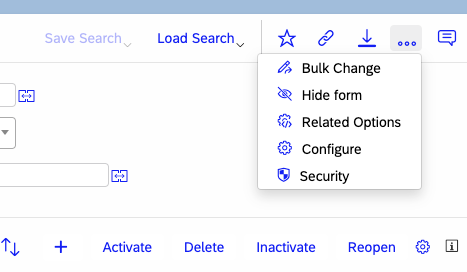
Now that we have our rows that we want to Bulk Change, Select the ellipsis (three dots) in the upper right corner of the screen and select
Bulk Change.
A new Bulk Change window opens with the Following Options:
- Record Selection
- Selected records: This option allows the user to pick and choose which records to Bulk Change. In this case, we are selecting 52 of the 53 records to be updated.
- Current Page: This option will updated every record on the search results page to be updated.
- All records matching criteria limited to 400 record(s): This option allows multiple pages of Search Results to be updated (up to 400 records)
- Error Policy: When checked, any validation error will prevent all records from being updated. Note: Leaving this box checked is best practice.
- Select Fields to be updated: In the screen below, i have started to type in "Canc" to search for the fields that i want to be updated: Cancellation Date and Cancellation Reason.

Bulk Change Options
- Double Click each field to move them from the Available box to the Selected box.
 Optional (but strongly encouraged😞 Enter a comment so that each record can be identified as being updated as part of the process for future reference. An entity comment record is created for each record updated by the Bulk Change Process.
- Select Next to continue to the next screen.
On this screen, you will be able to update the fields with the desired values. All selected records will be updated with the values entered on this screen.
The fields retain the formatting so that codes and dates can be entered properly as shown below.

Updating Target Fields
Update the fields with the desired values and select
Next.
APM will then provide a summary screen of the changes that are about to be made.

Change Summary Screen
Click
Apply to submit the changes for processing.
If no issues are encountered, the Bulk Change Summary Screen will appear with details of the changes.

Bulk Change Summary Screen
Click
Complete (or
Close) to close this screen.
Navigate back to the Producer Search screen to confirm the changes have been made.
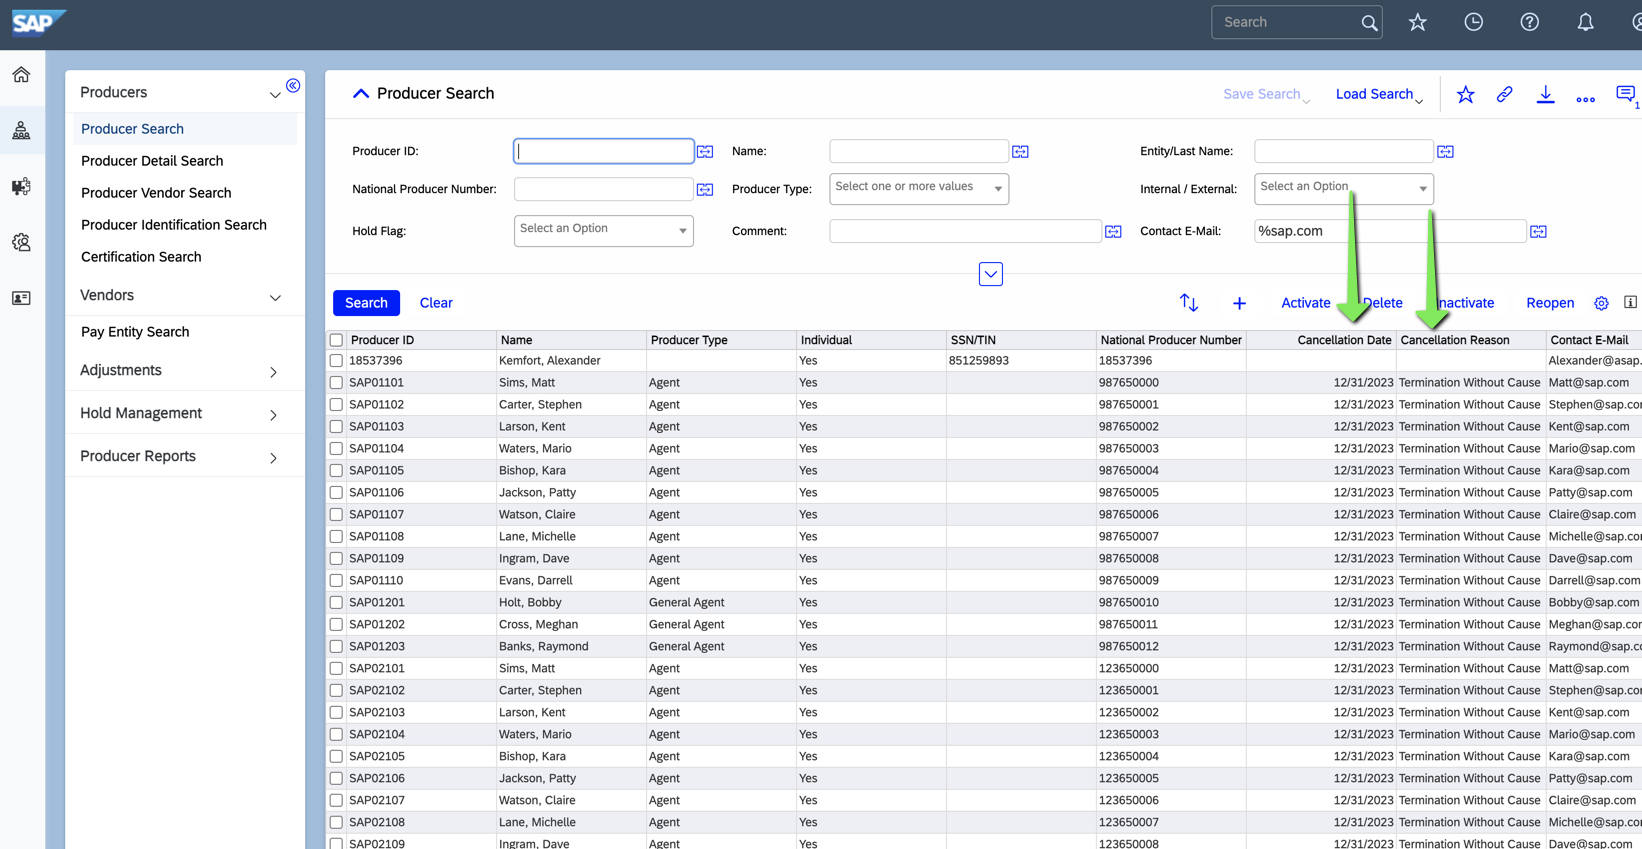
Bulk Change Complete
We have now updated 50+ records in the UI in 2-3 minutes! The Bulk Change process shaved precious time off of a manual process and and reduced the potential for data entry error.
In conclusion, the Bulk Change process in APM can be used to quickly (and consistently) update large numbers of records and is available on most entities in APM.
Drop a comment on this page and let me know what your thoughts on the Bulk Change functionality in APM.
Additional information on the Bulk Change functionality can be found at
APM Help Documentation
Please Follow additional APM resources at:
APM Questions
APM Blogs
